Annotating an ArcGIS Web Scene
To create 3D annotations on an ArcGIS web scene in Scalar, navigate to the scene in your project and click the annotation icon (paperclip) in the header bar. This will launch the annotation editor. Once in the editor:
- Use the ArcGIS web scene controls to navigate the camera to the desired position within the scene.
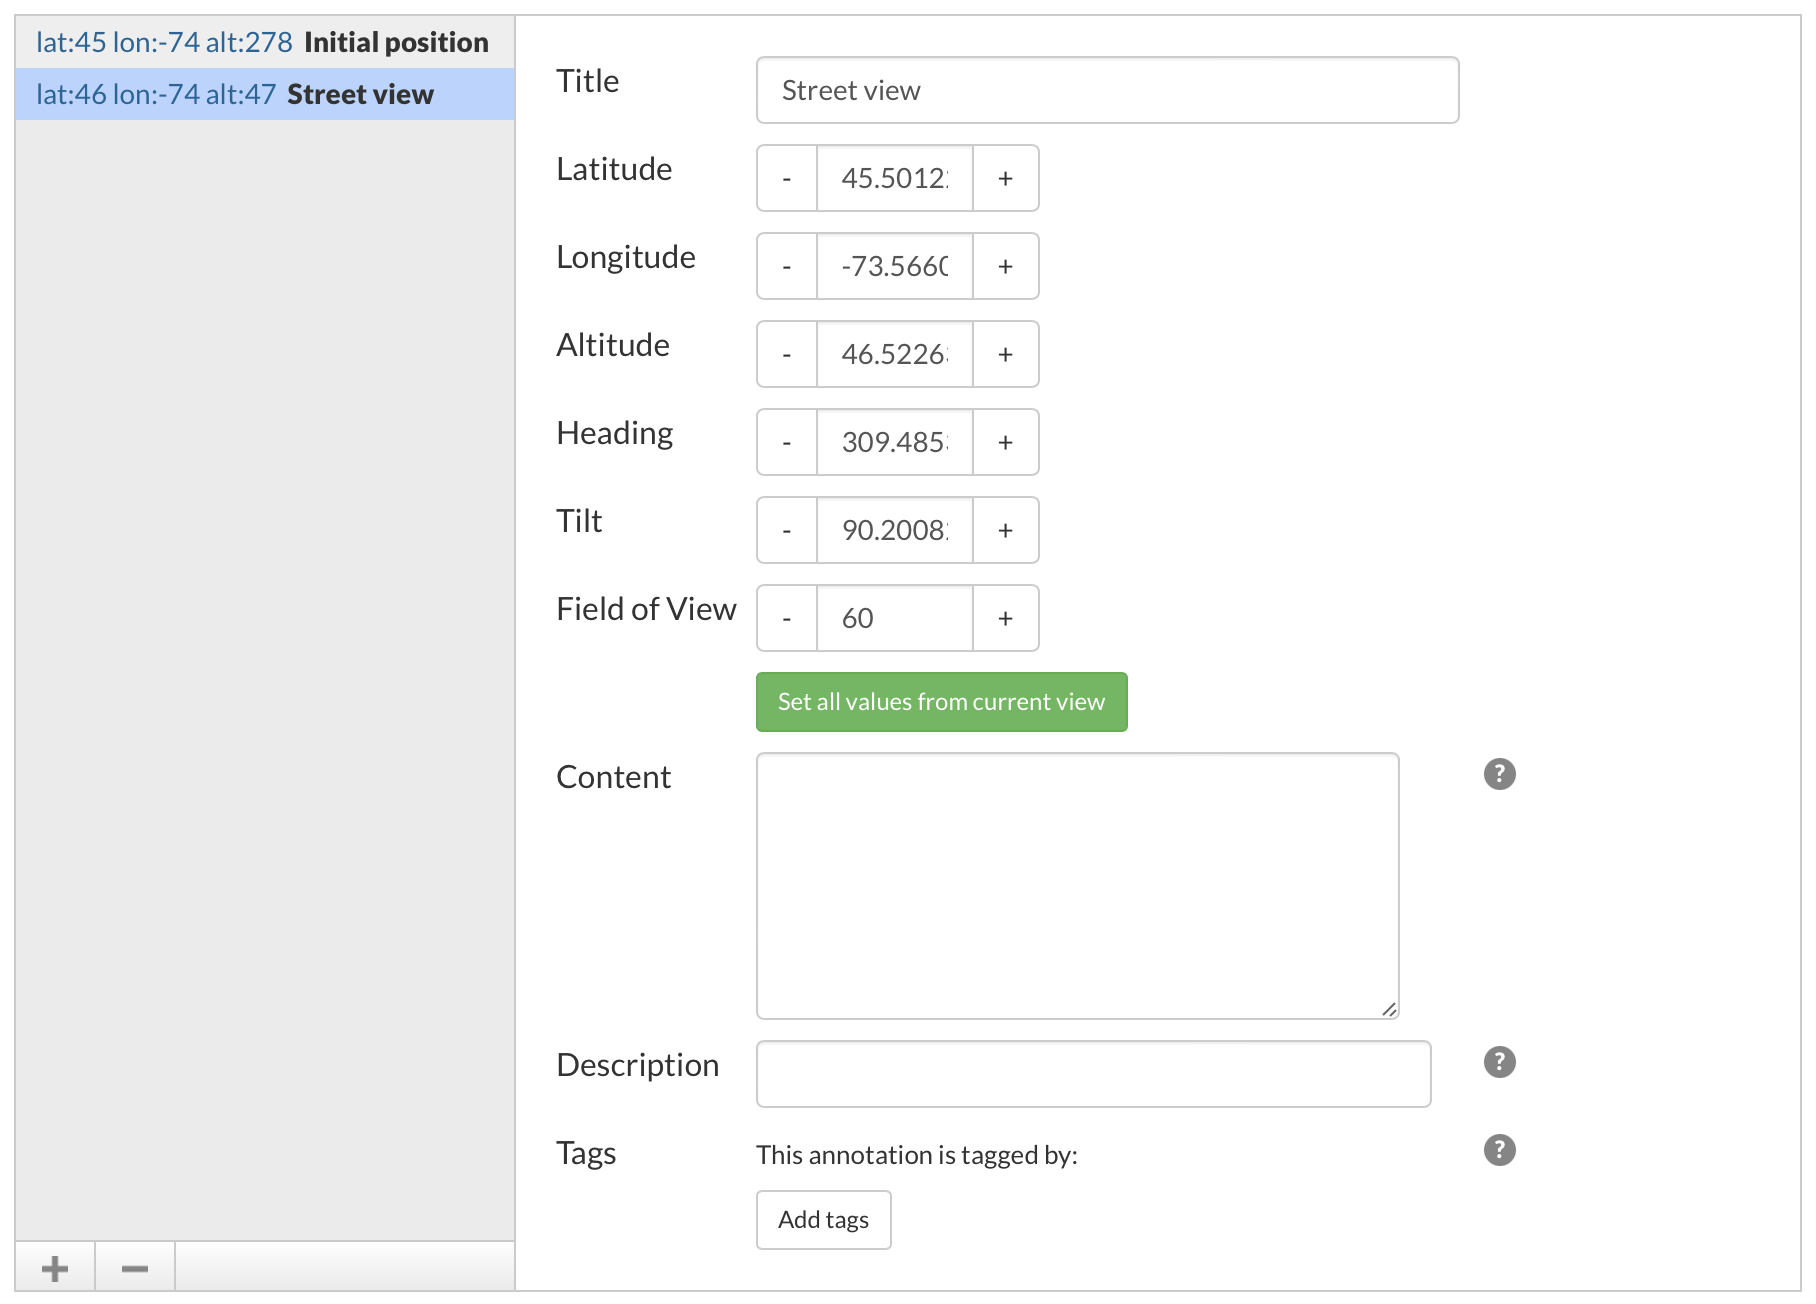
- Click the plus button on the left to create a new annotation. The new annotation will be set to the current camera position.
- Enter the title of the annotations.
- If you need to reposition the camera after the annotation is created, use the “Set all values from current view” button to capture the current camera position and orientation in the annotation.
- Enter the content of the annotation (optional).
- Enter an abstract for the annotation (optional). Whatever is entered here will be displayed alongside the media instead of the content above, which will be "saved" for when the reader navigates to the annotation's dedicated page.
- Click "Save" to save the annotation.
Additionally, you can click any annotation in the annotation list on the left to select it. Selected annotations can be edited using the provided form, or deleted by clicking the minus button. When you're done editing annotations for the file, click "Done" to return to the page for the media file.