Creating Paths
Scalar allows you to connect pages and other book elements in a linear sequence of links called a “path.” You can add as many different paths as you want, with the elements in any order that you want. You can use any given element in as many paths as you want.
To Create a Path
- Create a new page using the "+" icon or navigate to the page or media you want to make into a path and click the pencil icon to open the edit page.
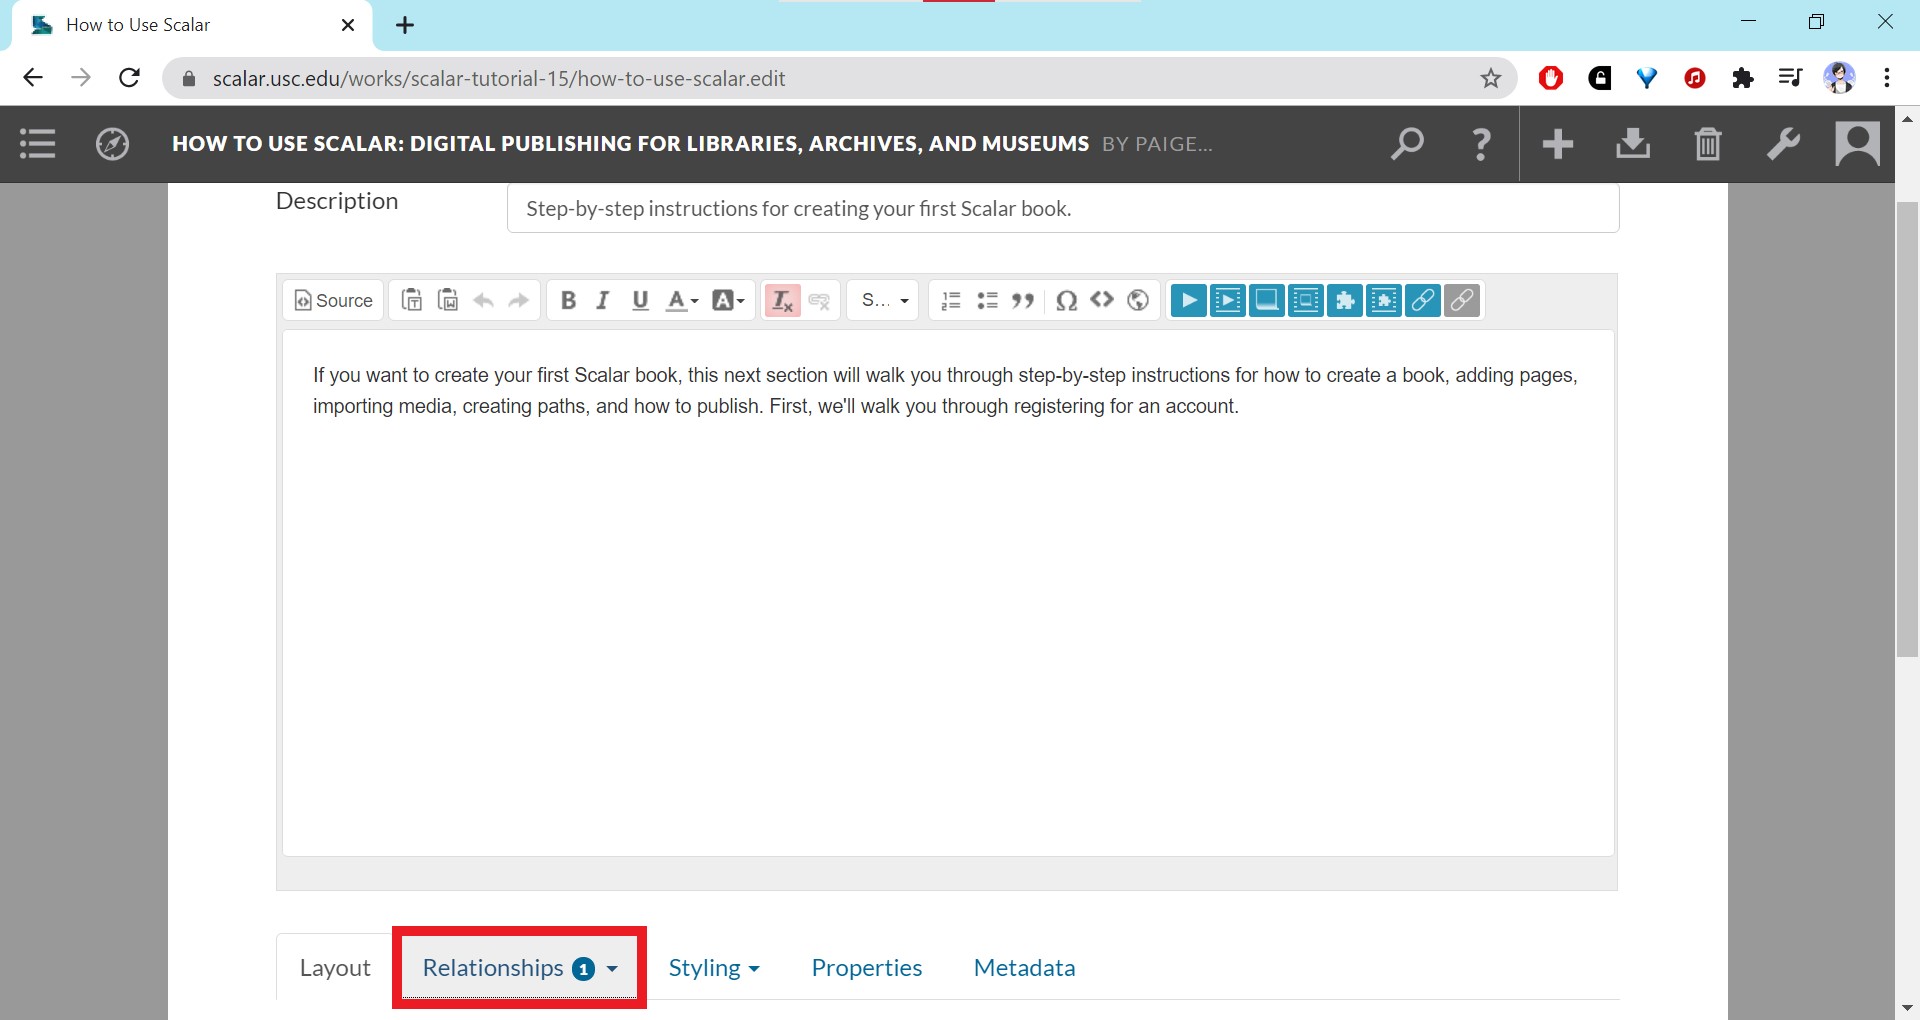
- Scroll down to the area under the content editor box and find the “Relationships” tab. Click on the option that says “Path.”
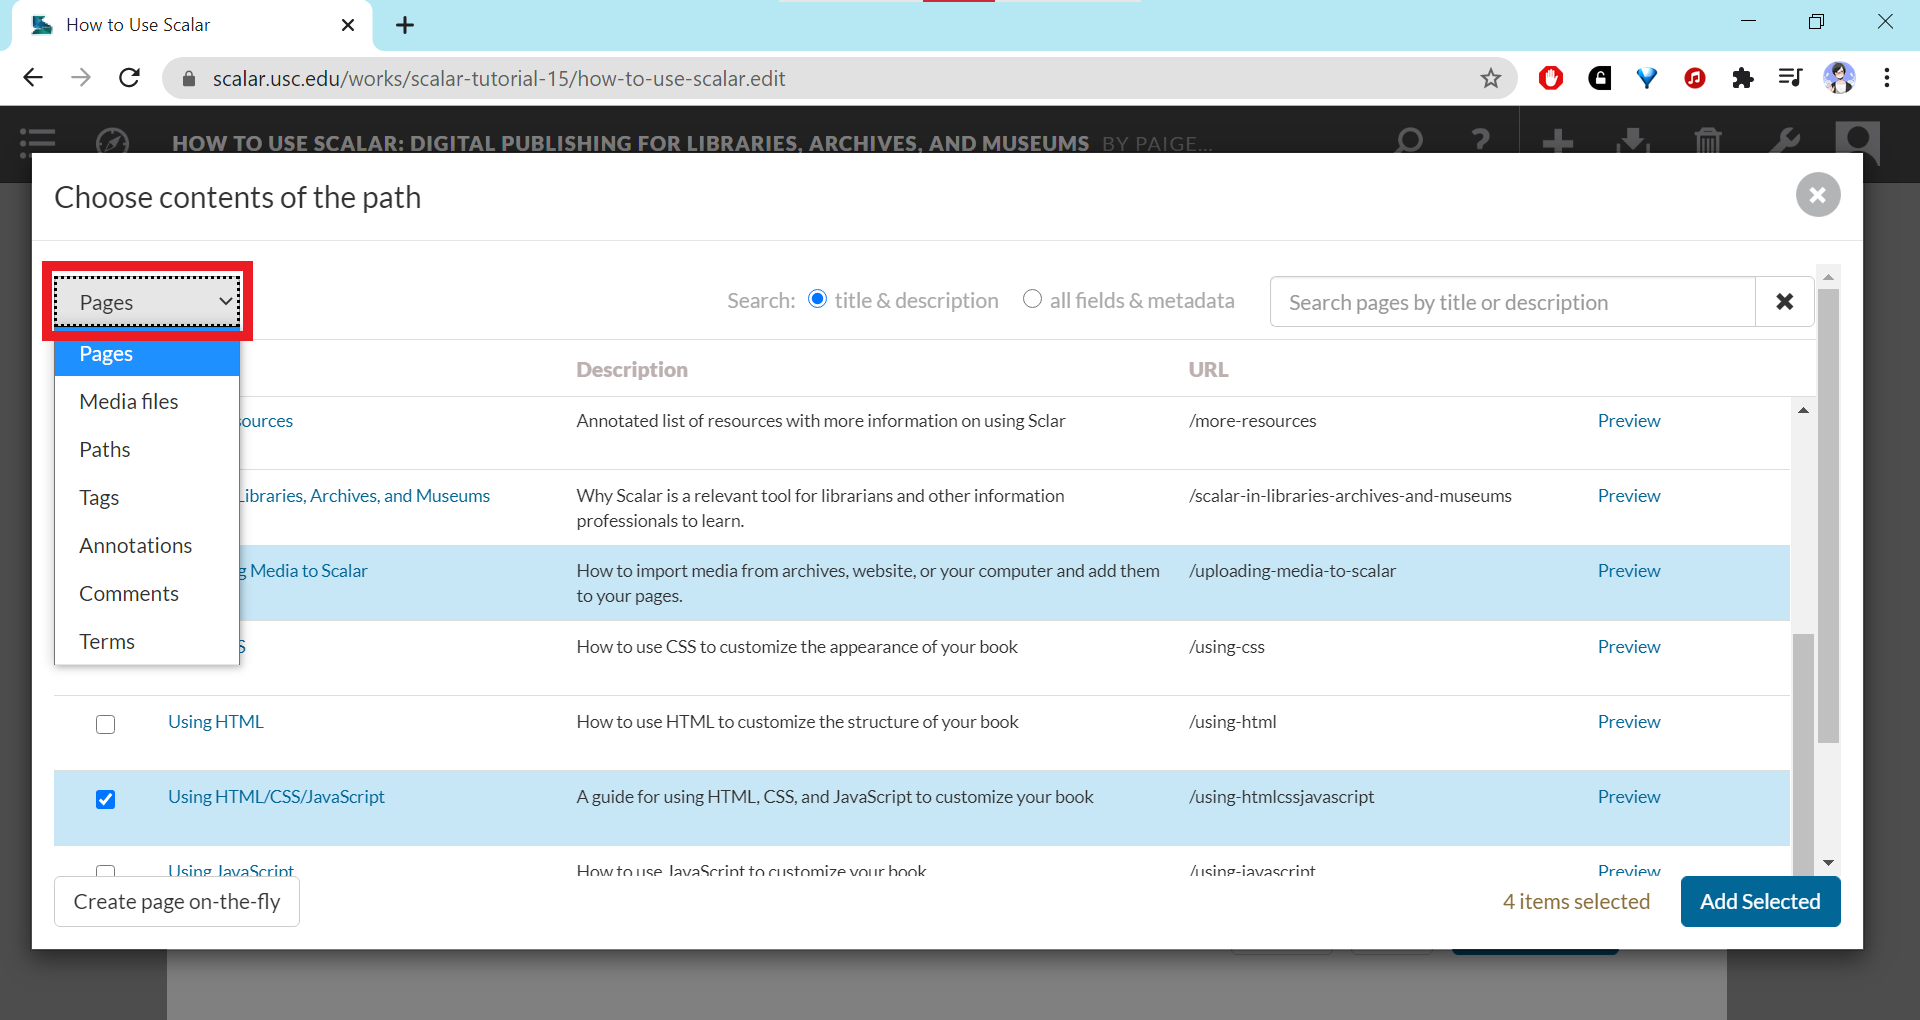
- Click on the hyperlinked text that says “choose the items that it contains.” This will pull up a pop-up window.
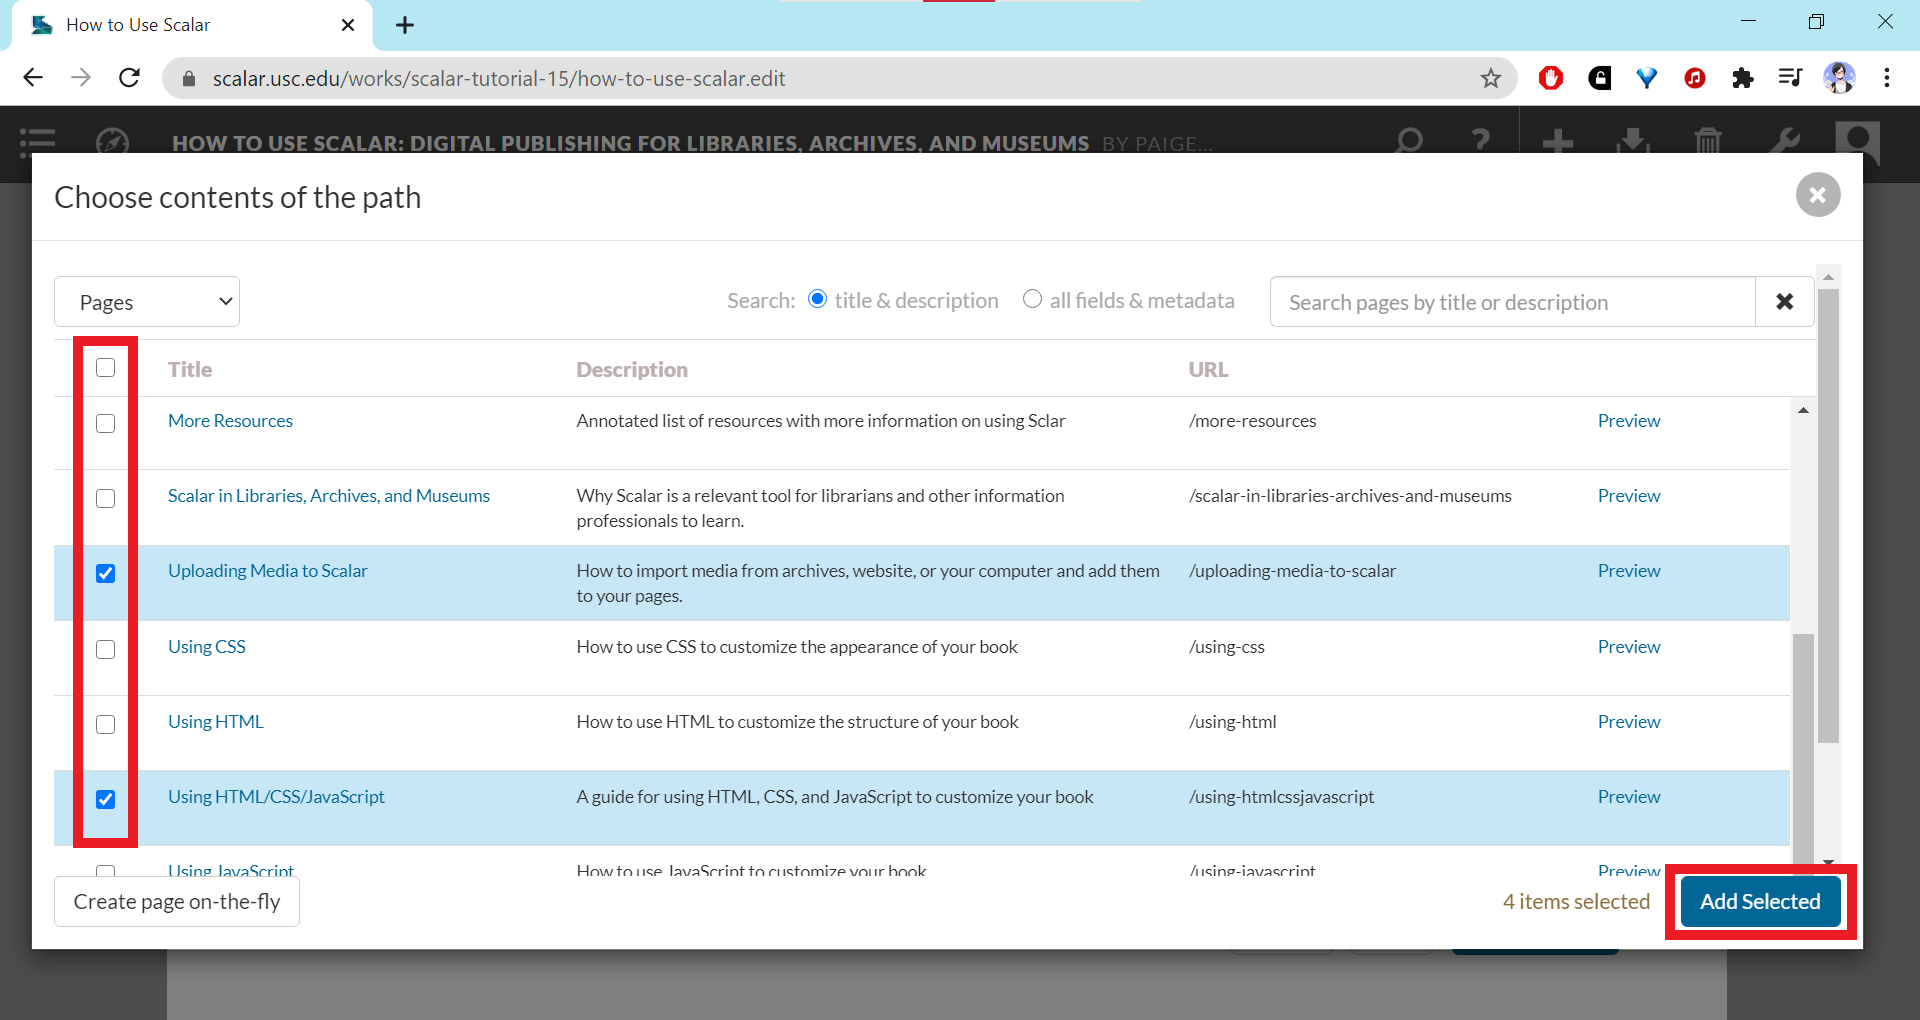
- Select all the items you want to include in the path by clicking the boxes to the left of the items’ names. You can add pages or select from non-page elements in the project by using the dropdown menu on the upper left.
- Once you’ve checked all the boxes for your selected items, click “Add Selected.”
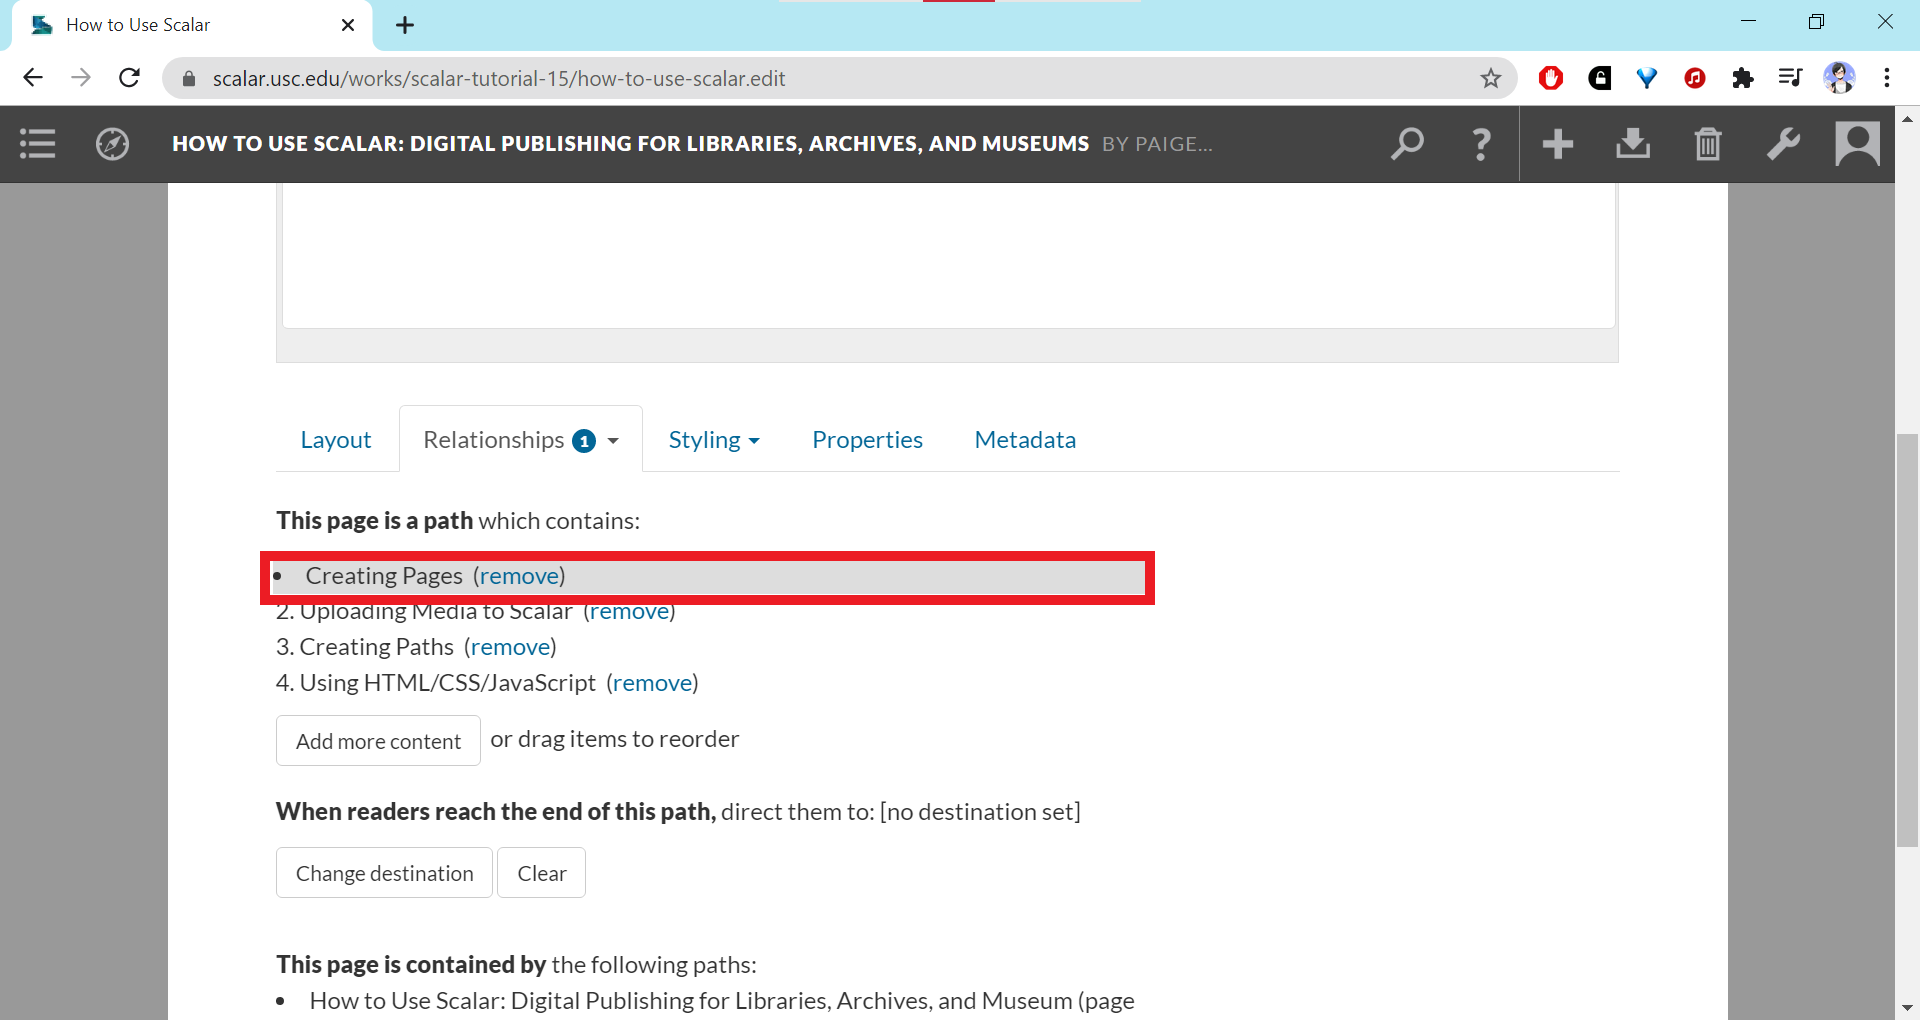
- The items you’ve selected should show up in a numbered list. You can click the “Add content” button to add more items to the path. To reorder the items, click on an item, hold down the mouse button (the item should become highlighted in gray and be preceded by a bullet point instead of a number) and drag it to the position you want.
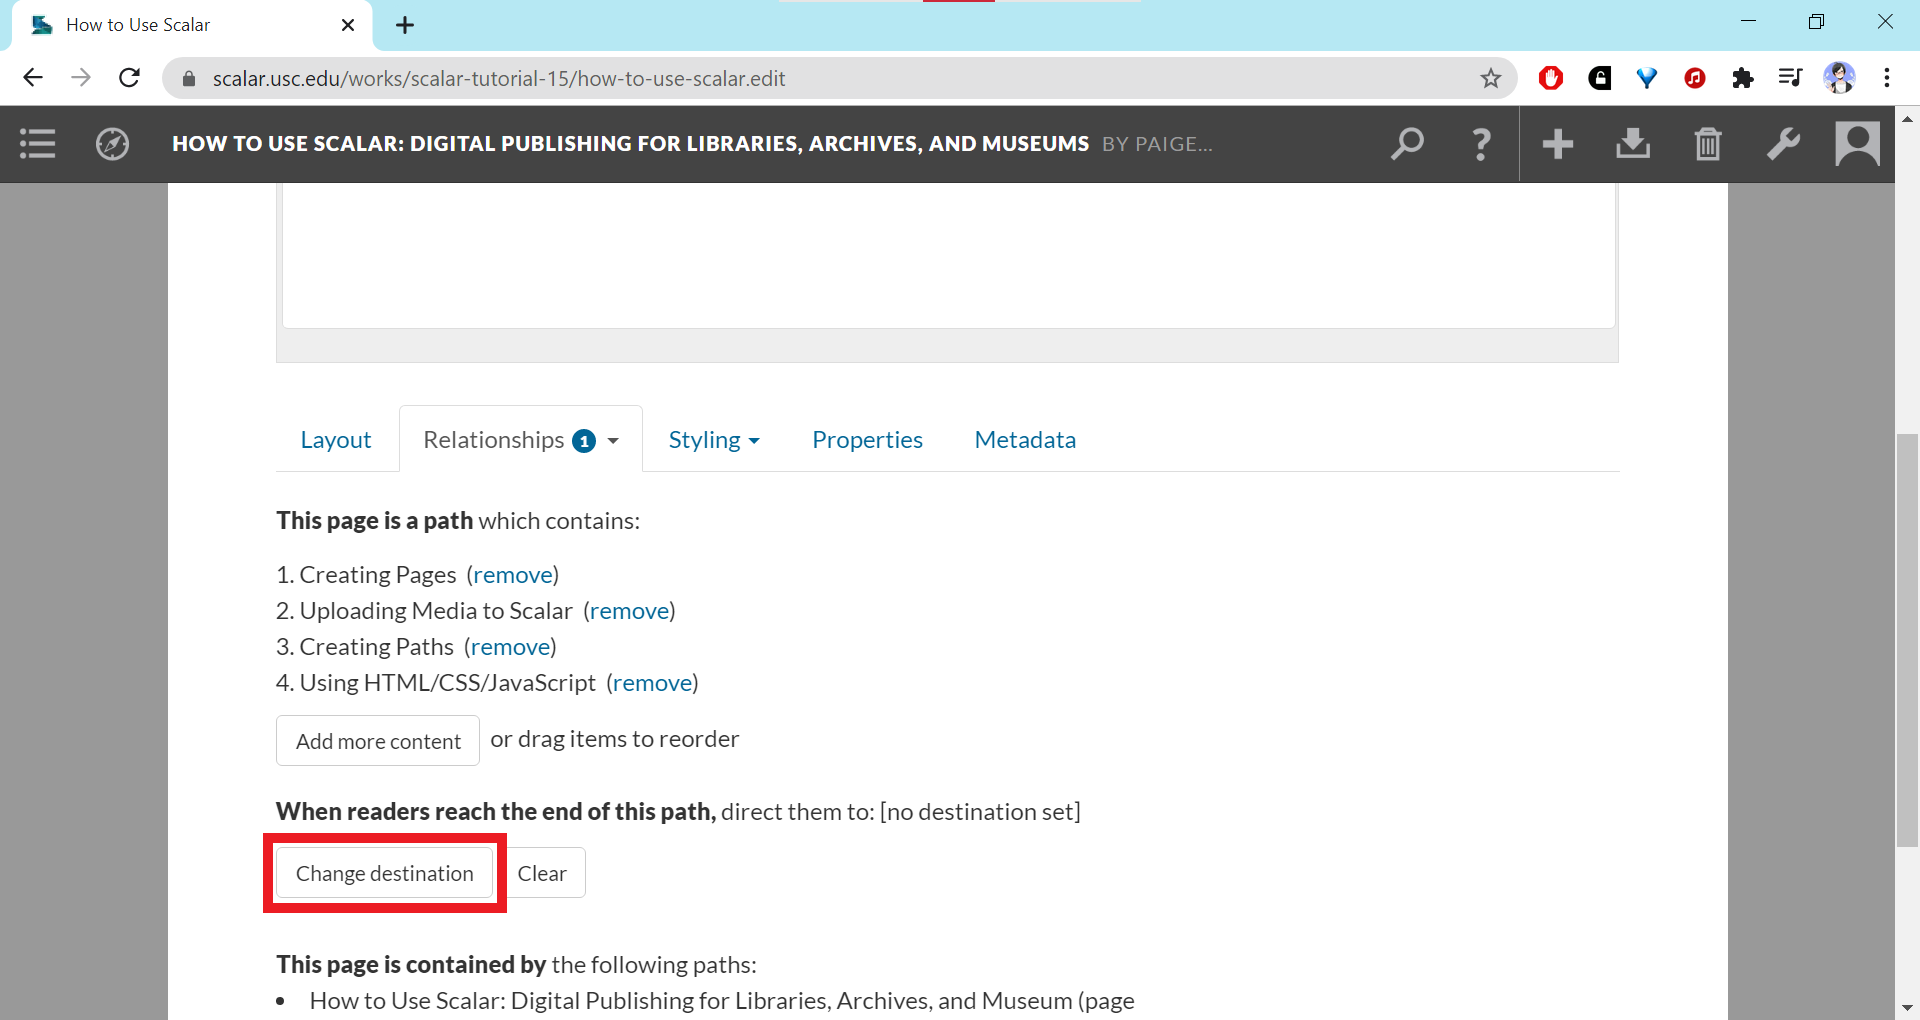
To Set a Destination
- Click on the “Change destination” button below the list of items in your path. It will pull up an embedded window.
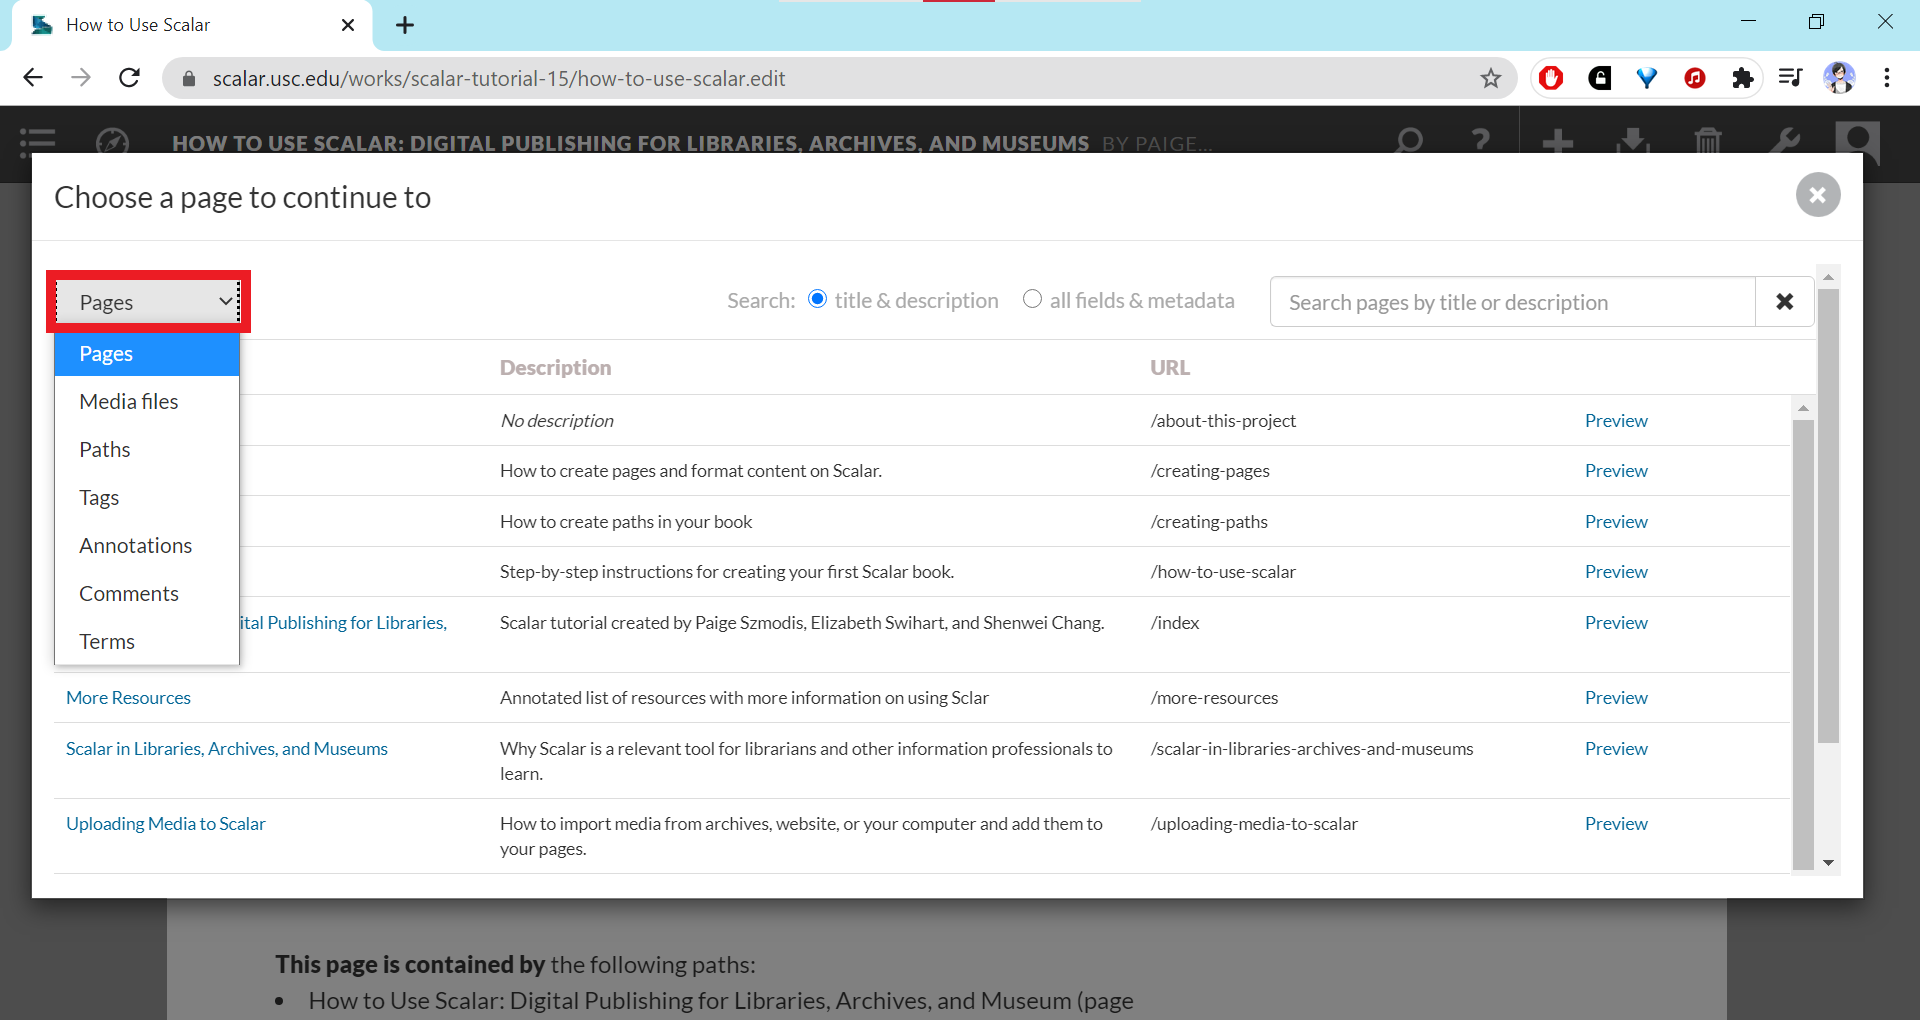
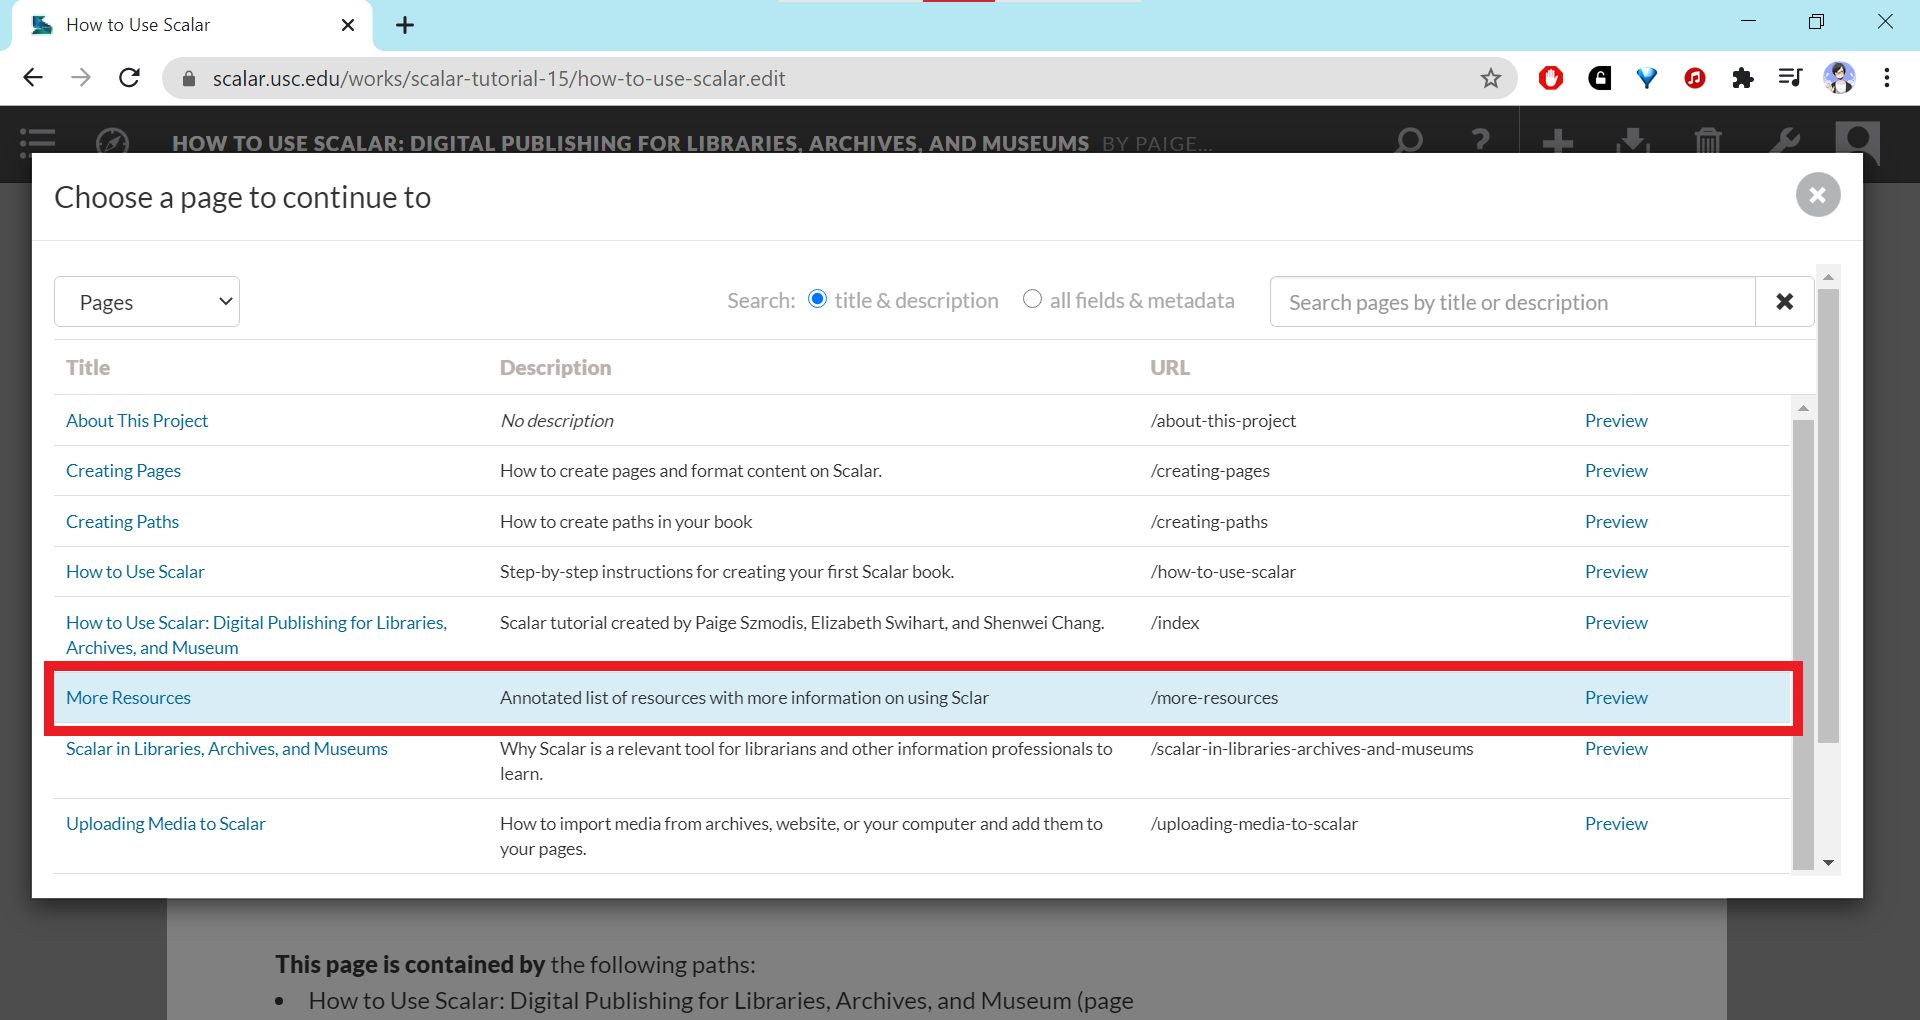
- Select the page or element you want to set as the destination. To navigate to non-page elements, use the dropdown menu in the top left corner.
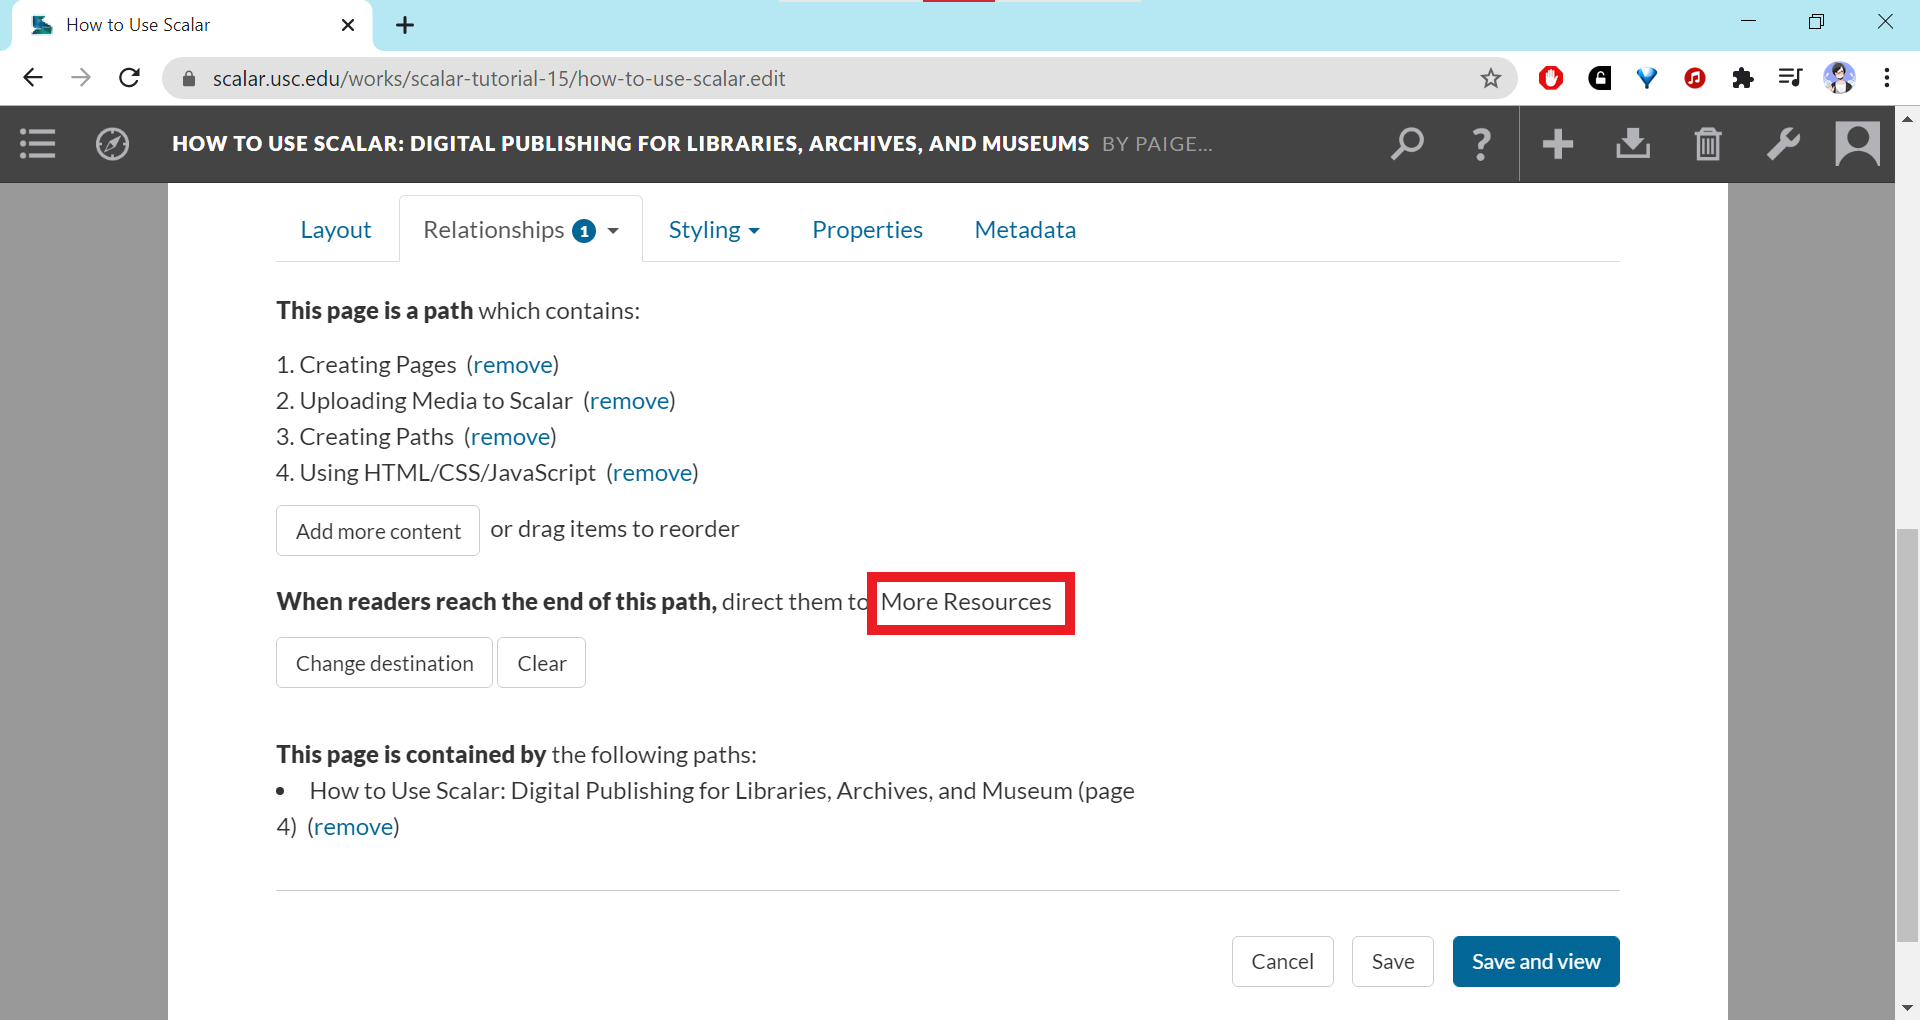
- After you select the desired destination, the pop-up window will close and the area under the "Relationships" tab should refresh and show the name of the destination item. You can remove the destination by clicking the "Clear" button or set the destination to a different item by clicking "Change destination" button again.
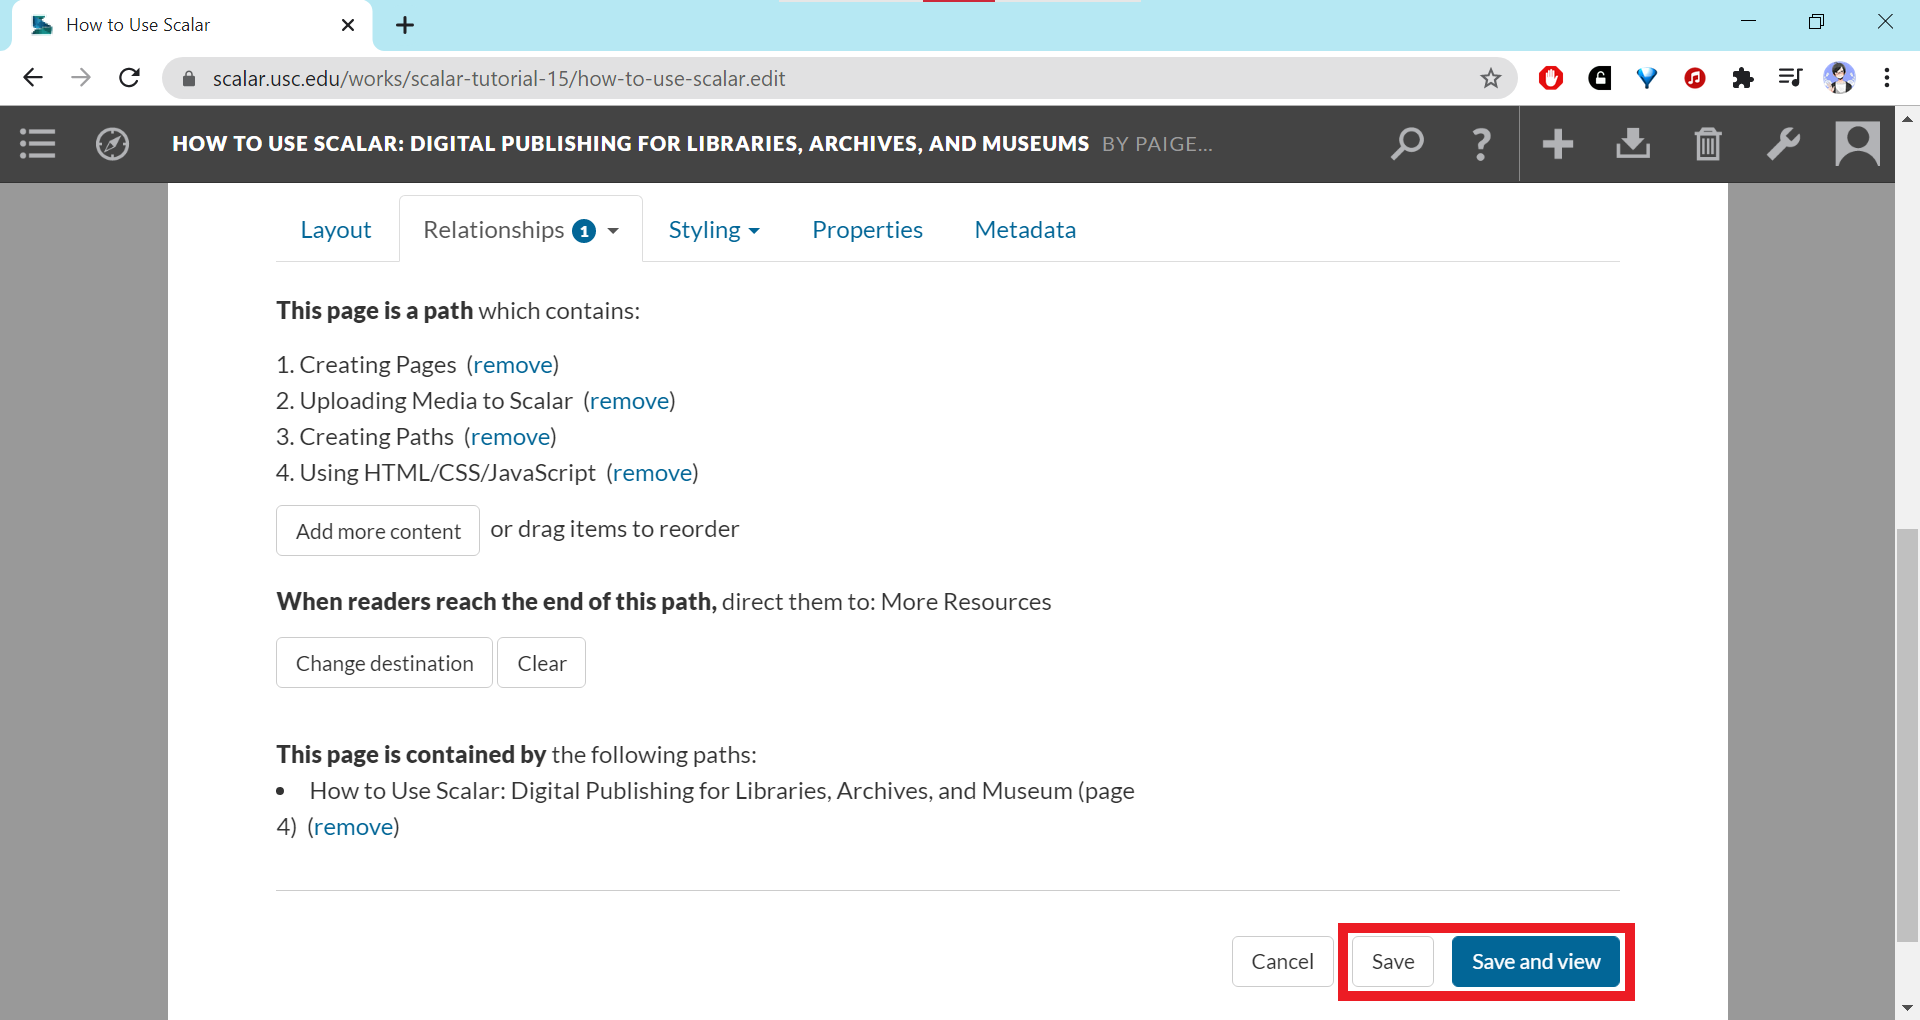
- Make sure to save your path using one of the two save options at the bottom of the editing page.
After you save your path and go to view the page for the path, it should show a table of contents listing each item linked in the path. The destination link should appear at the bottom of the page for the item at the end of the path.
This page has paths:
- How to Use Scalar Shenwei Chang
This page references:
- Screenshot of dropdown menu in Path contents window
- Screenshot of Path Selection pop-up window
- Screenshot of "Change destination" button
- Screenshot of "Path" option
- Screenshot of Relationships tab
- Screenshot of Choose the items that it contains
- Screenshot of Destination Page selections
- Screenshot of Path Reorder
- Screenshot of selected Destination
- Screenshot of updated destination
- Screenshot of Save buttons
- Screenshot of Path page
- Screenshot of Header toolbar