Creating a Table of Contents
- Navigate to the book’s dashboard by clicking on the wrench icon.
- Once the dashboard has loaded, look under the Properties tab.
- Scroll down to the section labeled Table of Contents and click the “Add item” button.
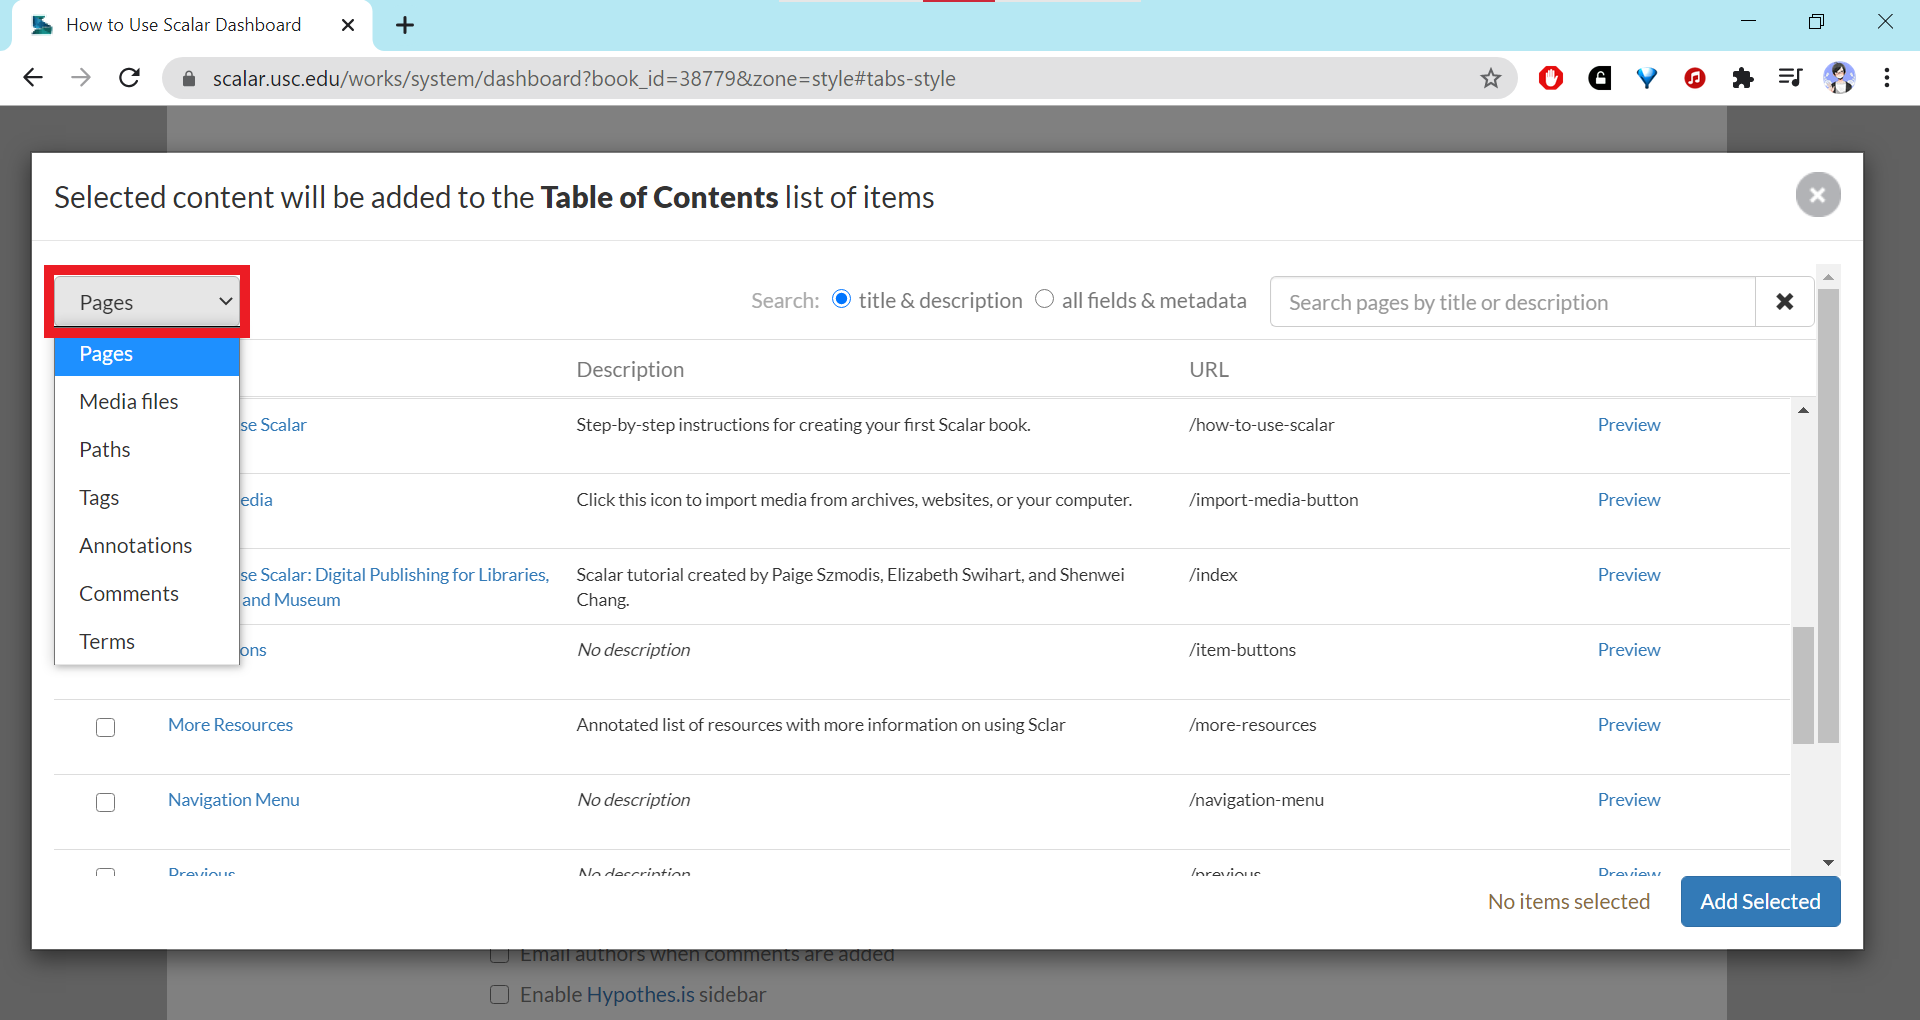
- A pop-up window will appear with a list of pages to choose from. If you would like to add an item that is not a page, go to the drop-down menu in the top left corner to find the lists of the other items by type.
- Click on the boxes next to the title of an item to select it. Once you have selected all of the items you wish to add to the Table of Contents, click the “Add selected” button.
- After saving your selections, the Table of Contents section of the Properties tab should refresh and display all of the pages and/or items you selected in the order that you selected them in the pop-up window. To rearrange the items, click on the left-hand side of the item where the three horizontal bars are, drag, and drop them in the desired location.
- Once you have finished rearranging everything into the desired order, save your selections using one of the Save options at the bottom of the Properties tab page.
- After clicking “Save and return to book,” you can click on the bulleted list icon on the leftmost corner of the header toolbar and see that your Table of Contents displays properly.
This page has paths:
- How to Use Scalar Shenwei Chang
This page references:
- Screenshot of main menu
- Screenshot of Options icon
- Screenshot of Table of Contents editing options
- Screenshot of Properties Tab on Dashboard
- Screenshot of Table of Contents Add Item button
- Screenshot of Table of Contents selection window drop-down
- Screenshot of Table of Contents rearrangement
- Screenshot of selected items in Table of Contents pop-up window
- Screenshot of Properties tab Save buttons