Thanks for your patience during our recent outage at scalar.usc.edu. While Scalar content is loading normally now, saving is still slow, and Scalar's 'additional metadata' features have been disabled, which may interfere with features like timelines and maps that depend on metadata. This also means that saving a page or media item will remove its additional metadata. If this occurs, you can use the 'All versions' link at the bottom of the page to restore the earlier version. We are continuing to troubleshoot, and will provide further updates as needed. Note that this only affects Scalar projects at scalar.usc.edu, and not those hosted elsewhere.
How to Use Scalar: Digital Publishing for Libraries, Archives, and MuseumsMain MenuAbout This ProjectAbout the creators and purpose of this projectWhat Is Scalar?A brief introduction to what Scalar can do as a platform.Scalar in Libraries, Archives, and MuseumsWhy Scalar is a relevant tool for librarians and other information professionals to learn.How to Use ScalarStep-by-step instructions for creating your first Scalar book.More ResourcesAnnotated list of resources with more information on using SclarPaige Szmodisc78c538ae17b32016e9167236f1aa8c213efc288Elizabeth Swihart2a47b61d624c2ba01890fc87ecc1d0c25d5107a3Shenwei Chang5f647018e81e72f2978f28d4dfbea5d53d6dd876
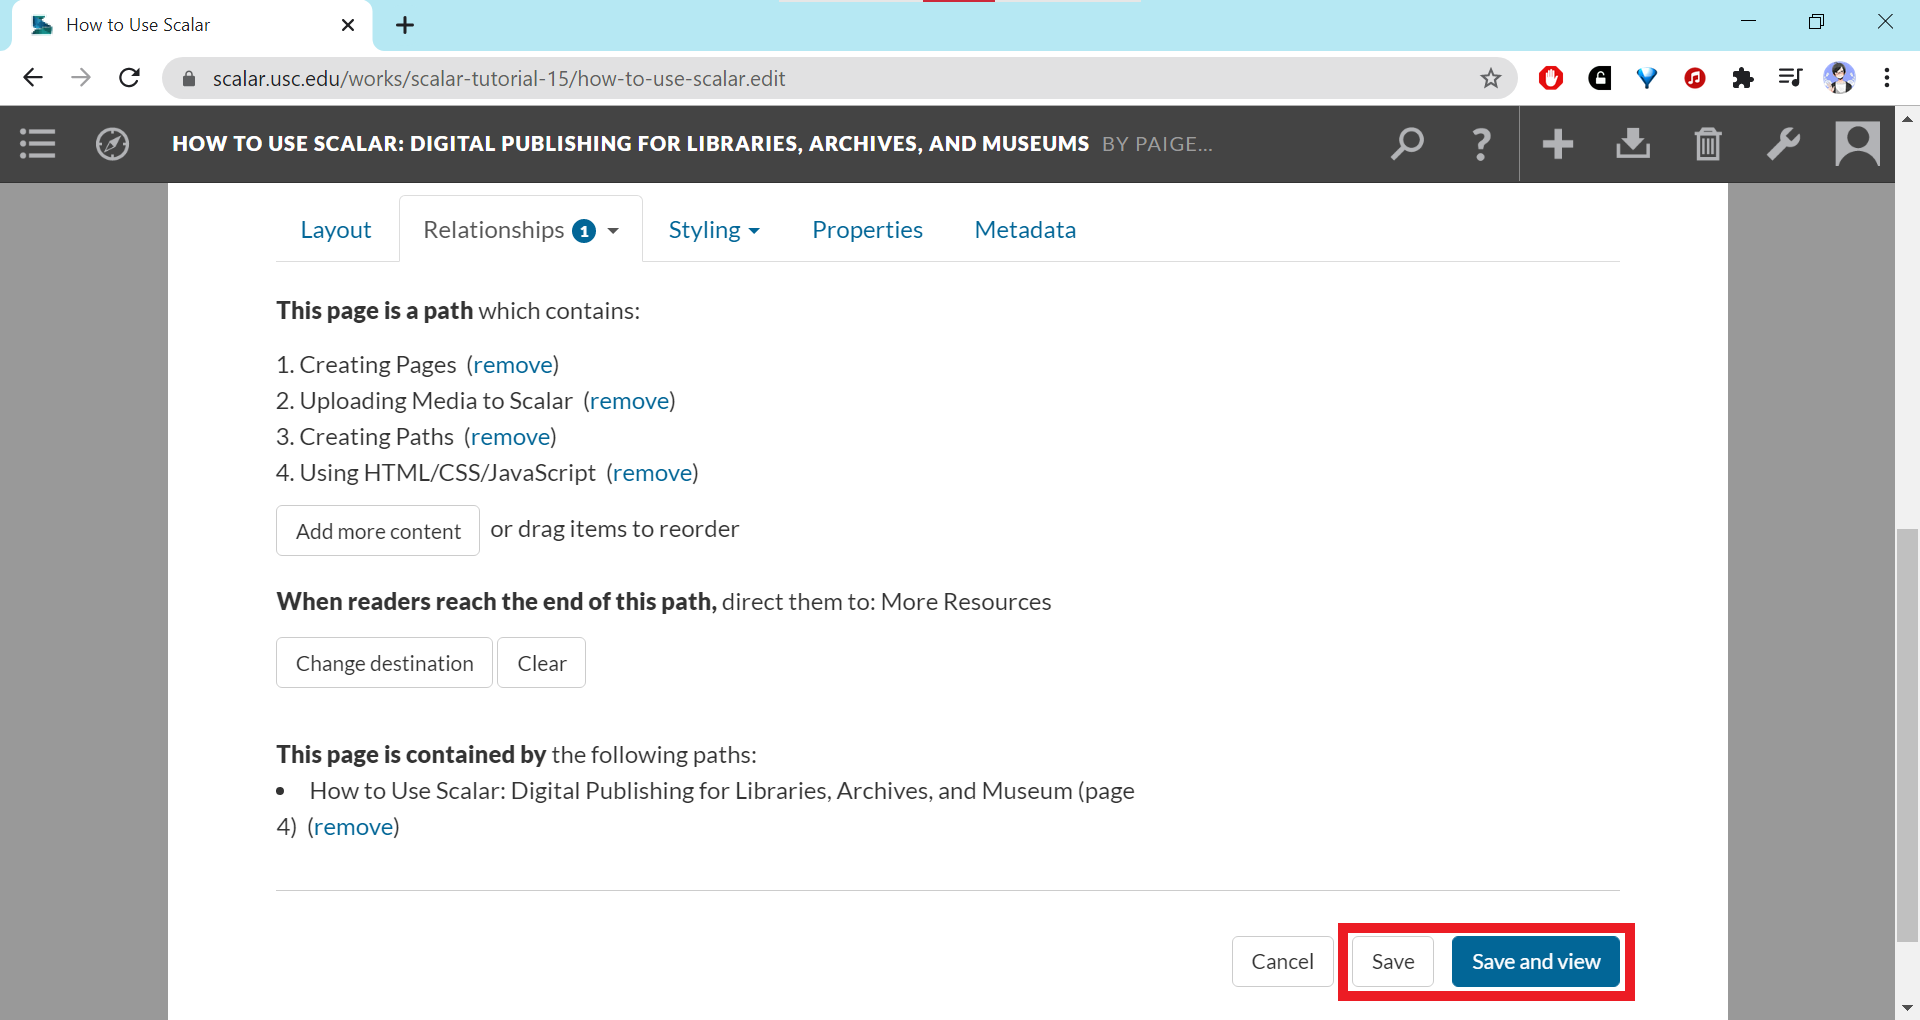
Screenshot of dropdown menu in Path contents window
1media/Screenshot showing dropdown menu in Path contents window_thumb.png2021-03-18T04:30:51-07:00Shenwei Chang5f647018e81e72f2978f28d4dfbea5d53d6dd876387794Screenshot showing dropdown menu in the Path contents pop-up windowplain2021-03-18T05:48:44-07:00Shenwei Chang5f647018e81e72f2978f28d4dfbea5d53d6dd876
This page is referenced by:
12021-03-18T03:37:36-07:00Creating Paths27How to create paths in your bookplain2021-03-21T20:22:04-07:00
Scalar allows you to connect pages and other book elements in a linear sequence of links called a “path.” You can add as many different paths as you want, with the elements in any order that you want. You can use any given element in as many paths as you want.
To Create a Path
Create a new page using the "+" icon or navigate to the page or media you want to make into a path and click the pencil icon to open the edit page.
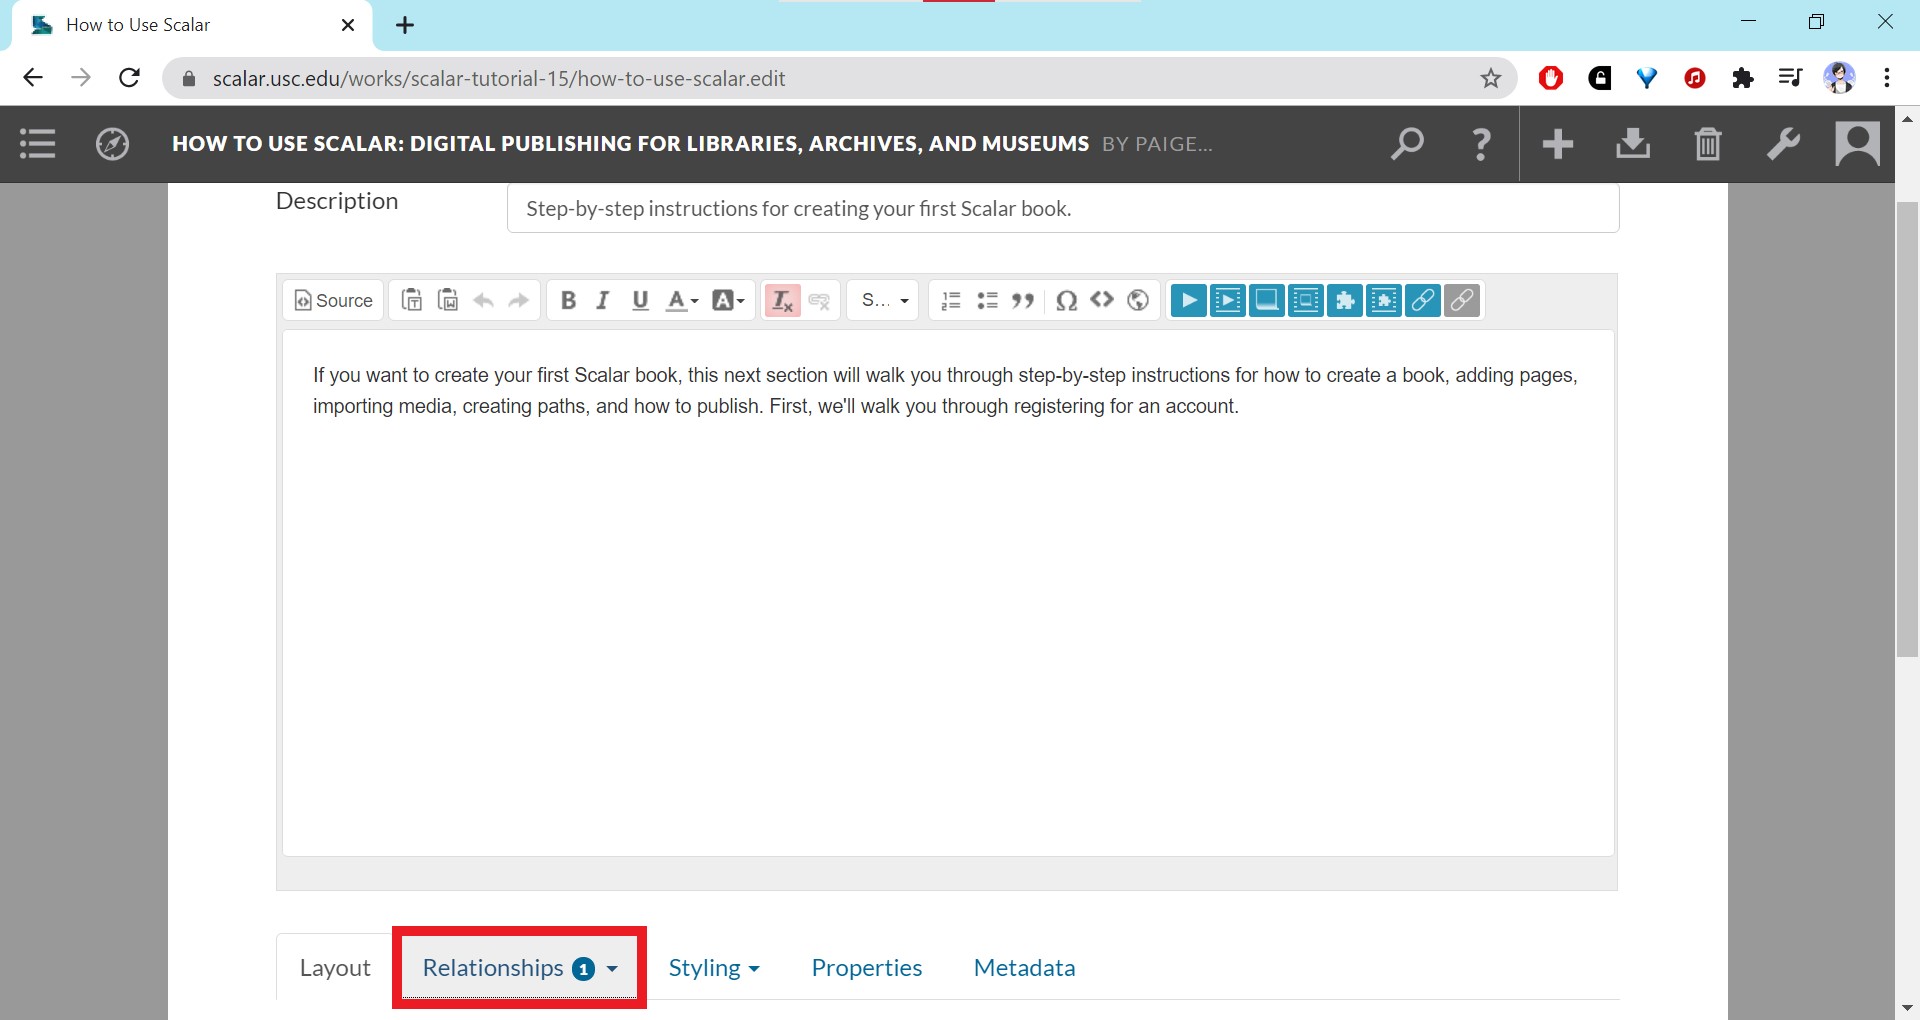
Scroll down to the area under the content editor box and find the “Relationships” tab. Click on the option that says “Path.”
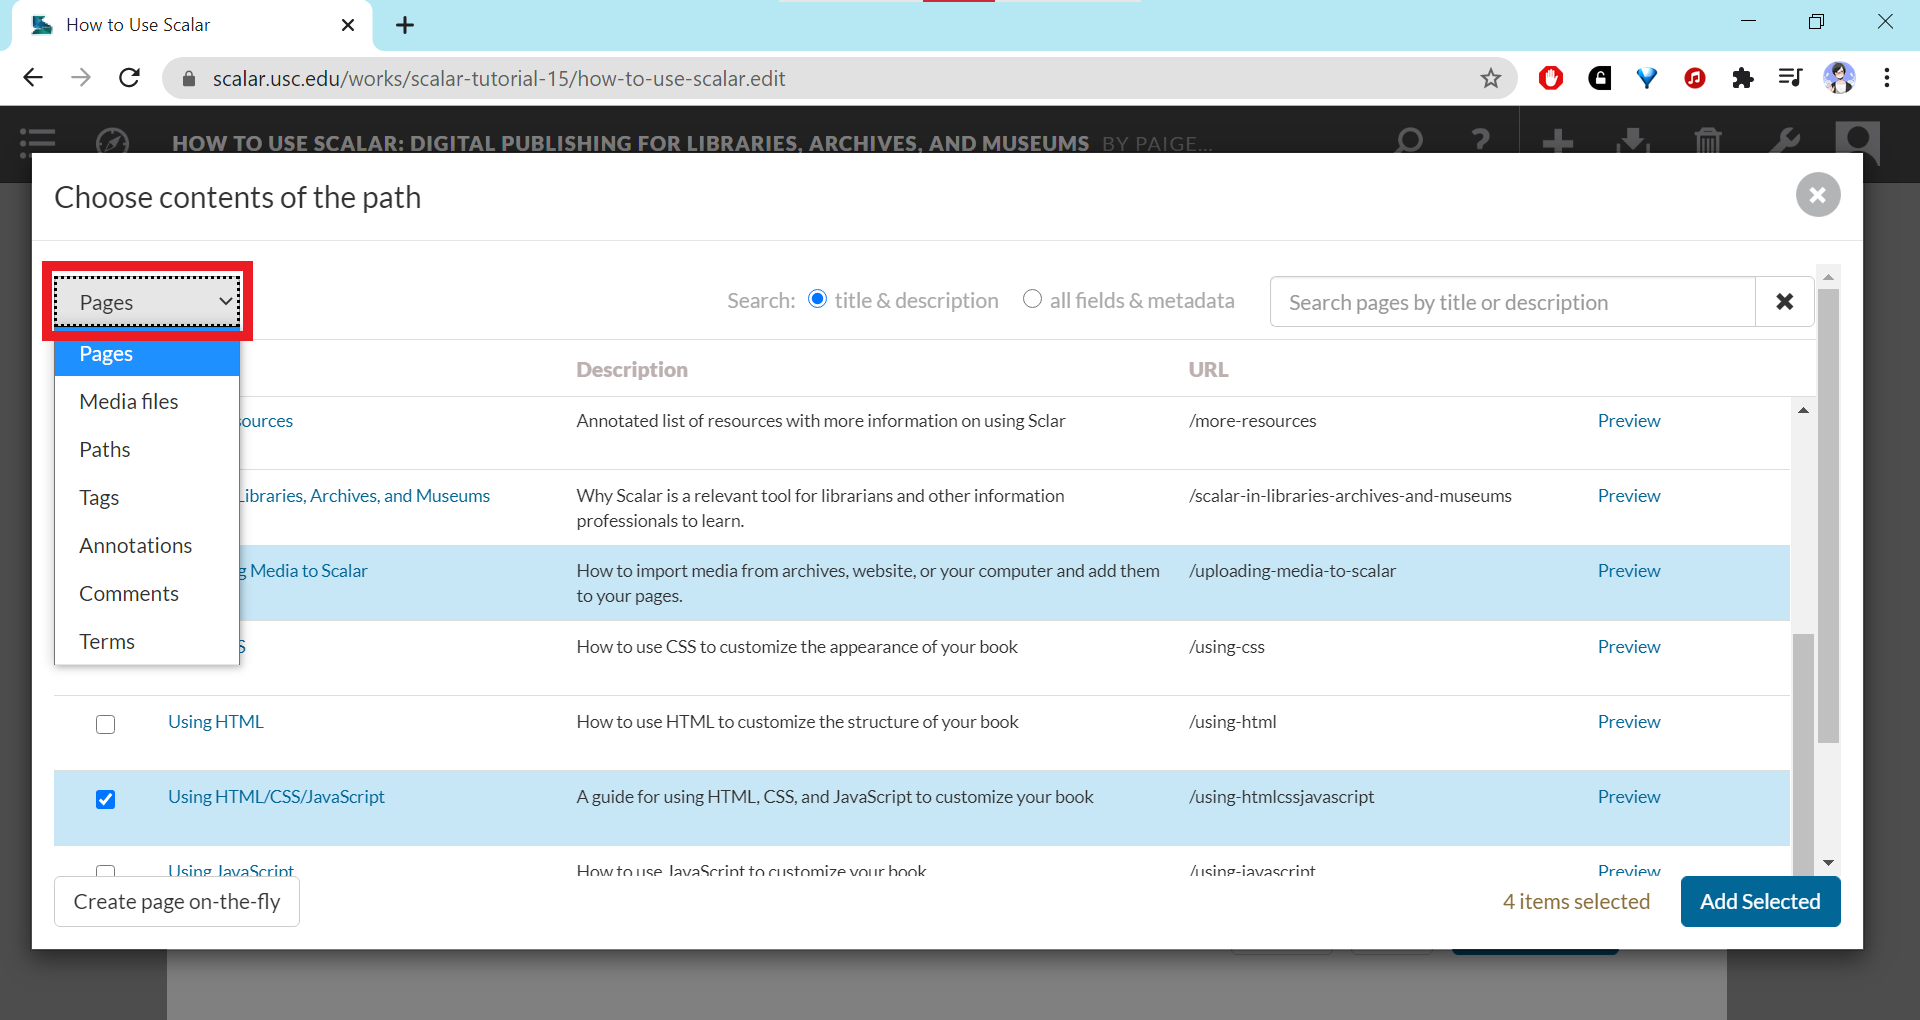
Click on the hyperlinked text that says “choose the items that it contains.” This will pull up a pop-up window.
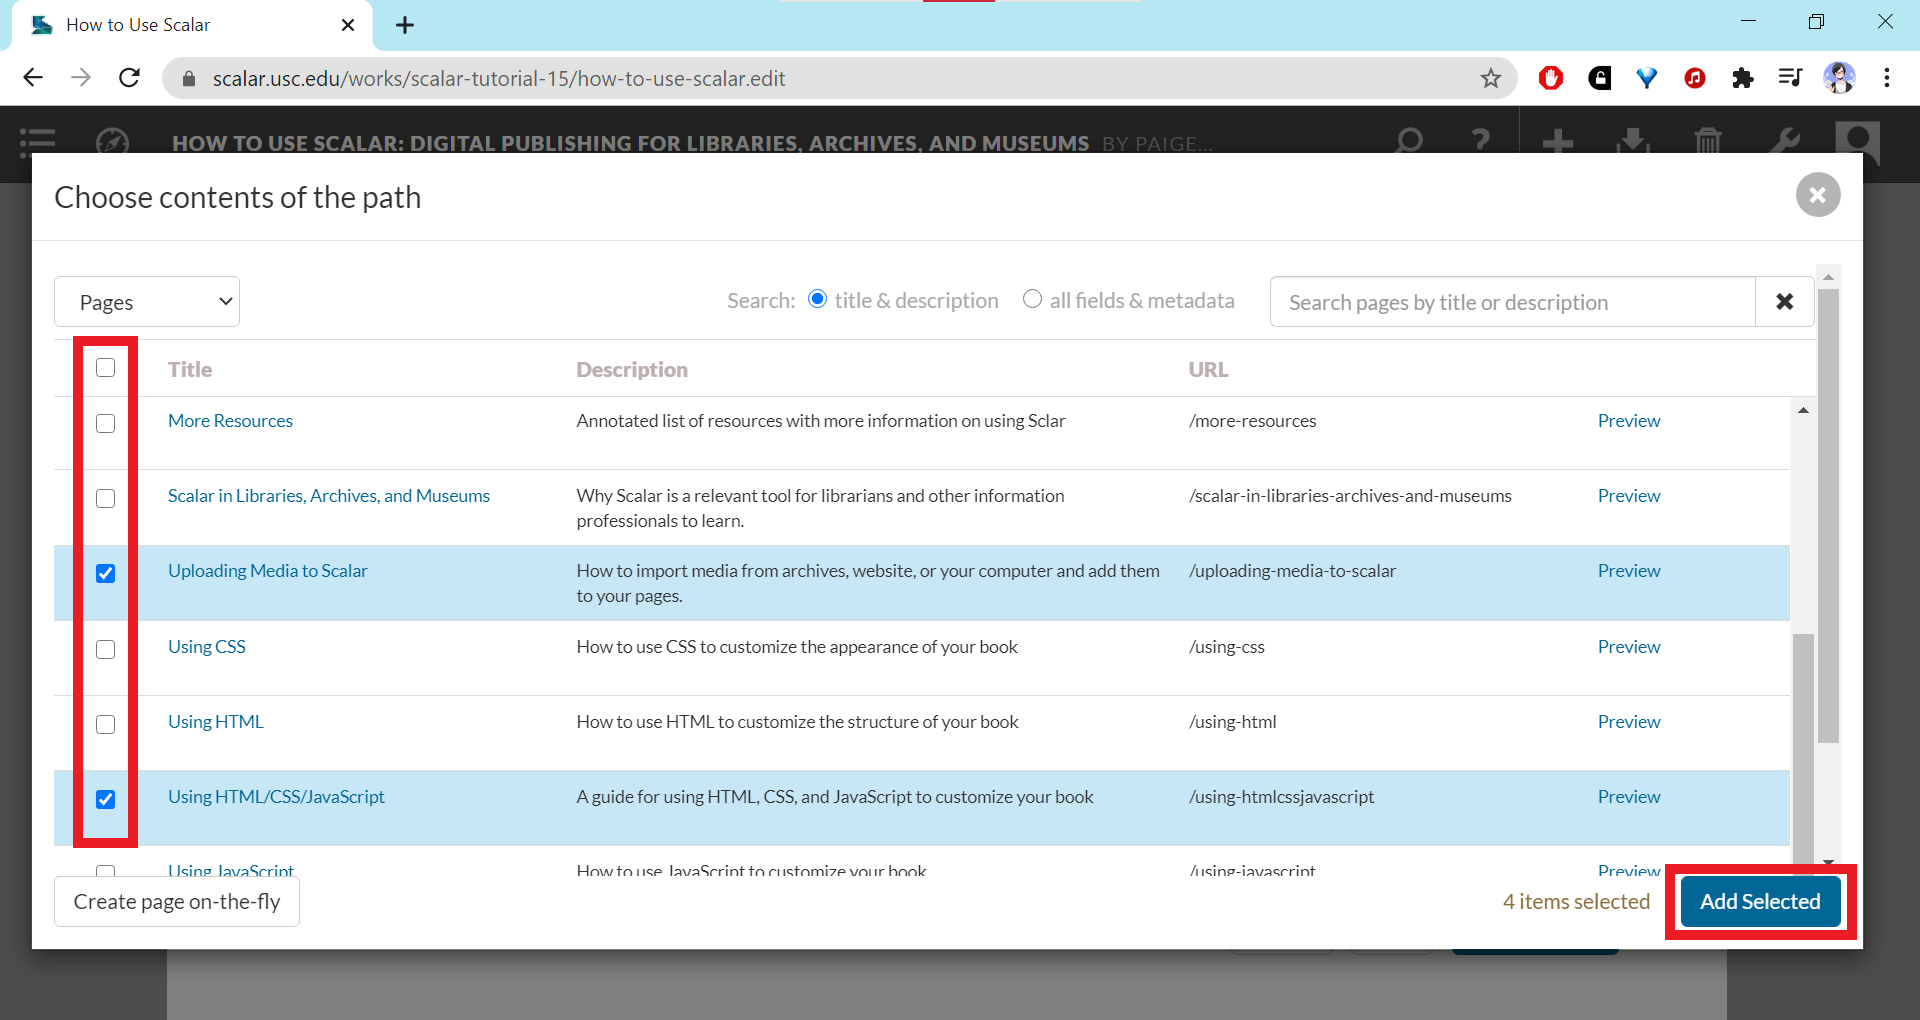
Select all the items you want to include in the path by clicking the boxes to the left of the items’ names. You can add pages or select from non-page elements in the project by using the dropdown menu on the upper left.
Once you’ve checked all the boxes for your selected items, click “Add Selected.”
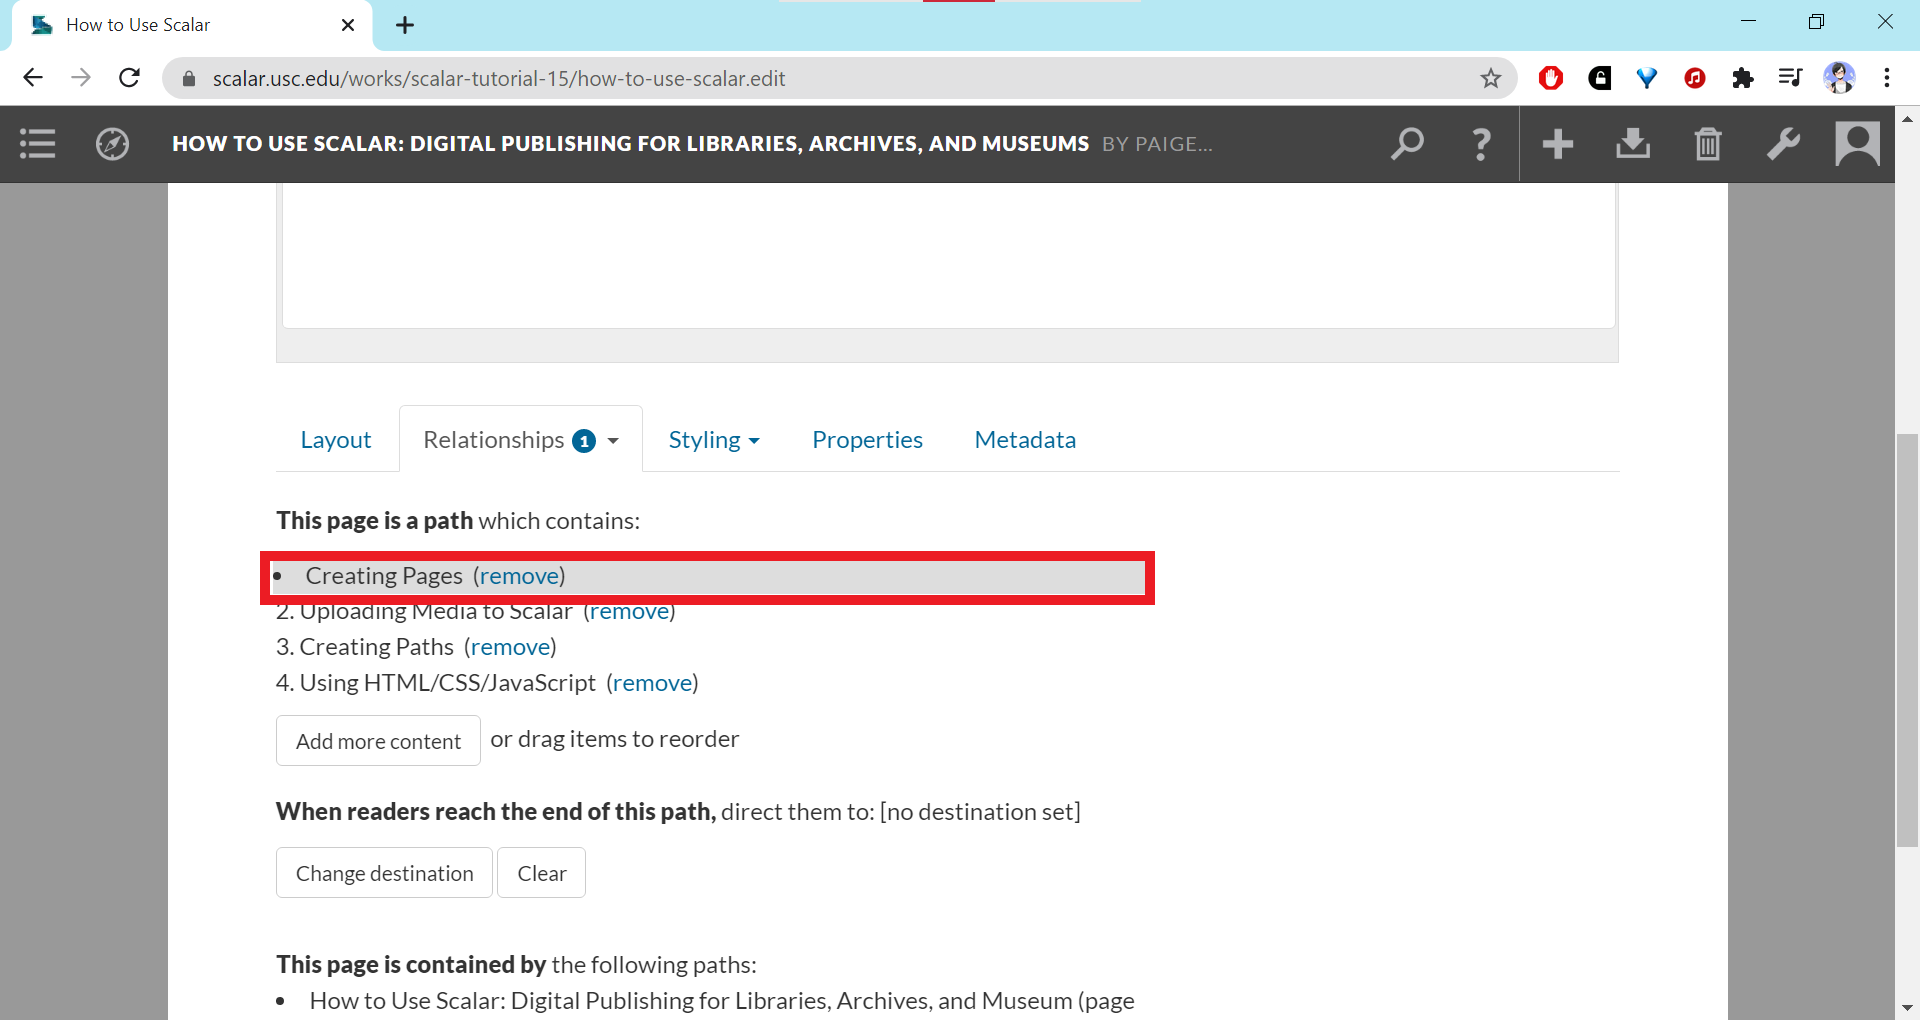
The items you’ve selected should show up in a numbered list. You can click the “Add content” button to add more items to the path. To reorder the items, click on an item, hold down the mouse button (the item should become highlighted in gray and be preceded by a bullet point instead of a number) and drag it to the position you want.
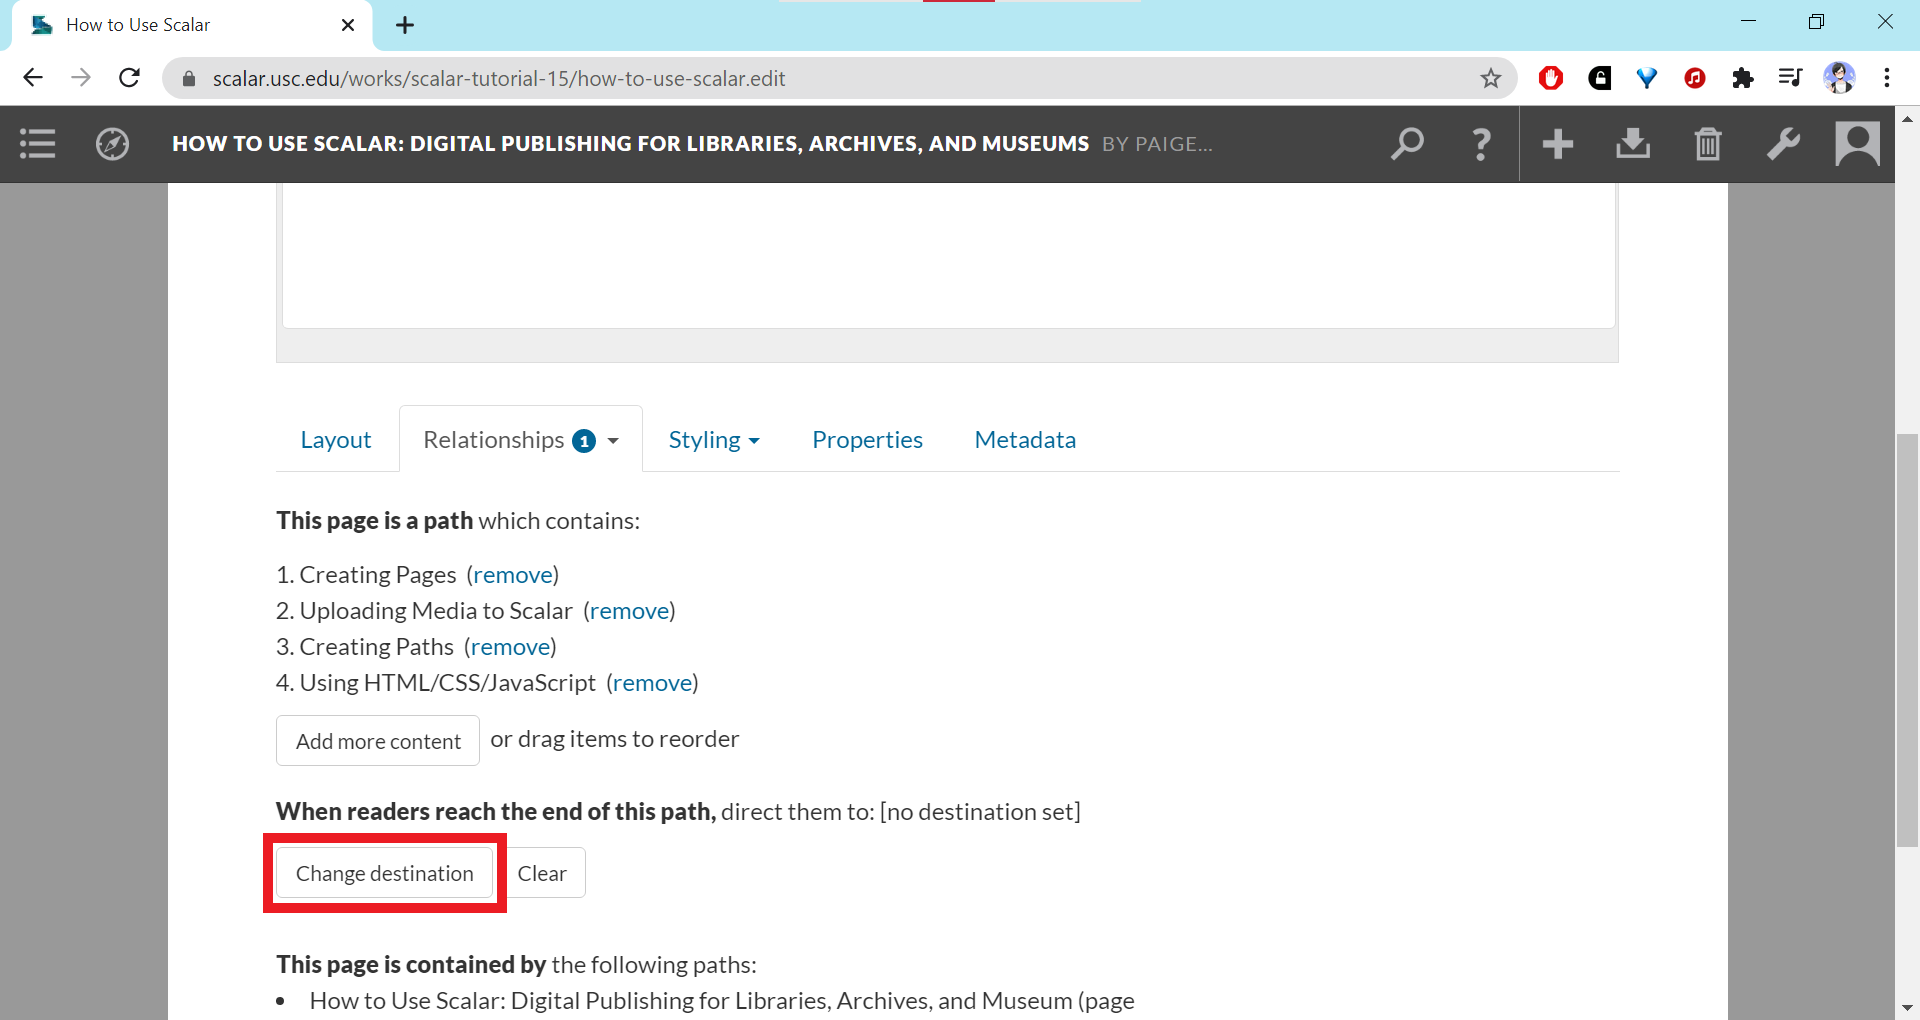
For any given path in your book, you can set a “destination” link to redirect the user to a particular place in your book.
To Set a Destination
Click on the “Change destination” button below the list of items in your path. It will pull up an embedded window.
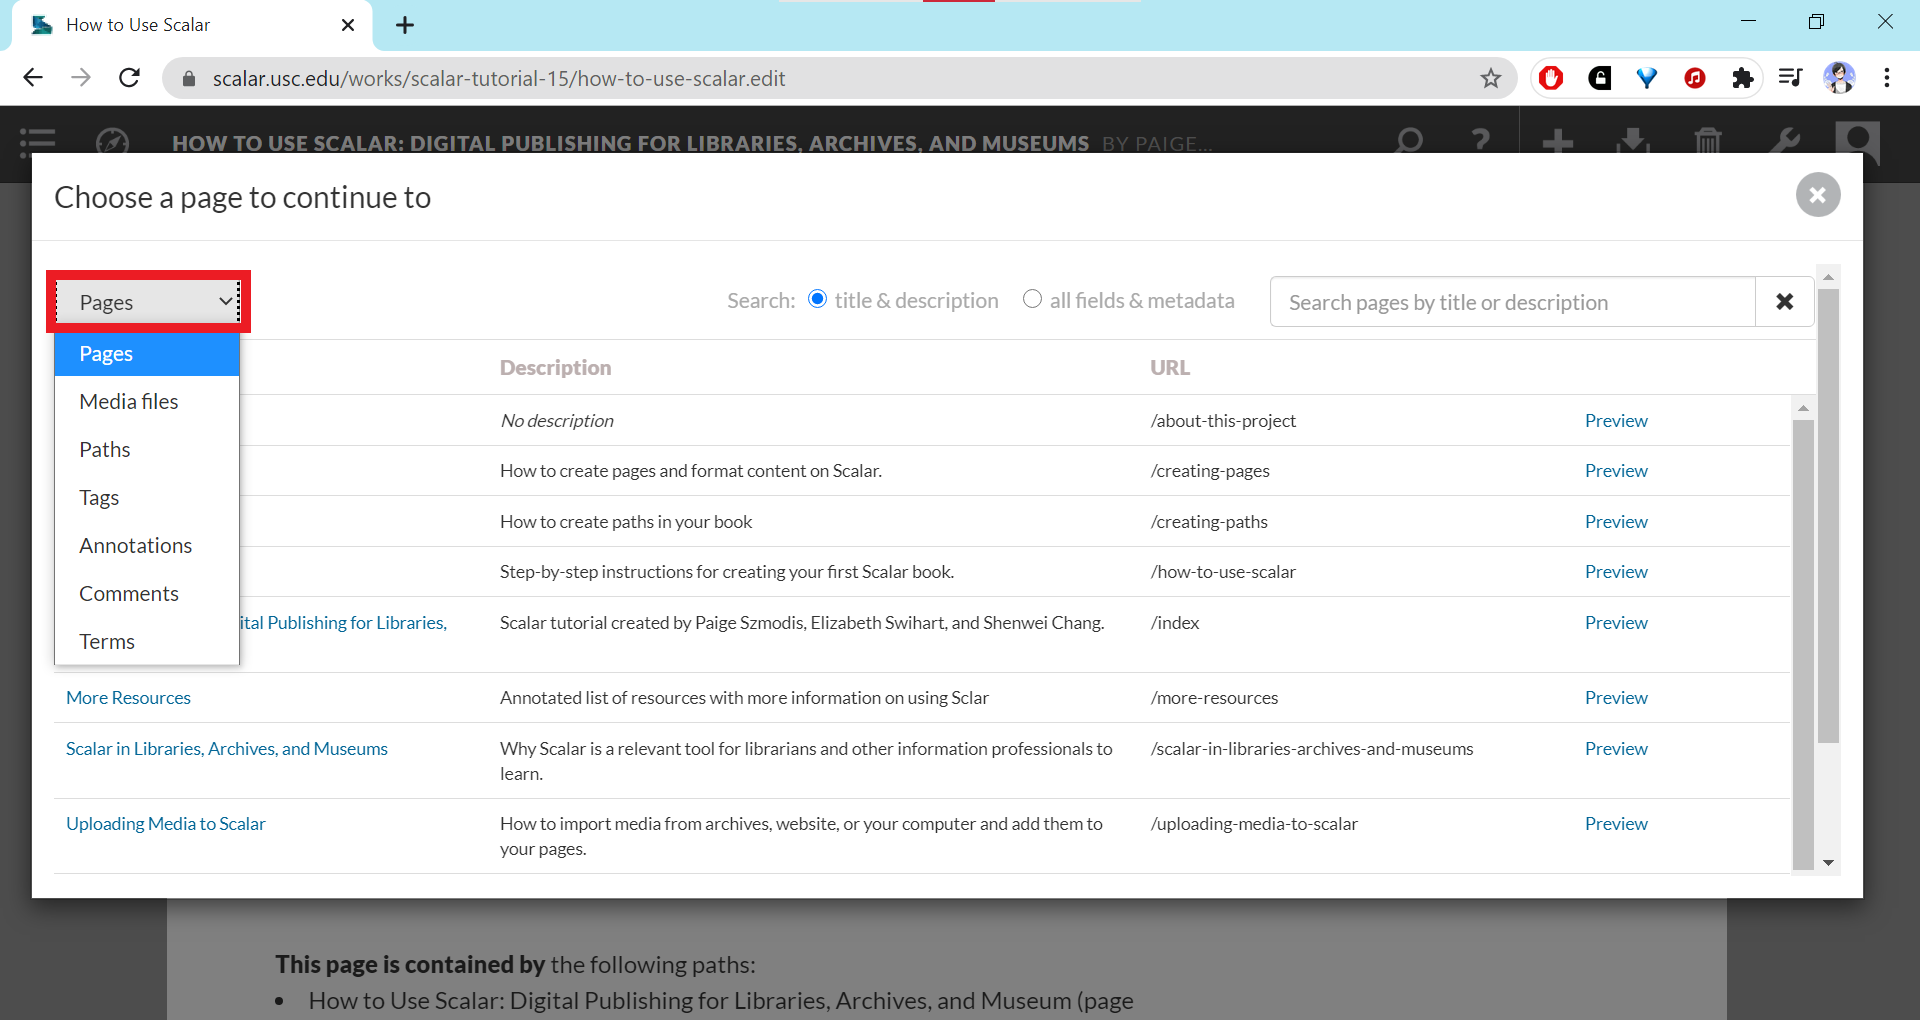
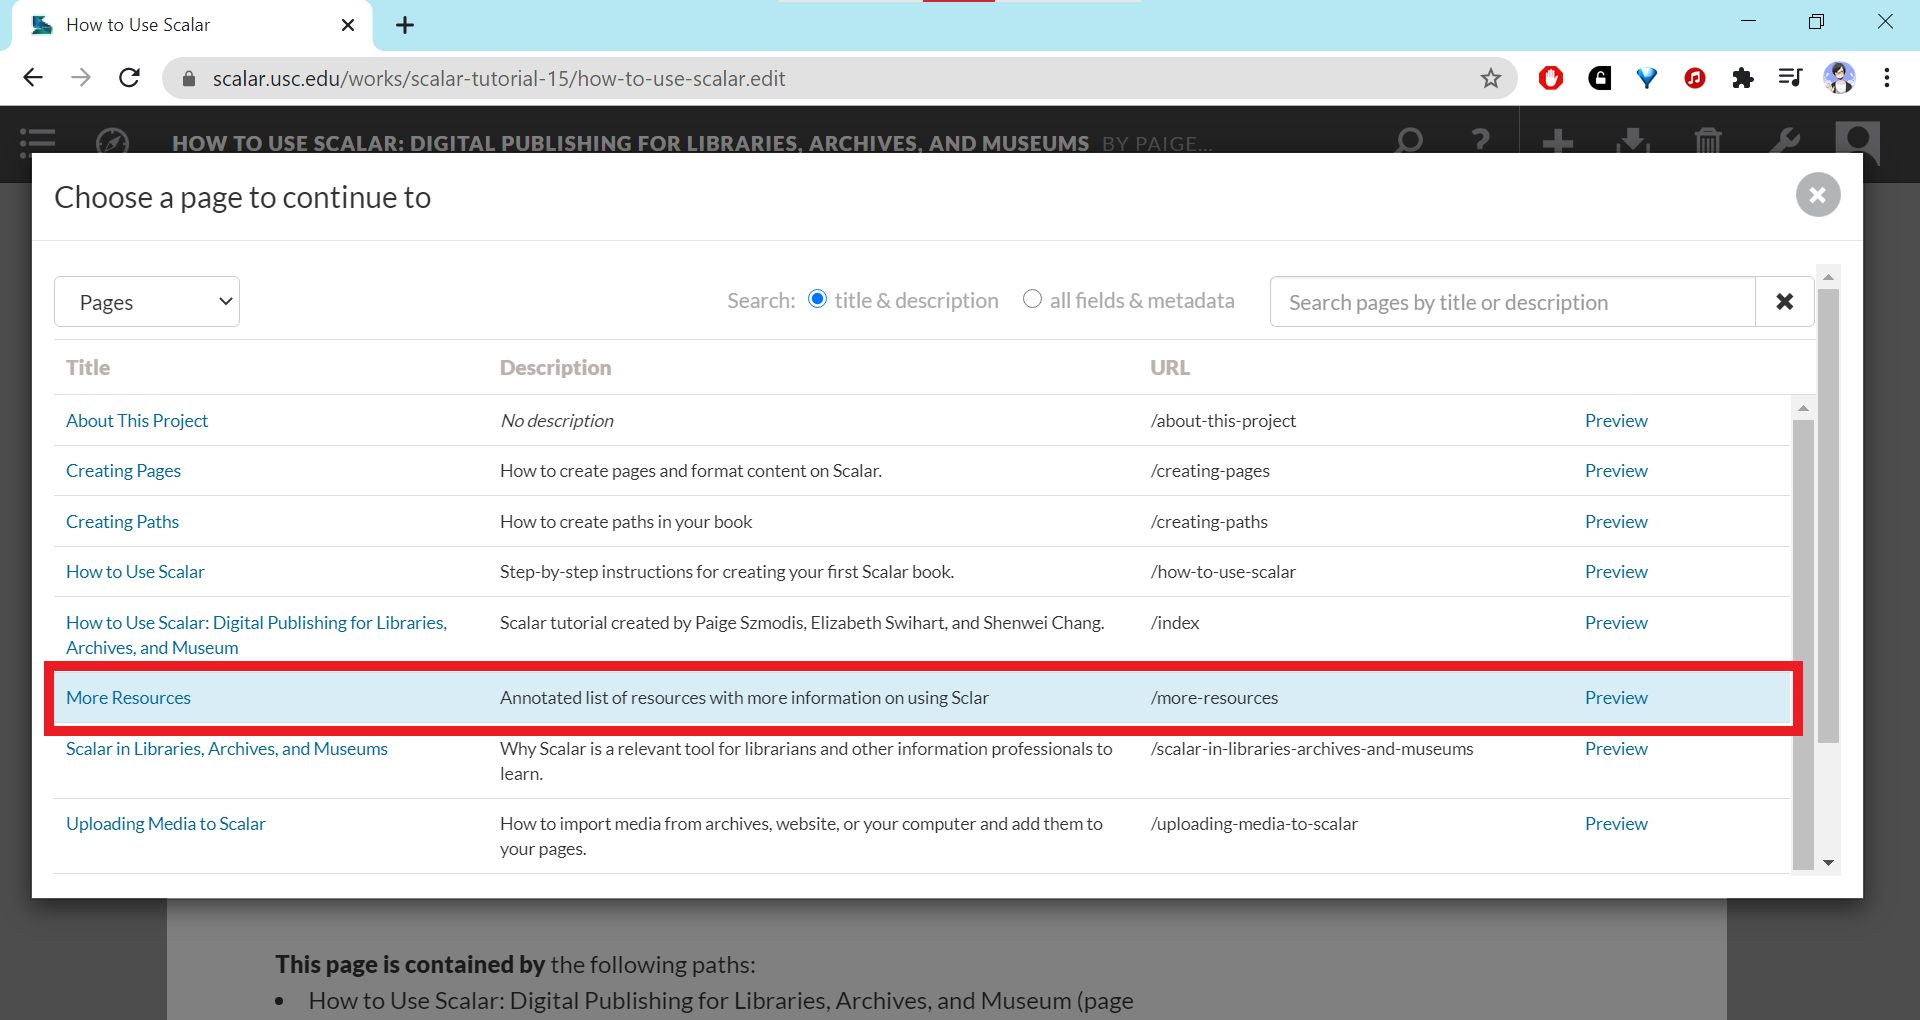
Select the page or element you want to set as the destination. To navigate to non-page elements, use the dropdown menu in the top left corner.
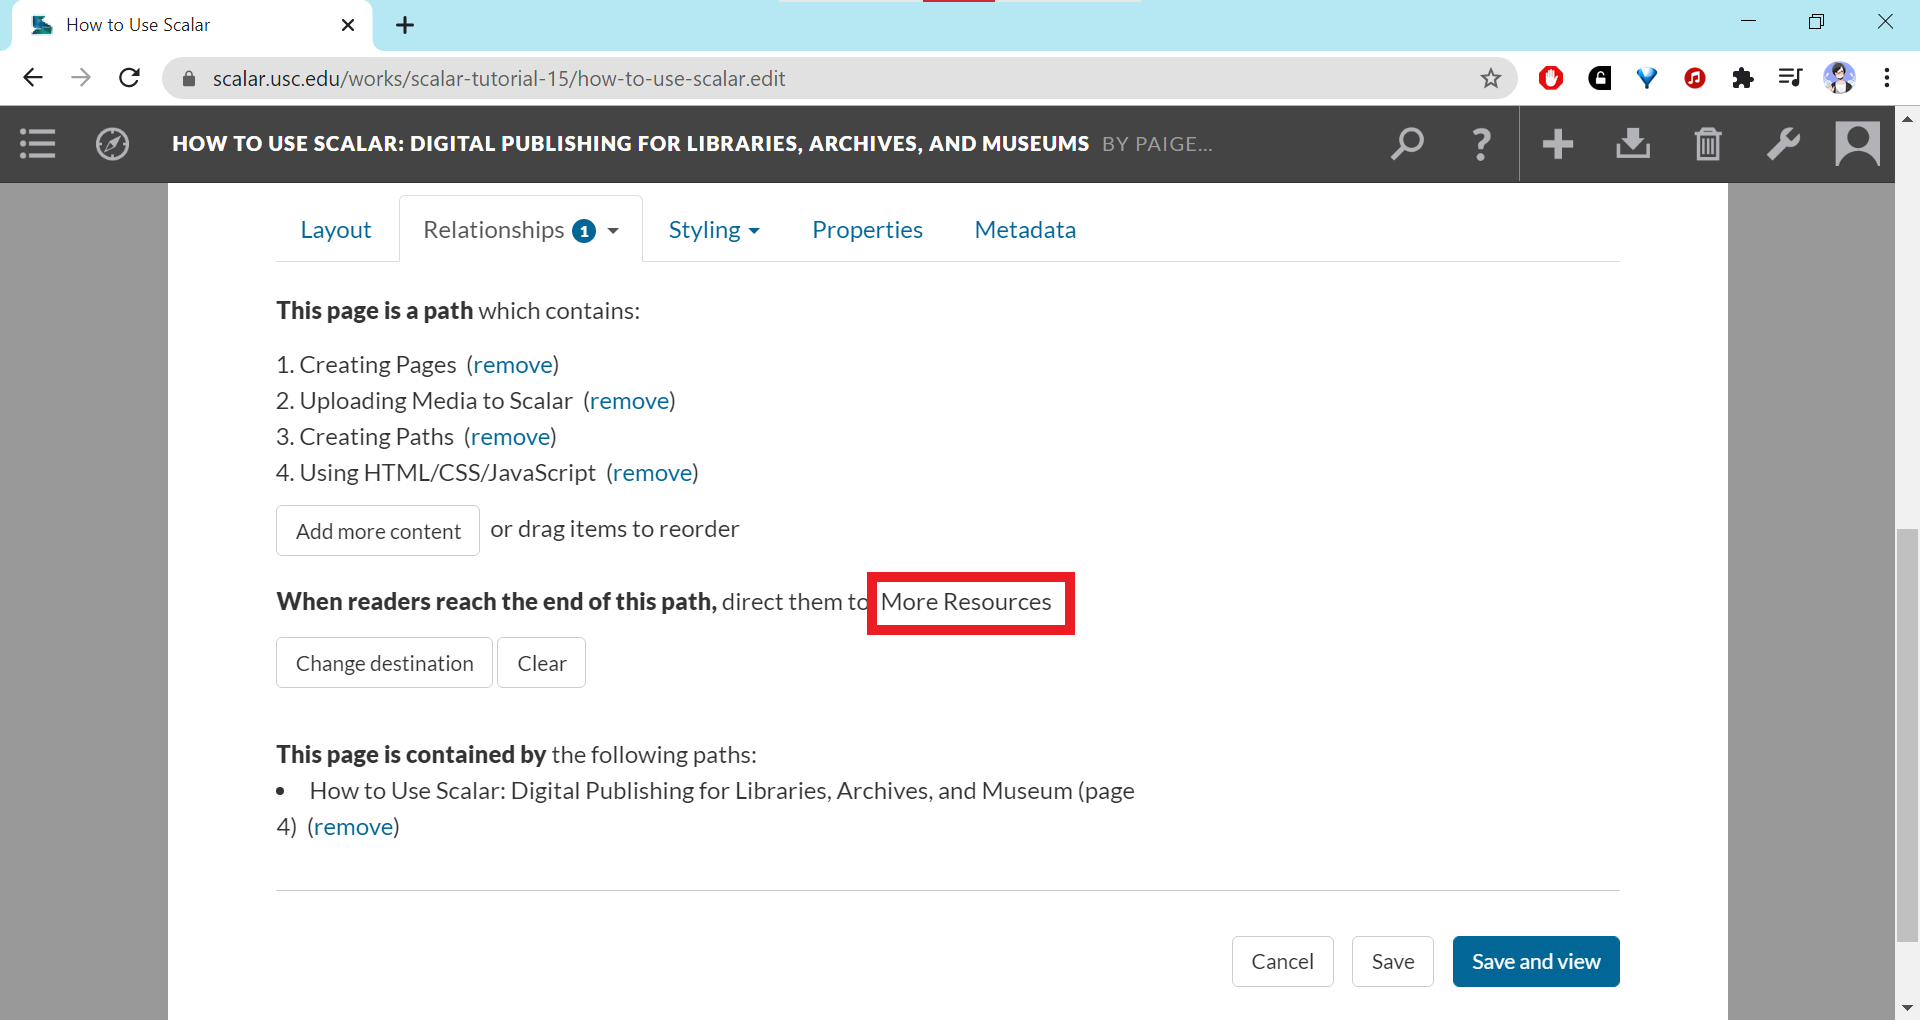
After you select the desired destination, the pop-up window will close and the area under the "Relationships" tab should refresh and show the name of the destination item. You can remove the destination by clicking the "Clear" button or set the destination to a different item by clicking "Change destination" button again.
Make sure to save your path using one of the two save options at the bottom of the editing page.
After you save your path and go to view the page for the path, it should show a table of contents listing each item linked in the path. The destination link should appear at the bottom of the page for the item at the end of the path.