Activities
Activity 1: What's Going on Here? An Exercise in Basic Visual Analysis
Activity 1 calls for each group to spend some time looking at a physical piece of art first, followed by some prompting questions and discussion. This exercise will promote observation and critical thinking skills, elements of cognitive capacity that have not been developed or are beginning to develop around this age. The activity leader could pick any number of different artworks to use, but it needs to be a visually intriguing/interesting work with many different elements of style, composition, and meaning to guide students. For example, a great piece to use would be Raphael's School of Athens.The group of 6 will be split into two groups 3, with the activity leader and the group leader both taking one group. Each group of 3 will be provided a tablet or computer with the central image on it, allowing the students to zoom in and see details of the work. First, the group will learn a little about the historical context of the piece and artist. Below are a few details that would be good jumping-off points in terms of historical context:
- Raphael was an Italian Renaissance painter and painted this work between 1509-1511 in Vatican City
- Renaissance art celebrated the rebirth of classical ideals and elements of architecture, philosophy, sculpture, painting, science, literature, and many other aspects
- the School of Athens was a meeting place for the greatest thinkers from many different time periods
- some of the figures include Aristotle, Plato, and Pythagoras
- a fresco is a painting done on a wall with plaster and pigment
With some basic background information, the students would then move to a visual analysis of Raphael's fresco. In the smaller groups of three, the leader (either the activity leader or group leader) would ask the students about some basic elements of visual analysis:
- What colors do you see in the painting? Are they light, dark, bright, dull?
- What lines do you see? How do lines define figures and shapes?
- What shapes do you see?
- What kind of space does Raphael use? 3D, 2D? Does he use perspective (does it seem like you could walk into the space?)
- Does Raphael's figures and space look real/natural or unreal/abstract?
- Do you see any symmetry in this piece? If so, where?
- Do you think the fresco is balanced? Does Raphael repeat any shapes or figures that help balance the piece?
- Do the figures fit within the frame of the architecture that surrounds them? How big do you think this wall painting is in real life?
- When thinking about what the goal of the Renaissance was, do you think Raphael did a good job of celebrating and incorporating themes of classical antiquity (logic, rational thought, natural shapes, etc.)? Why or why not?
**more information about basic visual analysis can be found here.
Activity 2: Make It Your Own!
This activity deals with portraiture and the recreation of the self through art. The activity leader would first start off with some prompting questions- "What is a portrait?", "Who/what can be in a portrait?", "What is a self-portrait?", "Can you think of a time you were in a portrait?". These questions will help the students begin to think about the topic of portraiture. Children would look at several instances of artists' self-portraits, including ones by Van Gogh, Picasso, Samuel Fosso, Frida Kahlo, and Artemisia Gentileschi (links to portraits are below). In their camp scrapbook, the children would take some time to answer a few questions about the self-portraits, like "Which do you like best/worst?", "What are some differences/similarities between these portraits?", "Why do you think artists make self-portraits?", followed by a short reading and specific questions about a portrait of their choosing. Next, the students would draw a self-portrait of their own in the scrapbook. Essential elements to this activity include exposure to different self-portraits, discussion about qualities of a "self-portrait", and an opportunity to reflect on how students see themselves. It is important to use the reflection as a time to point out individuality and capability of the students in the larger context of art history and education. The National Gallery of Art also has great lessons on self-expression that are good resources for expanding this activity into a class or other program.Van Gogh's Self-Portrait
Pablo Picasso's Self-Portrait
Samuel Fosso's Self-Portrait
Frida Kahlo's Self-Portrait
Artemisia Gentileschi's Self-Portrait
Activity 3: Jackson Pollocked
During this activity, each group will get to create a large abstract expressionist piece like one of Jackson Pollock's. First, the student will be prompted with questions like, "Has anyone heard of the man Jackson Pollock?", "What do you know about Jackson Pollock?", "What do you notice about these paintings or abstract expressionism?" (prompting with pictures of Pollock and his works, see links below). It is important to keep the scope and abstraction of these questions in mind; this specific age range (about 10-12) will begin to think logically with minimal ability to think completely in the abstract and hypothetical- it is better refer to physical things that the children can relate to and use those items as a building point; it might be helpful to give a very general definition of abstraction in art as well. Next, the children would watch a short clip showing how Pollock created his art (see below). More questions could follow, asking children to mimic in the air the kind of movements Pollock might have made. This would move into the actual creation of an "action art" piece by the children. The activity leader would describe the process by demonstrating on a large canvas on the floor how the students could add paint. By showing how to manipulate the paint both in the video and in the activity leader's motions, the children will have a concrete example when attempting the task on their own, a helpful aid for this age range's cognitive capacity. Next, the students could try with supervision of the group and activity leader. During the wrap up session, each group's work will be on display! In their camp scrapbook, the children would write about their experience making the art and what they learned from it.Jackson Pollock's Lavendar Mist and Pollock working
Activity 4: Artist Activity
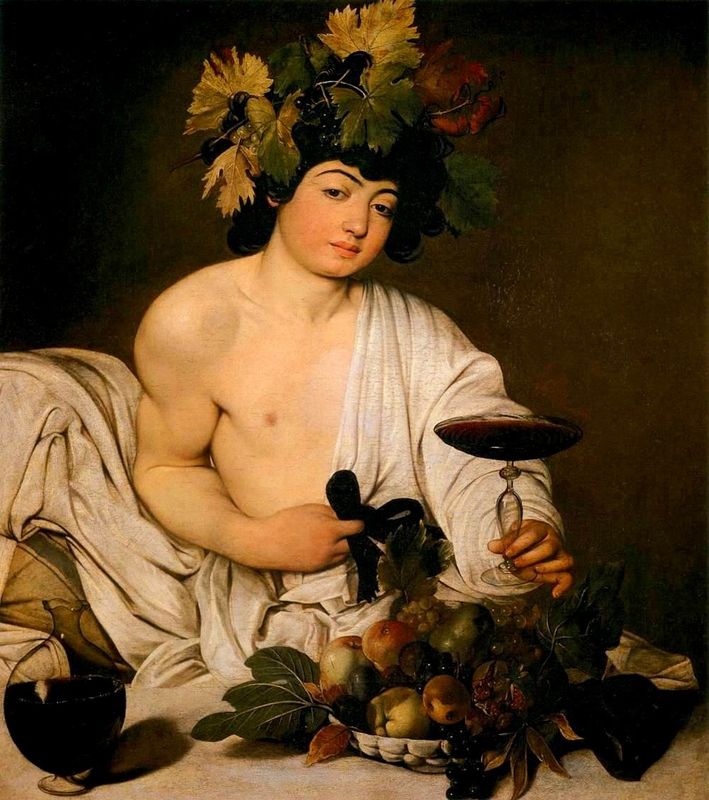
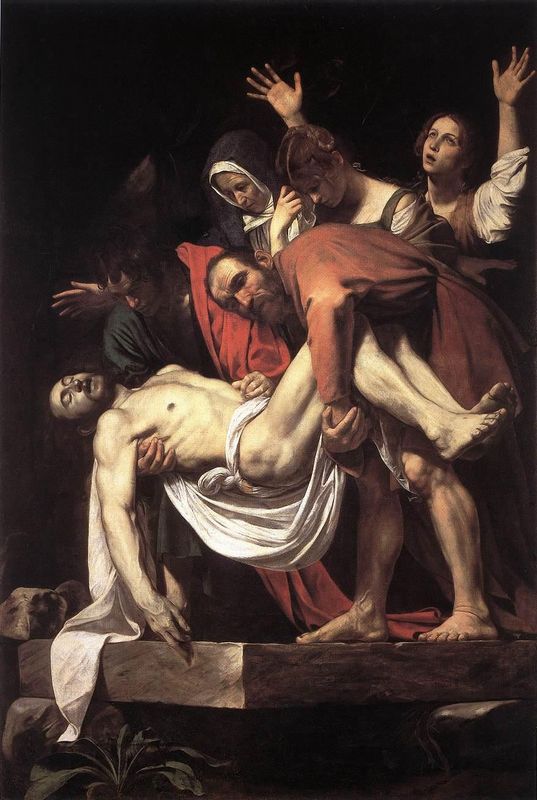
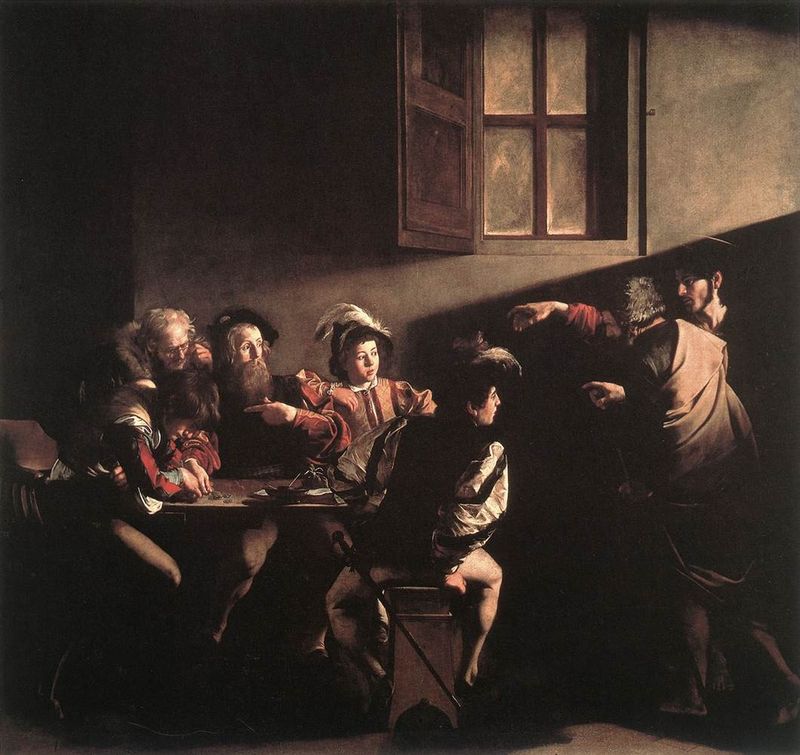
Each student would first find a partner so that there were 3 pairs. Each pair would pick an artist from a provided group and receive some short reading material and images of some works by that artist. Next, each pair would spend time reading the material and looking at the images together. They would work together to answer a series of questions about their readings in their scrapbook. A sample of potential reading material and questions is provided below. The kind of artists chosen can vary greatly and can be tailored to reflect the museum's collection. If there is time, the pairs could share a few brief facts about their artist and which works they liked with their larger group.Example: Caravaggio, Italian Baroque painter.
First, the students could read the sections titled "Caravaggio Artistic Context" and "Caravaggio Style and Technique" found here. Images of Caravaggio's Bacchus, Entombment of Christ, and The Calling of Saint Matthew would accompany the reading material. Some sample questions for the activity are below.
1. What is the name of your artist?
2. When/where did your artist live?
3. What art movement was your artist a part of and what are some characteristics of that movement?
4. What are some elements/symbols/techniques that your artist uses regularly?
5. What did your artist contribute to art history as a whole?
6. Which of your artist's works is your favorite? Why?
7. What other artists/movements did your artist influence later in time?
8. Name one interesting fact about your artist that you would like to share with the group.
Activity 5: Statue Playground
Like Activity 3, this activity also calls for more physical engagement that will hopefully catch the children's interest and keep them motivated to see the final product. At the beginning of this activity, the activity leader will take the group to a portion of the museum that has classical sculpture on display (this would also work with any other figurative artwork pertaining to the portrayal of the body). The leader will give a brief history/description of the art that the children are viewing. Here is an example for Greek classical sculpture:Although Greek and Roman sculpture are difficult and complex topics, it is imperative to use language that is easily understood by the program participants in the short time they have during this activity. Providing a broad overview of the topic will allow the children to have a basic understanding while also leaving room for further questions and exploration. Below are links to examples of the kind of sculpture the children might see.From roughly 800 to 300 BCE, the ancient Greek people created beautiful bronze sculptures of mostly male and sometimes female figures in various poses. These sculptures showed off the "male and female ideal". The male sculptures had an athletic body and strong facial features while the female pieces had soft features. Usually the Greek sculptors aimed to create sculptures that looked like the gods, such as Zeus or Athena. Over time, most of the bronze that was used to cast these pieces was melted down to use as war materials. Luckily the ancient Romans came along and made numerous copies of them in white marble. At one time, the copies may have even been painted, but all we see now is the white marble. Still, a few lucky bronze versions also survived.
Next, the activity leader would ask the students to pick out a statue that they like and take a few minutes to study it, perhaps even sketching it quickly and writing down the name and artist. After heading back to the activity station, the activity leader would ask each child to share their statue, what he/she liked about it, and its physical pose. Next, the activity leader would photograph each child posing like their statue; the photograph could be included in their camp scrapbook along with questions pertaining to what they learned about the art movement and their experience posing as the statue.
Artemisian Bronze
Praxiteles' Venus Braschi
Activity 6: Art History through the Ages
This activity is more individually-based, calling for students to work independently on short listening/reading exercises. Ideally, each student would have access to a tablet or computer for this "game". The aim of the game would be to travel the world of art history by answering questions about art history from different parts of the world. Students would answer a series of nine questions, with each set of three questions being preceded by either a short paragraph or a short video clip that contains the answers. Questions could vary between multiple choice, matching, or short answer to both quickly test knowledge from the video and to allow for some critical thinking. Ideally, questions would also span time and art movements from ancient art (Egypt, Mesopotamia, etc.), Latin American art, contemporary African art, East Asian art, modern European and American art, etc. The possibilities are endless and can be tailored to the specific collections at the museum. It is important that the activity and group leaders are available for guidance and questions pertaining to the use of technology- the less time that is spent trying to figure out how to navigate the computer, the more time that will be spent on engaging in the material. One possible example is highlighted below.A. Watch this video about Ancient Mesopotamian and Egyptian art and answer the following questions.
1. The Egyptian Kingdom lasted over 3000 years with four distinct periods. Put the periods of the Egyptian empire in chronological order:
-Old Kingdom
-Late Kingdom
-Middle Kingdom
-New Kingdom
2. Like the lion on the Ishtar Gate, the Mesopotamian's animal art ______
- was cartoon-like
- did not look animals at all
- looked very realistic
- incorporated human and animal elements
3. The Egyptians created images of their rules using very idealized and "perfected" features. Why do you think they used this style? What do you think the style says about how the rulers wanted to be remembered?