Book review: Getting started with 3d and 4d modeling in open-source Blender
By Shalin Hai-Jew, Kansas State University
A Beginner’s Guide to Virtual Reality (VR) Modeling in Healthcare Applications with Blender
Yuk Ming Tang, Ho Lun Ho, Ka Yin Chau, and Yan Wan Nova Science Publishers
2022
166 pp.
Yuk Ming Tang, Ho Lun Ho, Ka Yin Chau, and Yan Wan’s A Beginner’s Guide to Virtual Reality (VR) Modeling in Healthcare Applications with Blender introduces a free and open-source technology that enables the building out of some sophisticated three-dimensional visuals that can be used in games, films, immersive virtual worlds, visual effects, animations, and other applications. The z-axis, the third dimension, and animation, the fourth dimension, help bring digital experiences (virtual and augmented) into the perception of real space.
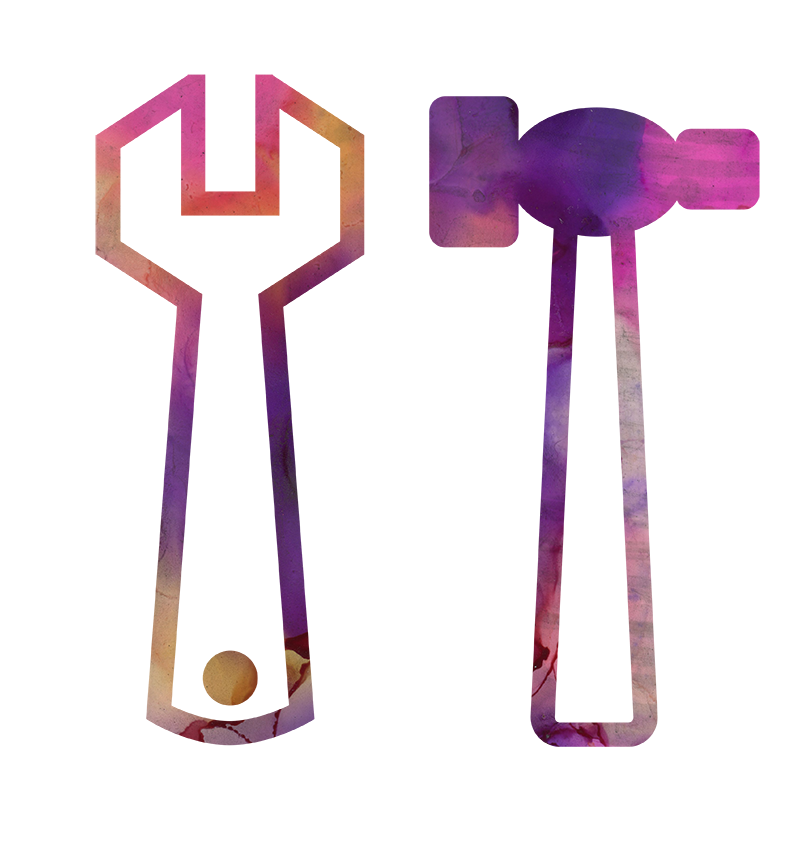
Figure 1. Virtual Reality (VR) Carpentry
A naïve understanding of transitioning from 2d to 3d, such as taking a 2d photo as reference, and changing that to include the third and fourth dimensions, may lead to the misunderstanding that such work is somehow simple. It is not just about adding bulk or depth in a less common dimension.
Virtual reality is not directly defined in the text. Google English dictionary, from Oxford Languages, offers the following definitions:
the computer-generated simulation of a three-dimensional image or environment that can be interacted with in a seemingly real or physical way by a person using special electronic equipment, such as a helmet with a screen inside or gloves fitted with sensors (“virtual reality,” 2022, Google dictionary).
Virtuality can instantiate in different ways.
Some Pre-Review Questions
For the reviewer, who has used some of the 3d features in Adobe Photoshop and Adobe Illustrator but not Adobe Substance, CAD tools, or Blender, some early questions involved the following:
- How easy is Blender to use?
- What is the quality of the created 3d digital contents?
- How vibrant is the social community of Blender users? How active are they? Is there a culture of mutual support?
- How capable is the software for creating images of body organs and other close-in visuals? Healthcare tools? Health-based exercising?
- What do those with beginning skills need to know about Blender? Intermediate skills? Advanced ones?
- What are the requirements in terms of digital image editing (given that the multimedia process often requires pre-processing, processing, and post-processing)? Knowledge of artificial lighting? Scaling? Body forms? Motion? Pacing?
- What are the tradeoffs for using Blender vs. some other tools, like Adobe’s Substance 3D?
Suffice it to say that some of the questions were answered, but others may have to be addressed outside of this multi-authored text.
A Little about Blender
Blender has an interesting backstory. It was created in 1994 by a self-taught software developer, Ton Roosendaal. The Blender Foundation ensures that the tool is free.
Its many users and enthusiasts do share bravura videos on YouTube, with proofs of concept about their own capabilities with the software. They share about their applications of the tool (such as liquid fluid effects) for various original looks-and-feels and digital outputs. They are step-by-step demos showing how the presenters solved particular technical challenges. There are a variety of use cases shown as well.
The software enables many more capabilities than may be seen in this book, which uses a narrow “use case” (making healthcare visuals in 3d at the starter level).
The capability of making objects and digital puppets and scenes in 3d is no small feat. In competition, though are other free tools and subscription-based software, with advances in artificial intelligence (AI) and downloadable resources and powerful partnerships. (The bigger companies can enable some very competitive pricing for subscriptions whereas boutique software companies tend to be much more expensive.) [The visuals included in this review were made using Adobe software, not Blender… And the software used are digital image editing ones—for raster and for vector images…not directly for 3d creations per se.]
Introduction
Dr. Yuk Ming Tang, Mr. Ho Lun Ho, Dr. Ka Yin Chau, and Ms. Yan Wan, all of City University of Macau, do a fair job of introducing the Blender technology in a way that may encourage readers to give the technology a whirl.
The challenge of introducing a complex technology in a complex space is no small feat. How the wielders of the technologies conceptualize the tool and apply it in their local contexts will affect how the tool is perceived and presented. The breadth of artful expressions will vary. The length of time that the technology presenters have in the field will inform their ability to share insider knowledge. They will know the rules in the professional space, and they will know how to strategically bend them.
Documenting a complex software, using text and screenshots, has its limits. There may be inaccuracies. There may be gaps in understandings.
This sort of book involves painstaking work and precision. Oftentimes, such texts benefit a clear order of information presentation. There does seem to be a movement from simple to complex in terms of the chapter headings. After the GUI is introduced, there is geometric modeling, sculpting, UV editing, rigging, material, rendering, exporting 3d assets, and then various complementary tools (MakeHuman, Marvelous Designer), and then a walk-through of creating a 3d syringe and then a 3d scalpel. A pre-chapter would benefit this work.
If readers are total newbies, it might help to glamorize the endeavor by showing particular dazzling created objects first built using Blender, as a motivation to the learners. Learners who are inspired by the tool and its capabilities, and driven by their own needs to self-express, could provide their own intrinsic motivation to engage.
It would be better if they had a clearer sense of the overall organization of the tool’s features first. It would help for readers to have a general sense of the 3d design space. It would help if they were given some tips on how to learn. It would help to have a sense of context before the smaller details are engaged. The variances in possible paths might be emphasized to good effect. It would help if some of the more general terms are defined, such as the “orthographic projection” mode.
When a tool is highlighted, it helps to know how it is situated and more of what it is used for, such as the Gizmo tool. When showcasing that a work may be viewed through two simultaneous panels, which may then be combined into one by “Join Area,” it would help to discuss pros and cons, so the learners are there with the authors.
It would also help to provide newbies with a point-of-entry, so that they can approach the tool and acquire some early “small wins.” They benefit from storytelling to bring readers into the use case, anecdotes and humor to make the text less dry and more readable, careful sequencing to build learning on prior knowledge, instructional design thinking to make the learning less weighty in terms of cognitive load, and augmentary videos and objects on a complementary website. In some well-resourced cases, there may be zipped folders of learning resources to enable reader practice on the particular software platform.
The stated target audience includes “professionals and researchers working in virtual reality, computer graphics, computer simulation, design, visual arts in various disciplines, e.g., computer science, design, art, healthcare, rehabilitation, education, and information technology” (Tang, Ho, Chau, & Wan, 2022, p. vii). This book is suited for students and others who are trying to learn Blender, but it may not be the best book to use to learn it.
About Blender and its Interface
The first chapter offers a “Brief Introduction to Blender Functionality and User Interface.” Blender, the y note, is used for artful self-expression and architectural imaging, albeit without the precision of computer aided design (CAD) tools used in industry. As a free software, Blender may be used on Linux, MacOS, and Windows platforms or operating systems. They describe the workflow as including modeling, texturing, compositing, animation, rigging, rendering, and video editing. The software enables the use of Python scripts. Blender, with its various capabilities and complementary technologies, is “a popular and industrial standard in the 3D industry” (Tang, Ho, Chau, & Wan, 2022, p. 2). The user interface is “highly customizable, stylish, easy to use, and appears consistent across all platforms” (p. 3). [As a person who has worked in IT for many years, creating a software that works equally across the three computer platforms…and that delivers difficult functionality effectively…and in user-friendly ways…is difficult.]
There is some degree of “sell” to the book. Early on, the researchers write: “The Status Bar is a perfect informative display and shows what each click can do in the context of where one’s cursor is at the moment. If a specific hotkey is being held down to change the function for certain clicks, for example, when the user holds ‘Shift’, the content at the bottom changes, keeping the middle mouse button to pan the perspectives” (p. 5). Huh? Perhaps the text here would make better sense with annotated screenshots instead of mere screenshots, without more explanatory depth. Perhaps the authors were referring to context-sensitive actions based on whatever object is activated in the main workspace (called a “viewport” in Blender).
Users of Blender can change out different workspaces with different featured tools and looks-and-feels for particular work focuses. Many of the cited functions exist in other digital image editing tools, but the terminology varies. The Layout Workspace has four editors: a 3D view, an Outlier, a Properties Editor, and a Timeline.
Early on, there is a very light definition of terms. Modeling refers to changing geometries, such as various prims (primitive shapes that are foundational to the representation of various objects in the world). Sculpting is about changing meshes. UV editing involves “mapping of image texture coordinates to 3D surfaces” (by applying the textures to 2d versions of the 3d shapes). Painting on textures involves coloring textures. Shading involves “specifying material properties for rendering” objects based on the direction of (artificial) light. Animation involves “tools for making properties of objects dependent on time.” Compositing involves “combining and post-processing of images and rendering information” (p. 7). For readers who do not have at least some foot in the digital image editing space, the terms themselves can be confusing.
Memorizing precise steps and keyboard shortcuts from a book is not particularly helpful (except for a few learners, who may prefer rote). A read-through though can jog the memory when one gets into the technology.
Finally, there are huge benefits to hands-on experiential learning to acquire the capabilities of a software program. There are benefits to achieving early successes (“small wins”) in the learning. And then it helps to build on those initial successes…and working through befuddlements and frustrations. After all, a complex technology requires incremental accrual of learning over time.
Finally, at the end of the book, it helps to have some ideas to launch learners into successful simple projects. [My optimal way of learning is to have a project with practical ends. I acquire piecemeal understandings of the software along the way. So many technologies are well documented within the tool and have context-sensitive help. So many are designed to “just push play.” Formal learning does benefit by heading off misunderstandings.]
Or perhaps the book itself is enough. Often, motivated learners will be inspired by something, and their motivation can carry them through to expertise. A typical development pipeline though has mass fallouts at each increment of difficulty, with only a “leet” minority making it to expertise. Those who have become expert forget how fragile new learning can be. Being confronted with terms like “vertex,” “edge,” or “face” may be enough to put off some learners.
Early Lessons
Early on, the lessons are fairly simple: how to move objects, how to rotate them, how to scale an object, how to scale along one of three axes or along all axes, and so on. There is a showcasing of a “pie menu” for the presentation of some options. The tone is conversational. There are clear efforts at formulating a user-centered text.
More rationales would be helpful. When would one want “only faces” when editing a 3d object? When are “Only Edges and Faces” desirable? When would one want to “dissolve edges”? When should a “loop cut” be removed, and why?
Having comparatives across multiple tools is helpful: “Collections are similar to ‘groups’ or ‘layers’ in other software. Each collection can hold any objects in the scene for organization purposes” (Tang, Ho, Chau, & Wan, 2022, p. 24).
The coauthors do convey that the software is accessible and usable. However, given the scope of their work, some of this reads as a little convoluted.
Seeing the World in Geometries
“Geometric Modeling” (Ch. 2) in Blender is about creating general shapes, but without the precision of computer-aided design (CAD) software which focuses on exactitude: “CAD software provides pinpoint accuracy features, Boolean operation, extrusion, shells, fillets, etc. and functions for editing on the mesh…” (p. 27). High accuracy is needed for manufacturing because the designed objects have meet precise specifications. Several times, the authors note:
It takes a very long time, or even years, to train a professional 3D artist; there is no shortcut, requiring a significant amount of dedication and investment of time and a multitude of aesthetics sense, basic art skills, and spatial awareness to create a model that looks realistic and fixes for the requirement from the project needs. (Tang, Ho, Chau, & Wan, 2022, pp. 27-28)
The geometrical primitives in this tool include the following: Plane, Cube, Circle, UV Sphere, Ico Sphere, Cylinder, Cone, and Torus” (p. 28). A basic art lesson is that all shapes in the world can be generalized into some basic primitives (in 2d and in 3d). The geometries of the third dimension are created using polygon / polygon meshes, with various platforms having practical size limits in terms of handling 3d object sizes. A still image vs. an object for a real-time game and such will require a particular proper level of details (but not more). [Some renders do not show a level of detail past a certain point, so the extra details are lost to perception anyway.]
The researchers explain:
Generally, the 3D artist will build and sculpt a model in high-poly, and retopology the high-resolution model into the low-poly model, and the texturing or material/shading artist will paint the assets and bake different Physical Based Rendering (PBR) texture maps like normal, roughness, metallic, specular, ambient occlusions, curvature, albedo, etc. on the low-poly model. The low-poly model will present the quality and finish reacting to lighting like the high-poly model does, using way less polygon budget. (Tang, Ho, Chau, & Wan, 2022, p. 31)
An environment artist places the object in the scene in a way that makes sense. [Understanding the functions of the human visual system can benefit 3d object designers since they know that they are building to…what people see.] A polygon is a closed 2d figure with straight edges, and a 3d mesh involves polygons with x, y, and z axes defined. The researchers write:
Mesh is constructed by vertex, edge and face for switching between these modes; click on these buttons or press ‘1’, ‘2’, or ‘3’ on the keyboard” for the vertices, edges, and faces, respectively. (p. 33)
Blender has various selection tools to identify parts of the 3d visual to work on. There are ways to extrude various parts. Blender enables the inserting of “an inner pattern” on a face of a prim…and to bevel edges (p. 36). There is a way to identify a continuous path of connected edges (for an edge loop) and an edge ring as “a continuous path of parallel edges” (not geographically parallel).
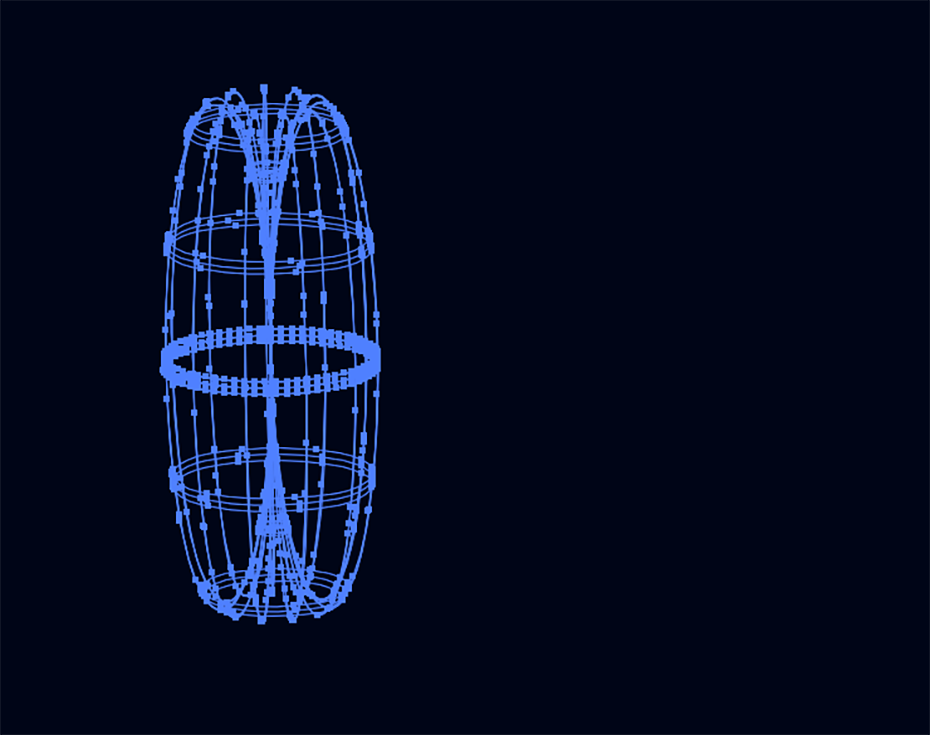
There are ways to sculpt pixels as if they were 3d shapes. Blender has a spin tool to help make bends in tubes and other visual effects. There are tips and tricks, such as using shading to create the look of a smooth mesh without the millions of polygons needed to create a smooth visual surface effect in terms of polygons (p. 41). There is also auto-smoothing in the Object Data Properties to create smooth edge effects (pp. 42 – 43). The authors describe common errors such as duplicated meshes, such as those “due to using mirror modifiers, duplicating the mesh accidentally, and shrinking-wrap modifiers” and how to either remove the duplicated mesh or if the mesh is part of a shape to merge close vertices (p. 44). If a topology breaks (vertices become disconnected from the mesh), the vertices can be reconnected to the mesh. Blender has a modifier function which allows non-destructive editing of an object. (This is reminiscent of the “smart object” approach in Adobe Photoshop.) (p. 46). The “array” tool that enables duplicating an array of objects reads somewhat like the “pattern” tool in Photoshop. There is a kind of “in-world logic” of all software programs (that are well designed). Blender enables the viewing of meshes as wireframes.
Figure 2. Wireframed Vertical Oval (in Adobe Illustrator)
They also consider inheritance of some 3d objects from other models and how to erase unwanted sharp edges from these. The sense of hands-on work in the real world is helpful and enhances the text. All tools have enablements and constraints, and professionals work around these limits.
Sculpting in 3D Digital
In “Sculpting” (Ch. 3), the researchers suggest the importance of having a background in “physical clay sculpting” in order to be an effective digital sculptor. (p. 51) A review of some of the barely passable YouTube videos of individuals using Blender for sculpting might suggest the same thing. They also suggest that “basic artistic sense and knowledge and spatial and proportional awareness” are also required (p. 51) although others might take exception to the idea that such knowledge is necessarily all that common. They write charmingly: “Being obstinate to perfection is required for the sculptor to create a great art piece” (p. 51). To start, they describe drawing a sphere and adding subdivisions to the mesh for a more detailed surface to sculpt. They describe various tools for digital sculpting like drawing brushes [including some for smoothing, building out clay, multiple strokes at one time, inflating, blobbing, creasing, flattening, filling, scraping, pinching, grabbing, pulling “finger-like shapes” (with a snake hook brush), thumbing, nudging, and others.] There are various settings that may be applied to various brush effects to enable spacing and jitter and other effects.
The researchers describe an alpha brush as one that uses “a black and white image to project a detailed or pre-formed shape on a mesh. It can help the artist to create a repeatable pattern or complex shape. Everyday use includes cases like skin texture, cloth, zip, hard surface, etc. An experienced artist usually has a huge library of different alpha images” (p. 67). They elaborate:
To use the alpha brush, the mesh mush has many verts, roughly around 1 million to provide sufficient mesh to hold the details; otherwise, the shape becomes unrecognizable. Add the image to the Blender project in the Texture Properties tab. Select the drawing brush and click the ‘Texture’ tab under the Active Tool and Workspace settings menu. Choose the texture created in the Texture Properties tab. Choose ‘Drag Dot’ in the ‘Stroke Method’ tab, and drag the alpha image detail on the mesh. (p. 68)
Another interesting feature is the Dynamic Topology (Dyntopo). This is…
…a feature that allows users to increase the geometry effect by applying the stroke while other geometry remains unaffected. This feature was conceived to enable artists to work on details when zooming very closely and provides the geometry to hold or preserve the details. Using this feature, the artist doesn’t need to subdivide the whole mesh and is much easier when rendering the mesh during working on the mesh. (p. 68)
Above, the researchers capture both the user experience and some in-depth technology angle, which enhances the text.
UV Editing
“UV Editing” (Ch. 4) refers to unwrapping / unwarping a 3d object into a 2d one, so a digital artist may apply a texture to the 3d object with more control. The “UV” refers not to ultraviolet light (which some erroneously suggest), but the “U” refers to the horizontal, and the “V” stands for the vertical in a two-dimensional plane. The researchers describe the process as using a knife to cut the 3d model and laying it on a two-dimensional plane “like a map of the earth” and then enabling the application of the texturing at the right placement considering seams and the right resolution (2K for real-time gaming, 4K to 8K for visual effects, film, and television) (p. 75).
Some UV transitions are not a direct coordinate transfer but a simplification of a 3d shape to a 2d one to manage computational load. One example of how unwarping may occur in a less intuitive way is in the unwarping of a torus prim. The researchers write: “It has 576 faces, 1152 edges, and 576 vertices. Compared with the cube, it has more edges and faces. To unwarp this model, there is no absolute solution, the main goal is to optimize the texturing space and distribute the faces all over the space after it is laid flat, as the space is a memory waste” (p. 77). “Smart UV Project” enables some efficiencies in the transcoding from 3d to 2d.
Rigging
“Rigging” (Ch. 5) refers to the placing of “armature for an animator to act as a bone in the mesh” (p. 81). Here, they refer to an Adobe-resource that enables placing markers on joints and elbows and moving parts of digital puppets. This Mixamo resource offers an animation library of humanoid (bipedal) figures in various forms of motion that may be applied to a 3D character or model (it takes as input the .fbx file). The 3d space does seem like one that involves cross-over of development work and sharing.
Representing Physical Materiality in Artificial Light in Digital Space
“Material” (Ch. 6) focuses on the Physical Base Rendering (PBR) of objects, which are emulations of physical objects in the world albeit in digital space. 3d objects are portrayed based on how the artificial light hits the object and also how the object interacts with other objects in-world and perhaps the sound that is emitted with the various interactions. Here, the researchers point to Quixel and its Megascans library as a resource that enable the creating of digital materials for the Unreal Engine 3d software. It is possible to paint multiple PBR materials or shaders on an object (which is not a capability in Adobe Illustrator’s “3D and Materials”). After the blending, the new effect is “baked” in Blender (p. 97).
Rendering in Blender
“Rendering” (Ch. 7) may be achieved two ways in Blender: through Cycles or Eevee.
Cycles is a high-fidelity path-tracing rendering engine; it takes quite a long time to render a single image depending on the rendering setting. It can be used in rendering an animation film or a still image for architectural visualization. ‘Eevee’ is a new real-time rendering engine similar to the technology used in gaming engines. This is very useful when texture painting or for quick visualization for real-time graphics. With time going on and updates on Blender, the output from Eevee, has become very much closer to Cycles. (p. 101)
The irradiance volume involves settings for the building of a light map to define how the light should diffuse through a scene.
Exporting the Assets for Applied Usage
“Exporting 3D Assets” (Ch. 8) involves critical information about how various digital files can “play” in various software programs and / or interact with each other. There are three main file types: .fbx is used in gaming and film “as it stores mesh data, texture maps and material, animation data”; .obj or Wavefront “stores the material separately in an MTL Format file when exporting the assets and may not be compatible with other software,” and .stl “stores purely mesh data and are widely used in the 3D printing industry” (p. 105). They observe that objects may render differently on different platforms and so be experienced differently by others.
Open-Source Downloadable MakeHuman Software for Making Humanoid Morphs
“Additional Content -- MakeHuman” (Ch. 9) refers to an open-source software that enables the making of a 3d human-shaped geometry, including in various stances. Different body dimensions can be changed. The authors share screenshots of the GUI and various “morphs.” They observe that this free software is “just a product built by a group of people in their spare time” (p. 109). The software may be downloaded at the following two links:
http://www.makehumancommunity.org/content/downloads.html
There is also a version on GitHub.
https://github.com/makehumancommunity/makehuman
They demonstrate how to apply different musculature and other topologies to the base morphs. There are individuals of various races and ages that may be represented. There are various rigs from the pose libraries that may be applied to the mesh to enable animations.
Marvelous Designer Software
“Additional Content – Marvelous Designer” (Ch. 10) introduces Marvelous Designer software as a “professional and industrial standard software in the game and film industry for creating realistic cloth simulations” (p. 115). This software requires a subscription license to use ($1,700 for a year for one person to use, for example). This tool enables users to sculpt clothing on top of the character, but requires “professional sculpting technique”; users can “bake clothing simulation in the character animation” (p. 115). They write: “With this software, users can automatically use their mesh or avatar and add arrangement points, which enables users to snap and fix the cloth mesh during simulation” (p. 115). This software enables physical actions of various types of digital cloth (chiffon, nylon_featherweight, muslin_oxford, denim_stretch, cotton_twill, and silk_taffeta) that must take as input environmental details to know how the various pieces work.
Some of the clothing visuals remind me of Simplicity sewing clothing patterns back in the day. When I think about Second Life, I remember how easy it was to apply various looks and clothing to our digital avatars, and most of us did that without a second thought. The physics of the materials were handled in the physics engine. There seems to be straightforward exporting to the various 3d output file types.
Making a 3D Syringe Modeling Tutorial
The researchers return to healthcare after the long introduction of Blender and various augmentary tools for drawing in 3d. “Modeling Tutorial -- Syringe” (Ch. 11). They suggest finding reference photos online…and then starting to create the object by shapes while paying attention to relative scale and related sizes. They faithfully follow the uses of the proper terminology within Blender as they move through the sequence of steps to create a digital syringe. The final work is 3d…but without many of the textures that would make the visual seem closer to the reference image (p. 152). [This process would be faster to do a technical tracing to capture the shape and relative measurements…and then building from that. Even a manual trace using a base layer as a reference would be faster.]
Modeling a 3d Scalpel
The next demoed project involves the making of a metallic scalpel in “Modeling Tutorial - Scalpel” (Ch. 12). Here, the authors start with a 3d cube that they hone down to a scalpel that looks like it could cut effectively.
Conclusion
I am left wondering if I would go with a 3d tool by a main software maker or a free open-source software. The first comes with various built-in resources (2d and 3d visuals, various digital puppets, rigging); templates; stock images; sound files; video files; tutorials, and the like. It comes with artificial intelligence filters and AI-informed selection and editing and other tools. Surprisingly, the software comes in suites, and the subscription costs are minimal (given the size of the corporation).
Figure 3. Scissors
Yuk Ming Tang, Ho Lun Ho, Ka Yin Chau, and Yan Wan’s A Beginner’s Guide to Virtual Reality (VR) Modeling in Healthcare Applications with Blender (2022) introduces Blender fairly well. It is good to know that such a tool exists for those interested in 3d and limited 4d. Perhaps if time allows, I will give this tool a whirl one day.
References
About the Author
Shalin Hai-Jew works as an instructional designer / researcher at Kansas State University. Her email is shalin@ksu.edu.
| Previous page on path | Cover, page 17 of 22 | Next page on path |
Discussion of "Book review: Getting started with 3d and 4d modeling in open-source Blender"
Add your voice to this discussion.
Checking your signed in status ...