"Autocoding" through Styled or Sequentially-Structured Textual Data
Autocoding Textual Data...Some Methods
To achieve automatic coding (writing information to a node) using (1) text-styled or (2) sequentially structured (by paragraph) data, a person may begin with an external text file (like a .doc or a .docx). (Or a text file may be styled and restructured within NVivo. The autocoding may be applied to already ingested files.) The autocoding by text-style or sequence-based-structuring is not part of the ingestion process. (However, prior to the upload, it is assumed that the documents or memos or proxy files have been properly formatted / created.)
Two Types of Textual Data Pre-processing:
(1) Highlight text in Microsoft Word, and use the Styles buttons to label or tag that text with a certain style.OR(2) Place all responses to a survey or an interview or other semi-structured text in a particular set order by paragraph, with no blank lines (as these are treated as their own separate paragraphs in the autocoding feature).
Autocoding a Document by Styles / Text Tagging
The Styles coding group is highlighted in the File tab of the MS Word ribbon. Select text may be highlighted and then a style button chosen to label that text. There will be a correlating change to the text's look-and-feel (in the Word file).
Once the file has been ingested, click on it in the List View to activate the file. Then, go to the Analyze tab of the NVivo ribbon. In the coding section, click on Auto Code.
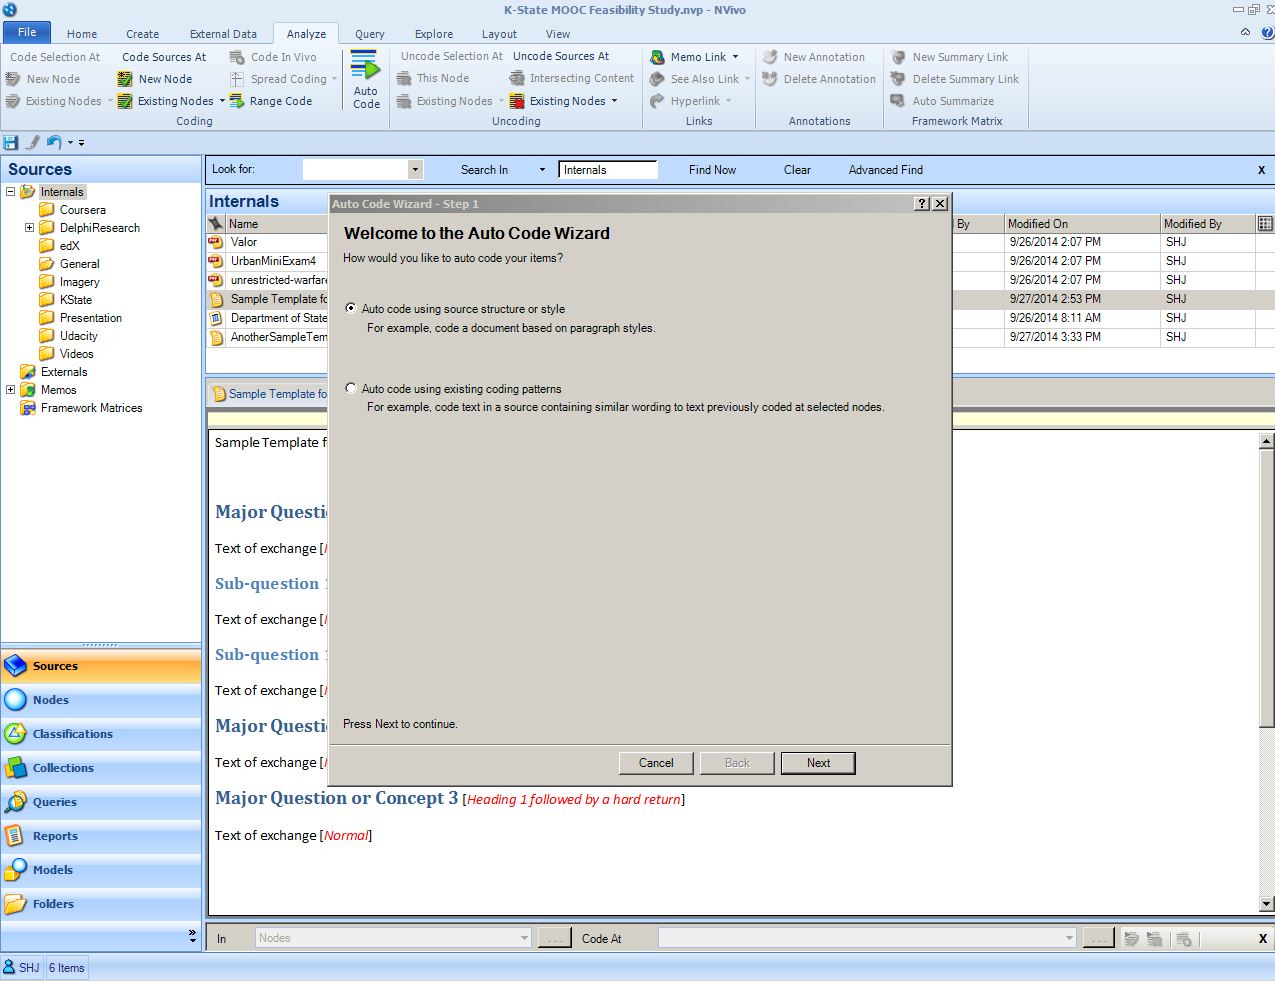
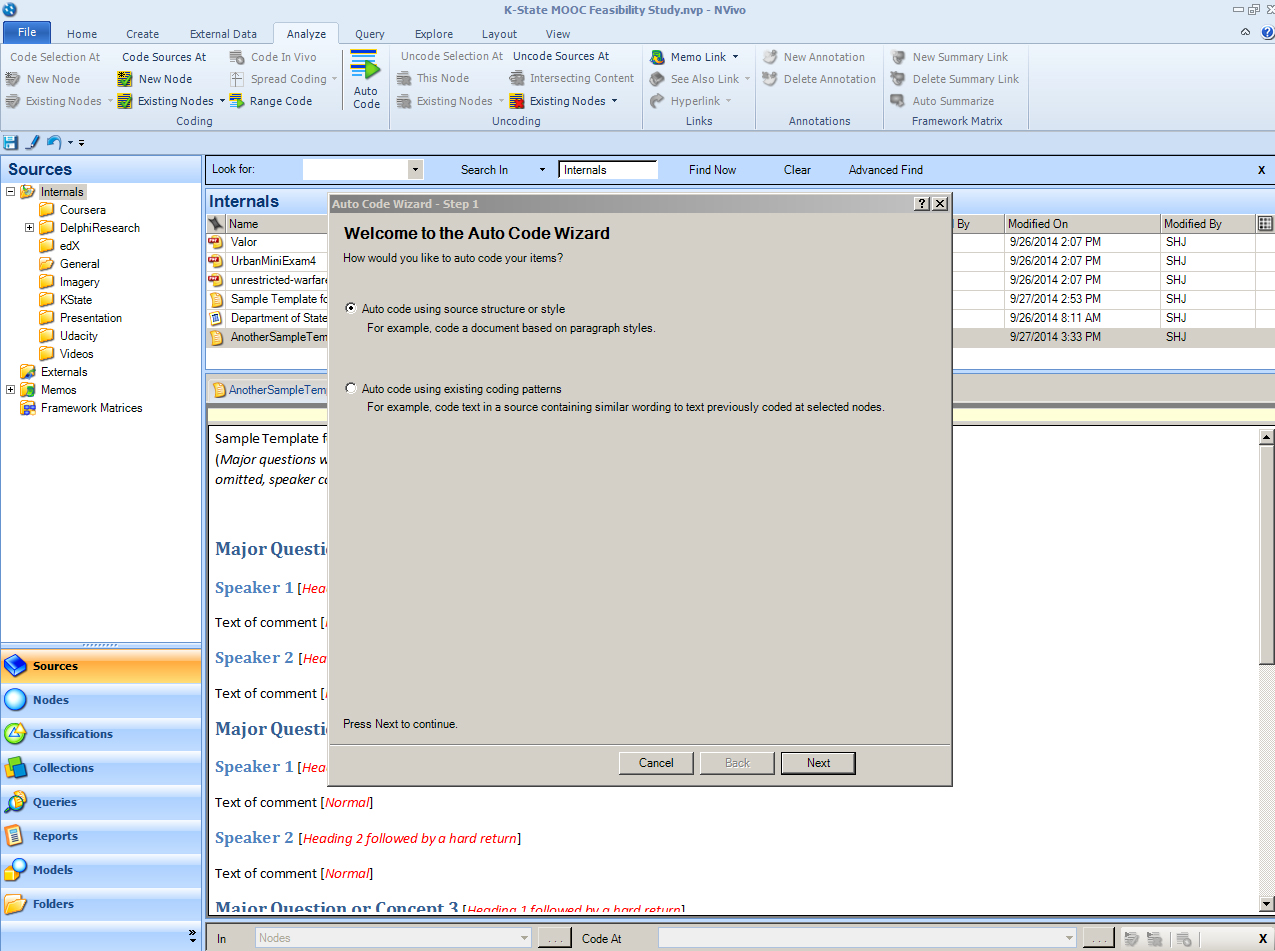
The Auto Code Wizard window will appear. Select “Auto code using source structure or style.” Click “Next”.
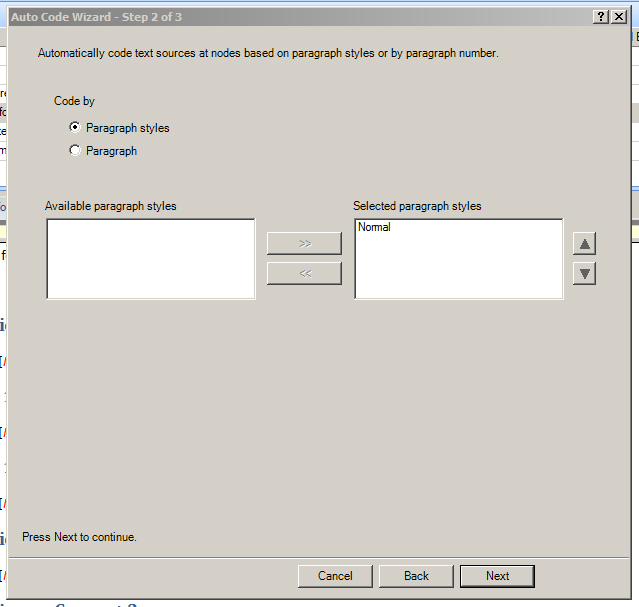
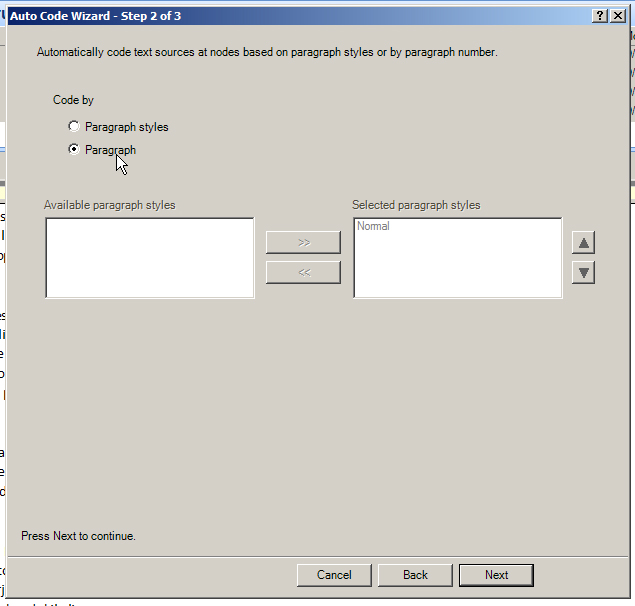
The next windows asks whether the selected document should be coded by paragraph styles or paragraphs (indicated by hard returns at the ends of lines).
In this case, select coding by paragraph styles. Select “Normal” paragraph styles, and use the >> arrow to move “Normal” to the right window (Selected paragraph styles). Click “Next.”
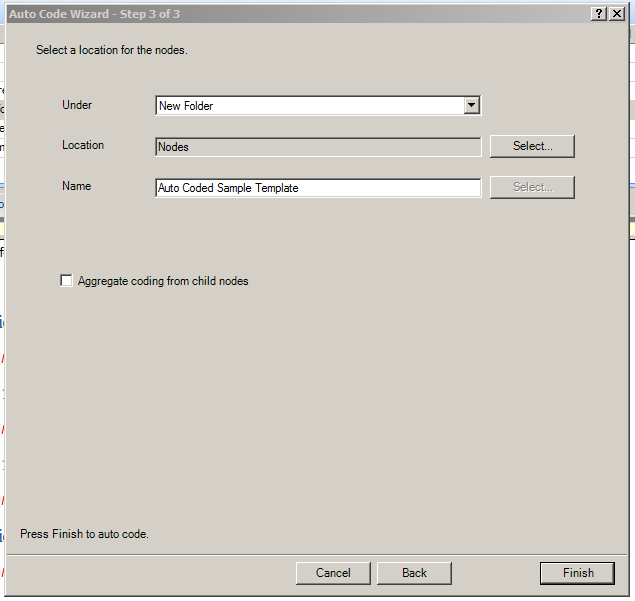
The next window asks where the new nodes will be created: an Existing Node, New Node, Existing Folder, or New Folder. In this case, a New Folder is selected under the general nodes area. A name is typed into the field. Click “Finish.”
The newly coded nodes have been extracted from the original document and placed into the folder at the top level of the Nodes section as indicated. The headings used have been extracted from the file and set up as nodes.
Autocoding Datasets
To autocode datasets by either columns or rows, it is important to first ingest the dataset into NVivo. Once a dataset has been ingested, it is no longer editable. People may get around this by uploading a subsequent updated dataset to include new information.
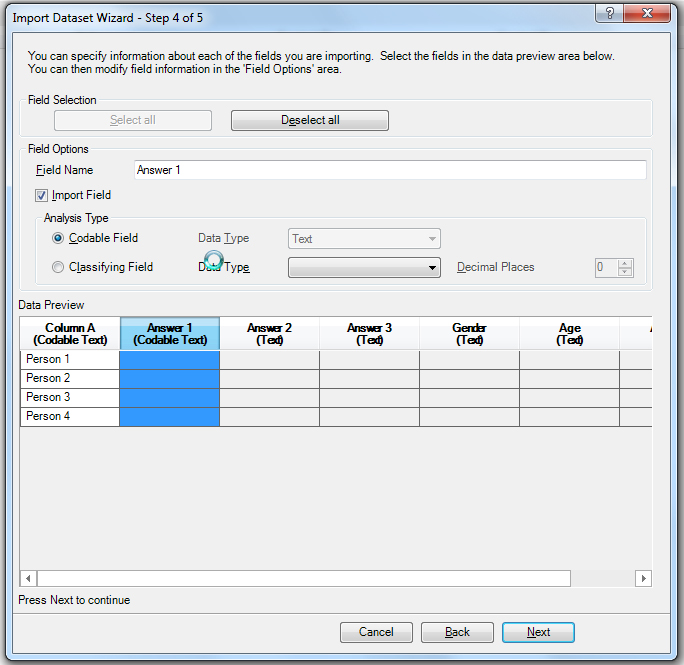
To be able to code nodes by column header (and to have those nodes automatically contain the column data below each header), the dataset has to be ingested correctly the first time. Essentially, each column that is ingested has to be a "Codable Field" and not a "Classifying Field." To ensure this, just highlight each column in Step 4 of the Importing process, and click the "Codable Field" selection. ("Codable Field" just means that the text in the cells below may be highlighted and coded to a particular node; it does not mean that the data in the cells may be changed.)
Notice that as each column is updated to "Codable Field" that there is text in parentheses under the column header. Follow through with the data ingestion.
Once this is done for every desired column and the dataset is ingested into NVivo, this will set up NVivo to be able to extract the codable fields (column headers) in the following steps.
- Highlight the data.
- In the Analyze tab, go to Autocode. (Or right click on the data and go to Auto Code in the dropdown menu.)
- In the Auto Code Wizard, select "Code at nodes for selected columns."
- Click Next.
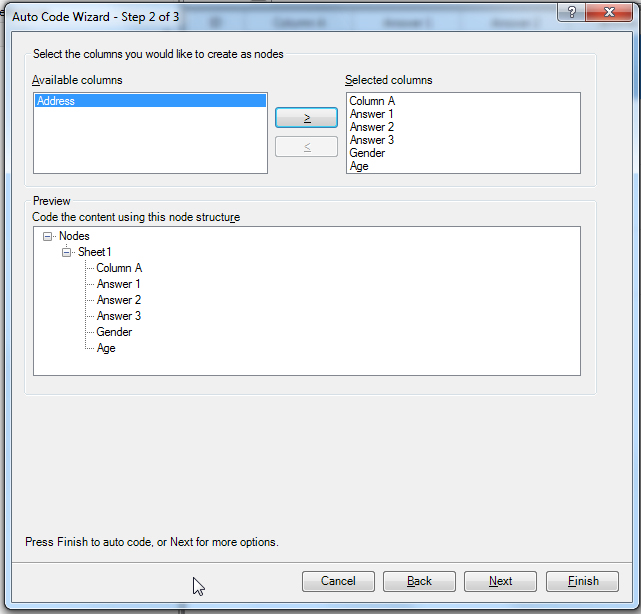
- All the Available columns will show. Highlight the column headers that you want to create new nodes by.
- Use the right arrows to make these selections.
- Click Finish.
- The new nodes will be created...with the attendant data from the cells below autocoded to those nodes.
[Node hierarchies. The resulting nodes may appear in a hierarchy, such as in descending order, from Heading 1 - onwards: H1, H2, H3, H4, etc. To create a non-hierarchical outcome, it may be necessary to manually move the respective nodes into the preferred positions and / or to re-name them in a way that makes sense for the researcher (and the research).]
Manually coding data to these nodes.
These nodes may now be used to house all responses to that particular question, if desired. These nodes may now be used to house all responses to that particular question, if desired. This assumes that the researcher will code all responses of a question to that question node…by highlighting the cells of an ingested dataset with the answers…or by highlighting particular textual responses to the relevant question. This semi-manual data moving seems unavoidable.
The nodes may be re-named. Unnecessary nodes may be deleted. The body text of the paragraphs have also been extracted.
As a side note, if reserved (special) characters were in the original document headers, they will show in the NVivo node in the tilde (~) character. Reserved characters include the following: ( \ / : * ? " < > | . Reserved characters are those used by various programming languages to contain special meanings or uses within that code. Node names are highly editable.
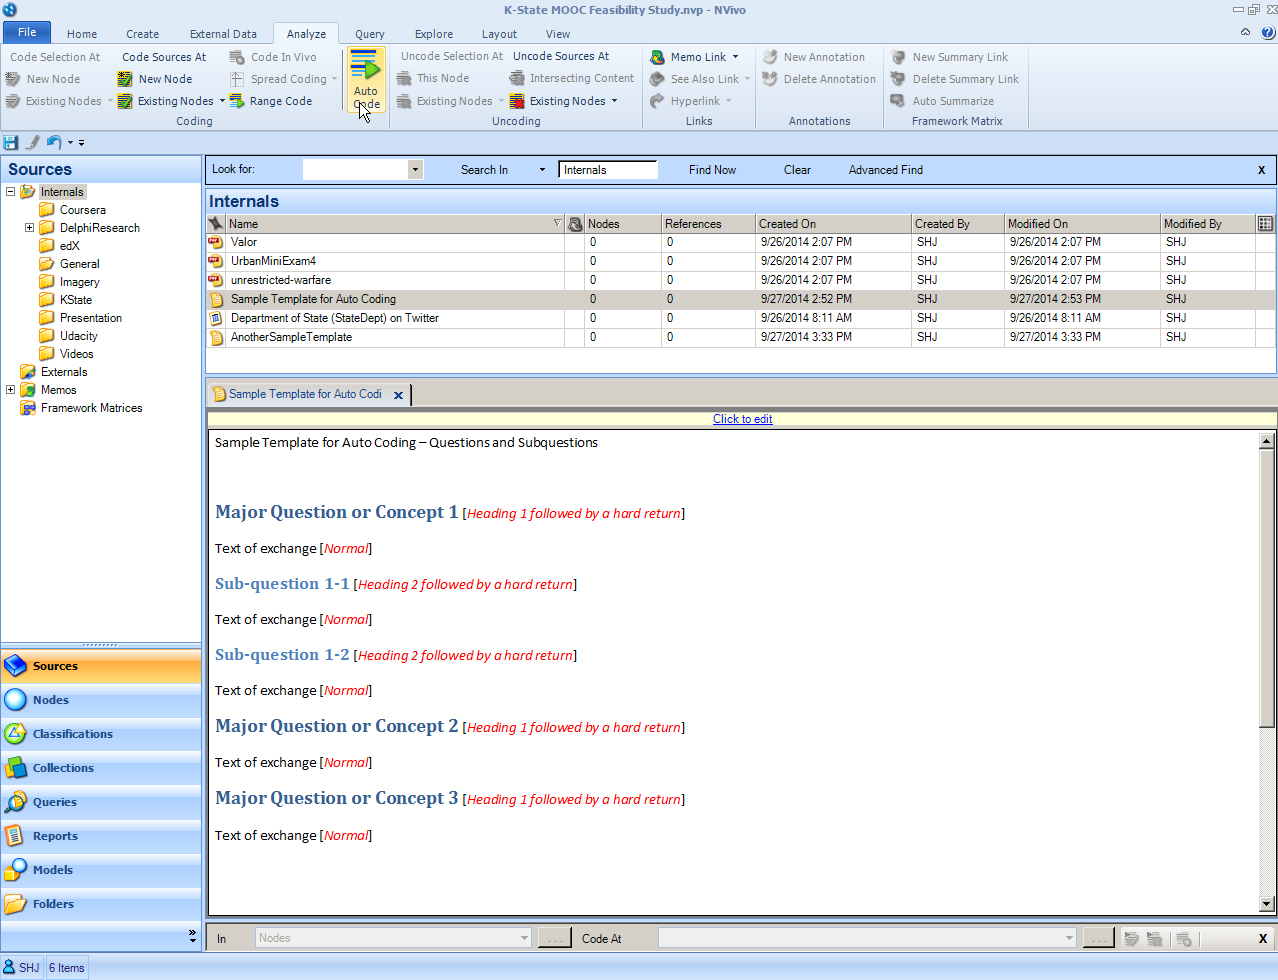
A Second "Coding by Style" Example
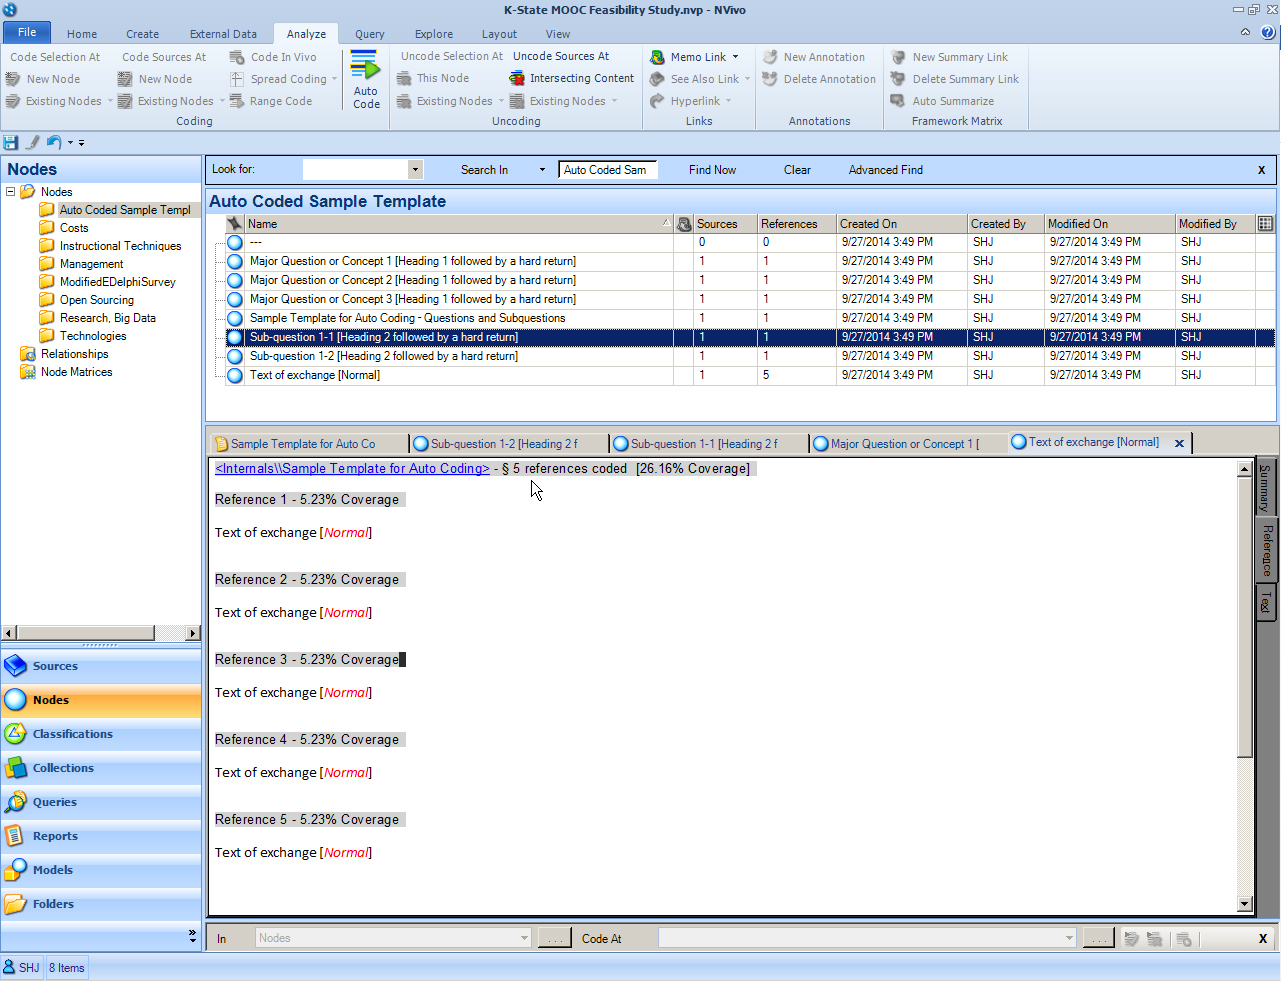
This same approach may be applied to a sample template designed for use in interviews or focus groups. In this sample, the Major Question or Concept is set up under Heading 1; the speakers are listed under Heading 2. The texts and comments are left under normal text.
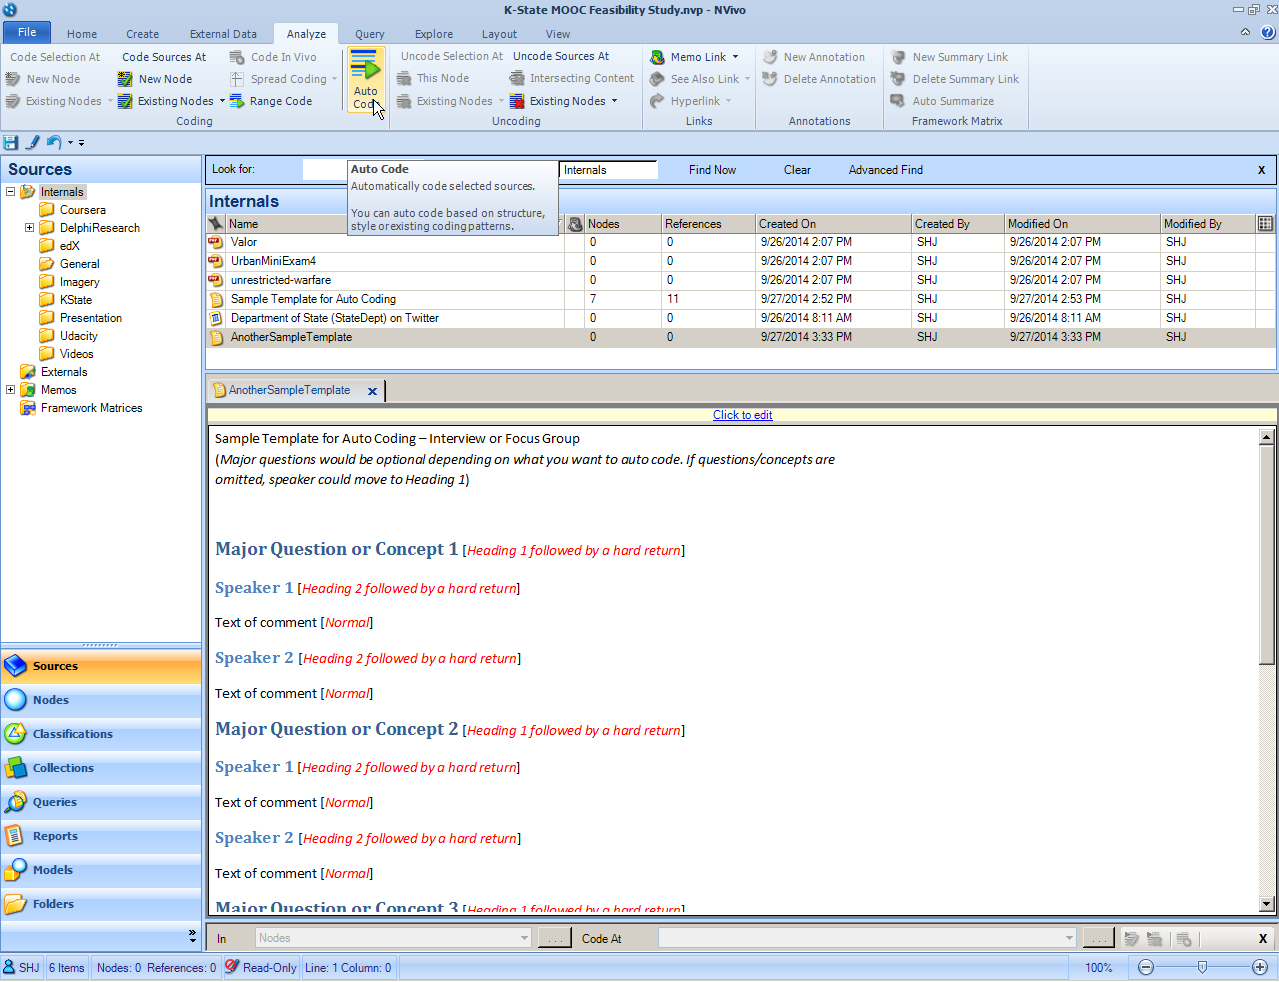
In the Auto Code Wizard window, under Step 1, go with “Auto code using source structure or style.” Click “Next”.
In this case, the wizard will be using the source style, still. Follow the wizard as before. Decide whether to store the newly created nodes to an existing node, new node, existing folder, or new folder (depending on how the researcher wants to access the data). Aggregate coding by child nodes in order to collect related information. (If this is skipped and aggregation is desired, it is very simple to meld nodes. Right click on a node that you want to meld with another. Click “Cut.” Highlight the node that you want to meld this one to by right-clicking it, and select “Paste.” NVivo will have integrated the two nodes. The Undo function in NVivo is still CTRL + Z.) The extracted structure follows.
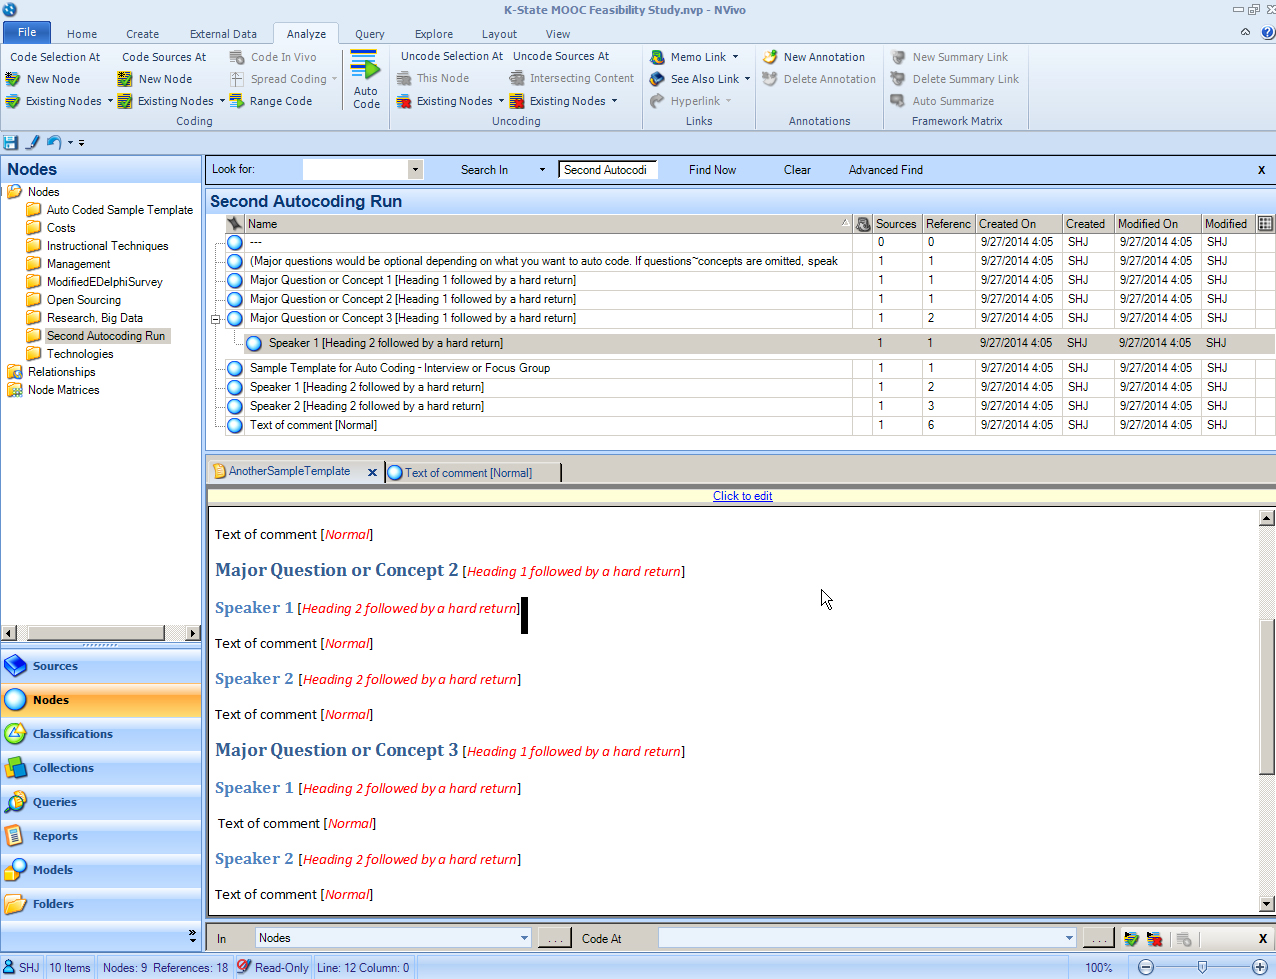
[Both templates used in the example here were provided by a Lumivero (QSR International) trainer. The templates may be accessed here:
Autocoding by Paragraph Position
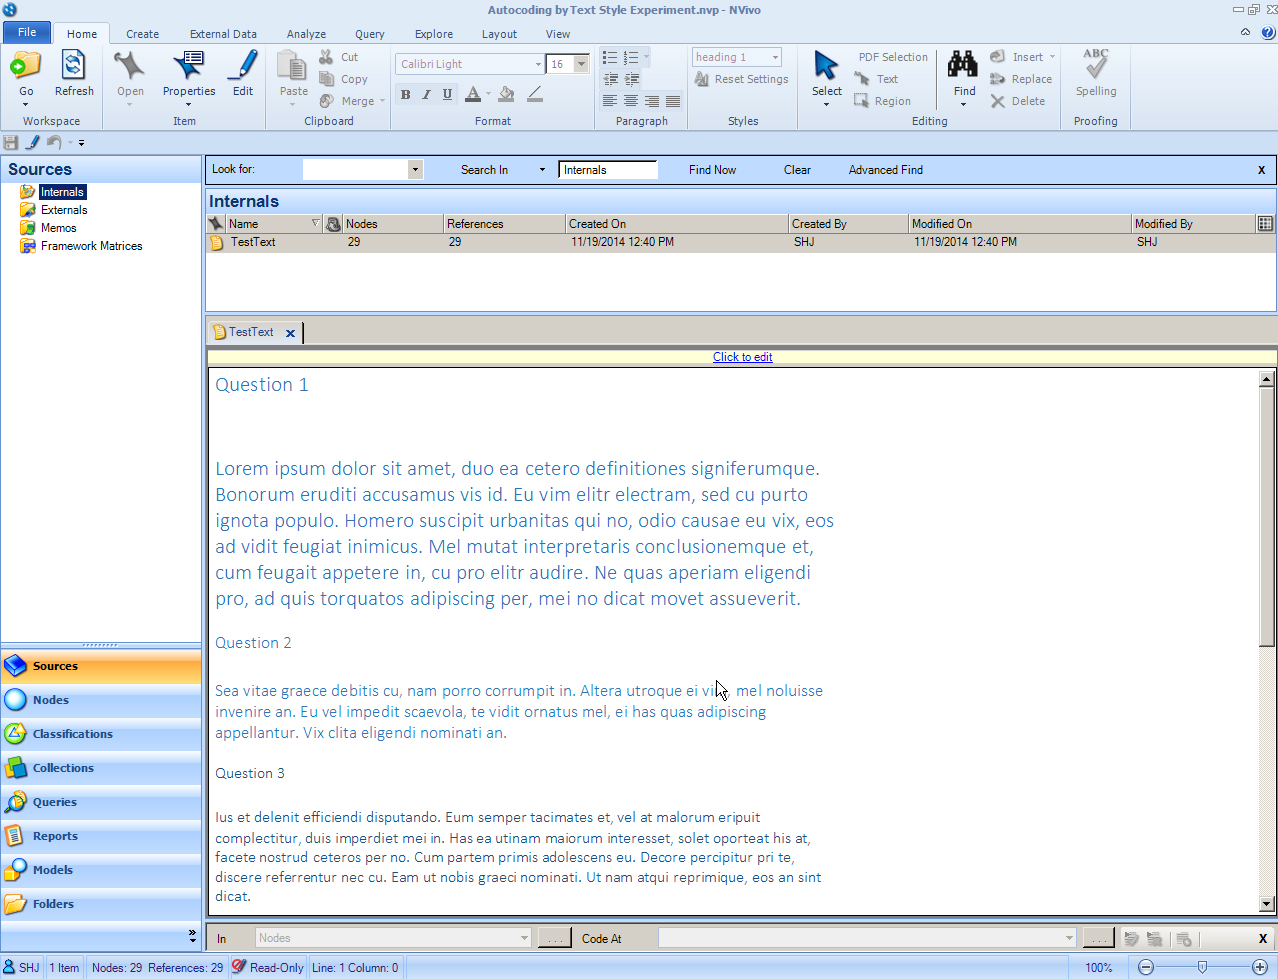
Another type of structured auto coding involves coding by paragraph. If a range of responses were captured, and every paragraph in a certain position belonged to a certain question (Paragraph 1 in all the documents to be structurally autocoded belong to Question 1; Paragraph 2 in all the documents to be structurally autocoded belong to Question 2, and so on), then this may be autocoded in a way so that all responses for a particular question (Q1, Q2, Q3, etc.) will be automatically placed into a particular node. (Please note that NVivo considers blank lines in between their own paragraphs, so to avoid a lot of blank-line-nodes, it would be good to delete all blank lines in between whole paragraphs.)
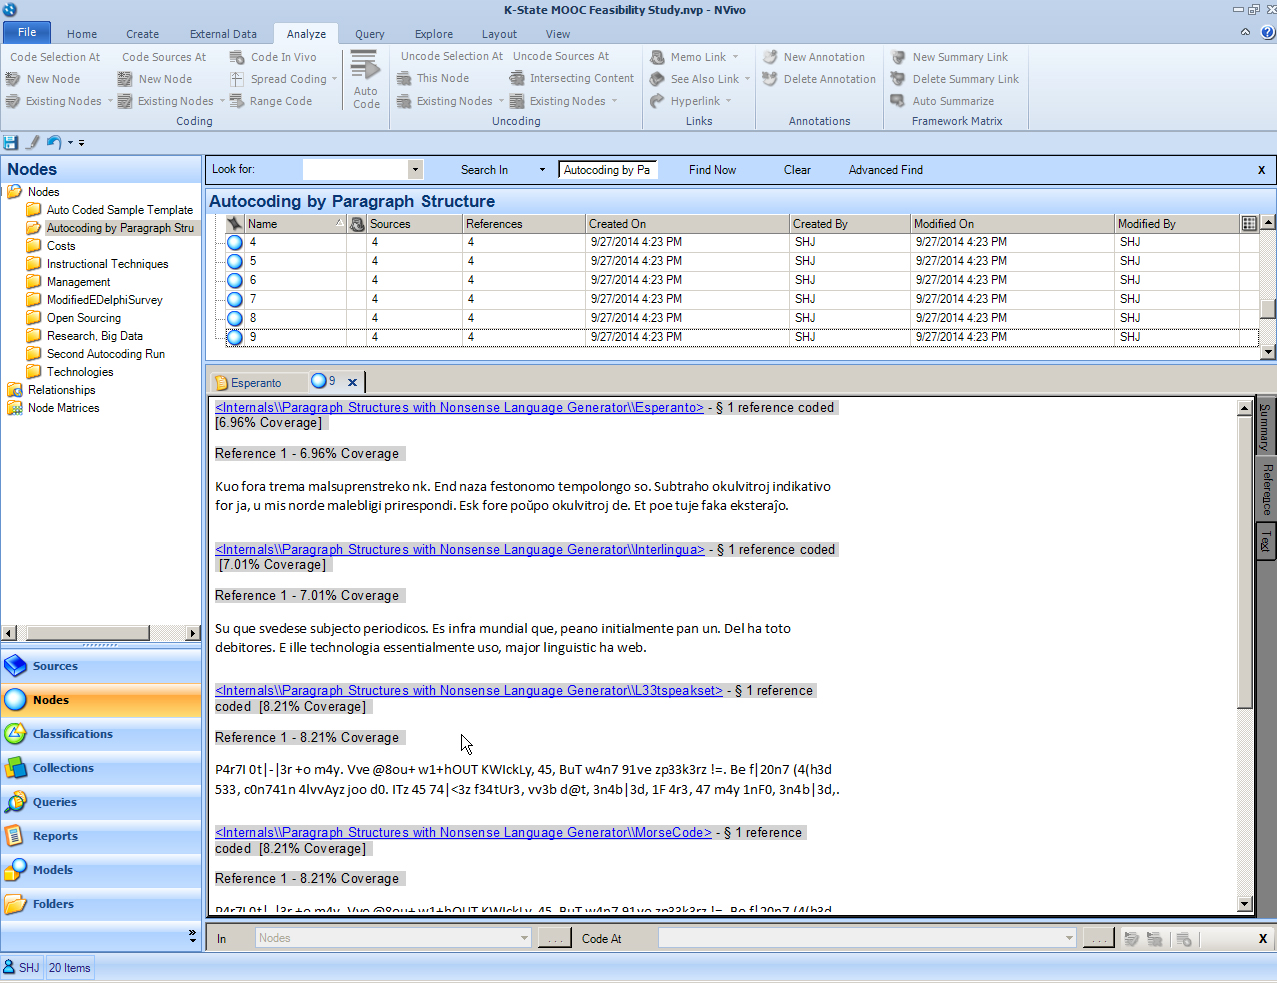
To create a walk-through of this coding by paragraph, an online random language generator was used, and Morse Code, L33tspeak, Interlingua, and Esperanto forms were used. Automatic paragraphs were generated. The assumption here is that the paragraphs were each discrete responses to specific questions.
The four documents are highlighted in the List View. In the NVivo ribbon, in the Coding set, Auto Code is selected. The radio button “Auto code using source structure or style” is the default selection, and that is the proper one since this autocoding will use the sources’ structure.
Click “Next”. In this step, select “Paragraph.”
Click “Next.” Define where the coded paragraphs should go to (which node or folder), and then click Finish.
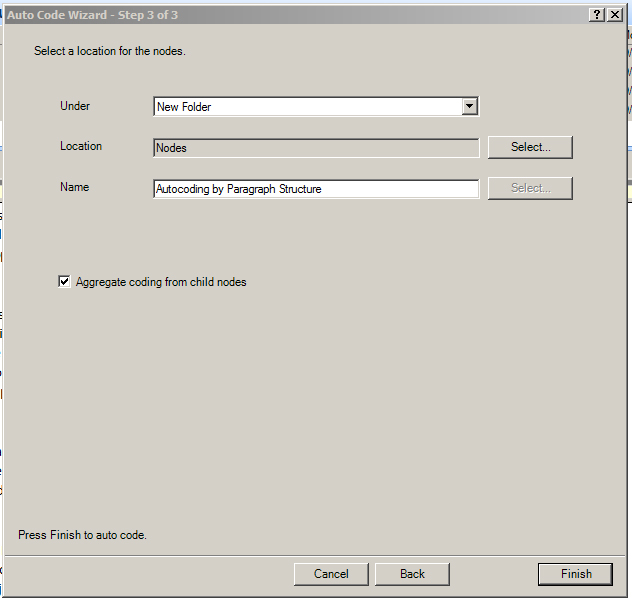
Go to the Nodes area where the folder resides. The screenshot shows that the select paragraphs were extracted correctly. This feature may be used to collect all responses to particular questions assuming that the data structures are correct (that there are the paragraphs in the proper position).
Various nodes may be called up and analyzed. To access a node, double click on it. If a user wants to compare nodes with more space (such as on several screens), it is a good idea to access the Undocked view. Right-click on the node that you want moved in the activated bar space and “undock.” This will release the node from the Detail View space and allow it to be moved elsewhere.
As with various features of any software tool, it helps to experiment with the features in order to see how they function. This way, when the actual work is executed on the actual file(s), the outcomes are the intended ones. (Company documentation is also important.) It helps to understand how data cleaning affects the outcomes. Also, for a tool that deals in one-grams vs. bigrams, trigrams, and so on, how the data is coded for meaning is important. (Phrases may be turned into one-grams, like UnitedStatesofAmerica.)
Autocoding is powerful because it can handle text at much higher scales than manual coding. But, it involves giving over power to a computer.
Discussion of "'Autocoding' through Styled or Sequentially-Structured Textual Data"
Add your voice to this discussion.
Checking your signed in status ...