Creating .gifs with the Snagit Plugin in Google Chrome
By Angela Glascock, Fairfield High School, USD 310
Figure 1: Create with Snagit (an animated .gif)
In the past, moving .gifs were little more than annoying icons that drew your eye back to them time after time and made a webpage difficult to navigate, and sometimes made you want to pull your hair out or go out for some liquid lunch. They still can be annoying, but when used correctly, they are a really cool tool for instruction and especially for how-to documentation for learners.
Accessing the TechSmith Snagit Extension for Google Chrome
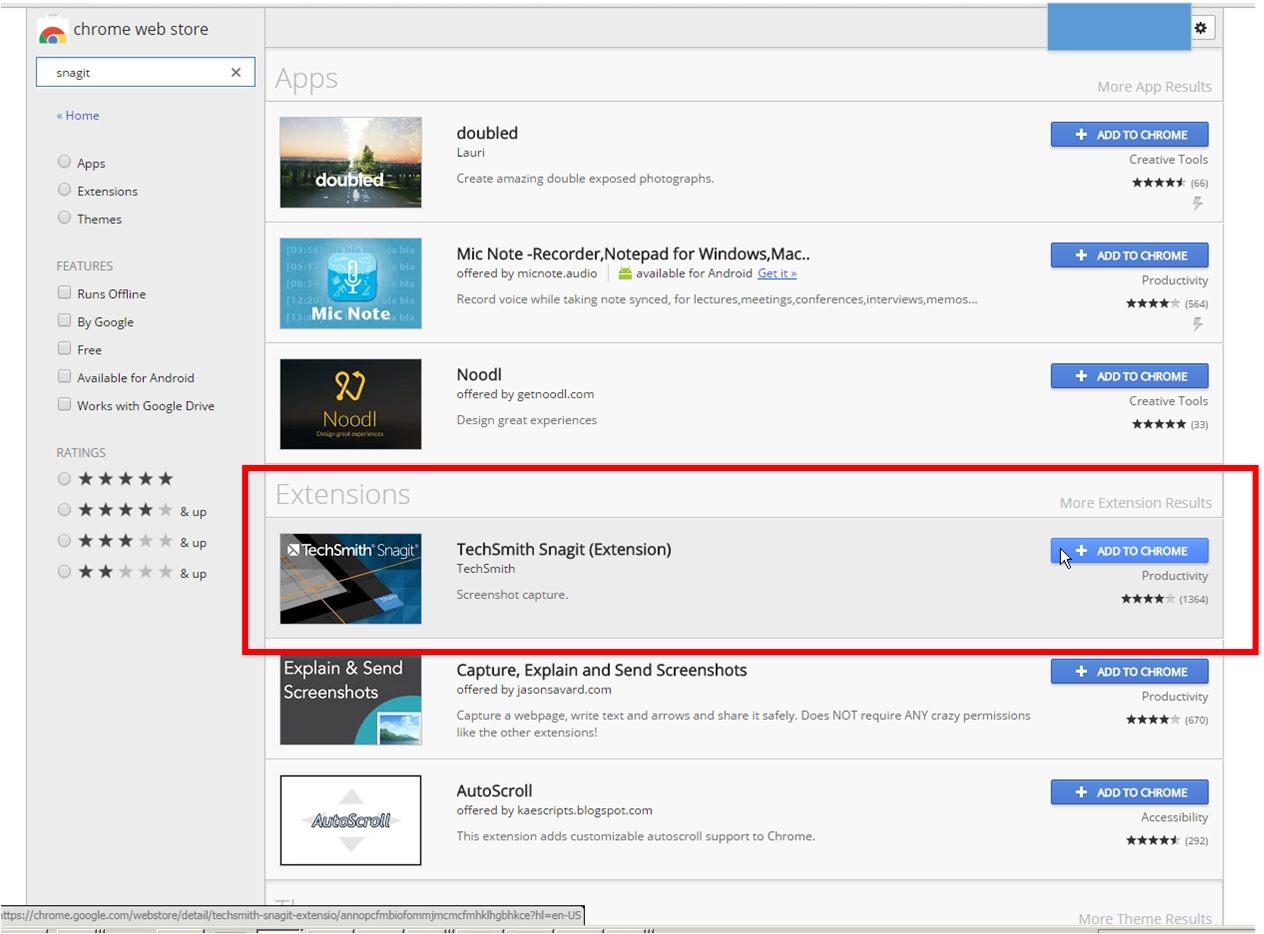
To begin, these steps only work when you are using Google Chrome as your web browser and you have installed the Snagit app and extension. If you search for the Snagit Chrome extension, you should get a link that takes you to the Chrome store, and it is a FREE extension. Also, the website address is https://www.techsmith.com/snagit-google-chrome.html where there are tons of ideas and videos to help.
Figure 2: TechSmith Snagit Extension from the Google Chrome Store
In general, once you have installed the Chrome app and extension, the steps are fairly simple as long as you remember a few simple rules:
- The video must be 20 seconds or shorter
- Know what you plan to capture before you begin
Steps to the Capture and Creation of an Animated .gif
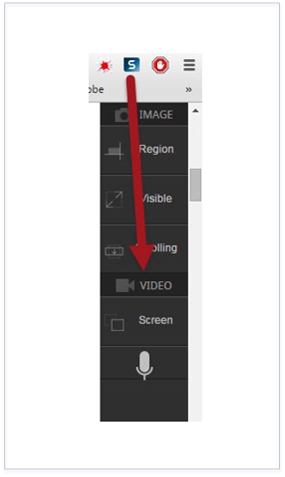
On the toolbar, you will see a new little icon to indicate you have the Snagit tool installed and ready for use. It looks like this:
Figure 3: The Snagit Button in Google Chrome
The general how-to of recording the screen:
Step 1: When you are ready to capture something on your screen, click the Snagit icon and a sidebar will pop out with your options.
Figure 4: Snagit Plug-in and Video
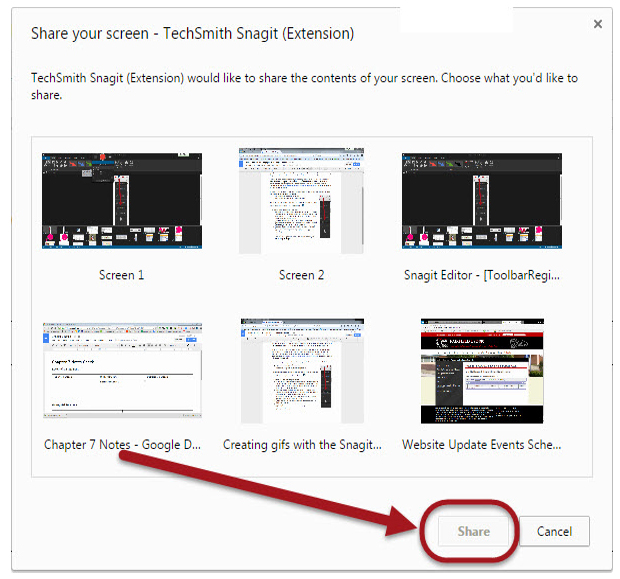
Step 2: Click on the Video -> Screen option and choose the screen where you want to create the video/demonstration.
Click the screen you want. Click the "Share" button.
Figure 5: Share Your Screen
Step 3: Recording begins IMMEDIATELY, so be ready! Click the "Stop Sharing" button at the bottom of the screen when you have finished. Remember to record for fewer than 20 seconds.
Figure 6: “Stop Sharing” Button
A screen will appear where your video is processed or “synced”.
Figure 7: “Syncing Complete” Button
Step 4: At the top of the screen, name your video.
Figure 8: “Name your video” Space
Step 5: When you have named your file, click the three blue dots at the bottom of the screen. Select "Animated GIF."
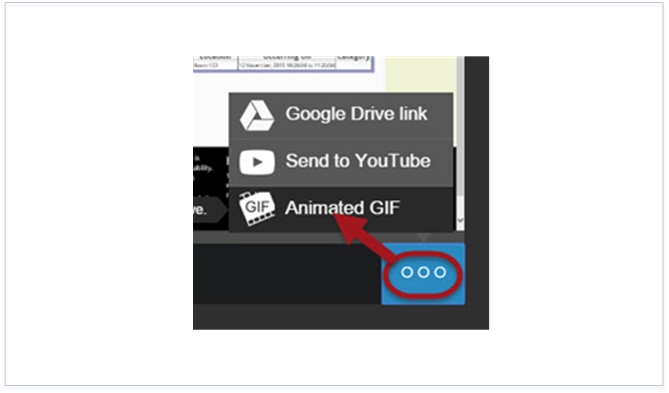
Figure 9: Clicking “Three Blue Dots”
Step 6: Once it has “cooked,” it will be ready for you to choose whether to Grab the link from the TechSmith website or Download to your own computer for use.
Figure 10: .gif Ready (and Selecting between Hosting by TechSmith or Downloading to a Local Site)
Place into your page or website or online file the same way as placing a regular image.
How to Make Animated Gif TechSmith Snagit Extension (video)
About the Author
Angela Glascock is a Business teacher, Assessments Coordinator, and Jill-of-All-Trades for Fairfield Schools, USD 310. She has worked in education for 23 years both in secondary and post-secondary as a business/math/computer teacher and instructional designer. Her degrees are B.S. Business Administration, B.A. Secondary Education, M.S. Instructional Design & Technology and in-progress M.S. Business Education.
| Previous page on path | Cover, page 10 of 28 | Next page on path |
Discussion of "Creating .gifs with the Snagit Plugin in Google Chrome"
Add your voice to this discussion.
Checking your signed in status ...