Create a Table of Contents
Creating a Table of Contents
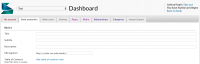
As we've already learned, the primary means of navigating Scalar is through paths. The Table of Contents is a special kind of path that's handled slightly differently from all other kinds of paths. The most important difference is that you can see the Table of Contents by selecting the icon that looks like a list on the top right hand corner of the Scalar interface. Any pages or paths that you select for the Table of Contents will be displayed there, and you can display the pages contained with any paths by clicking on the arrow to the right of the path name in the Table. You can see what we're talking by navigating to the Table of Contents icon in this Scalar book; in the book you've been working on, the Table will be empty except for the Home and Index buttons.In order to populate your Table of Contents, click on the wrench icon in the top right hand corner, also known as the Options button. You'll be directed to the "Book Properties" tab on the dashboard, which looks like this:
Select the "Add Table of Contents" item link, and you'll see a pop-up menu similar to the one you saw a few moments ago when you made your path. Click on the "Paths" option at the top of the menu and select that page that contains your path. When you've done that, click "Add Selected." At this point, you'll be tempted to go into your book and see the Table of Contents but don't do that yet. Whenever you do anything in the dashboard, its important to remember to scroll down and click the blue button that says "save" in the bottom right hand corner-- if you navigate away before saving, you'll have to repeat your work.
After you've saved, you can go back into your book by clicking "Back to Book" at the top right. If you hover over the Table of Icon, you should see your table.