Creating a New (Node or Source) Classification Sheet with Ingested Data
Classification Sheets
(Source Classifications, Case Node Classifications)
[The verbiage has changed to some degree in the latest version of NVivo. Still, some of the ideas here may be relevant.]
Classification sheets enable a broadening of the types of queries that may be used to deal with interviews, focus group data, transcripts, survey data, and so on...especially in cases where demographic data and choice data are important identifiers.
Two Types of Classifications in NVivo: Source and Case Node Classifications
In NVivo, classifications are grouping or types of certain types of objects. A "source" type of object is a data object in digital form. A "node" object is a "code."
What are "Source" Classifications?
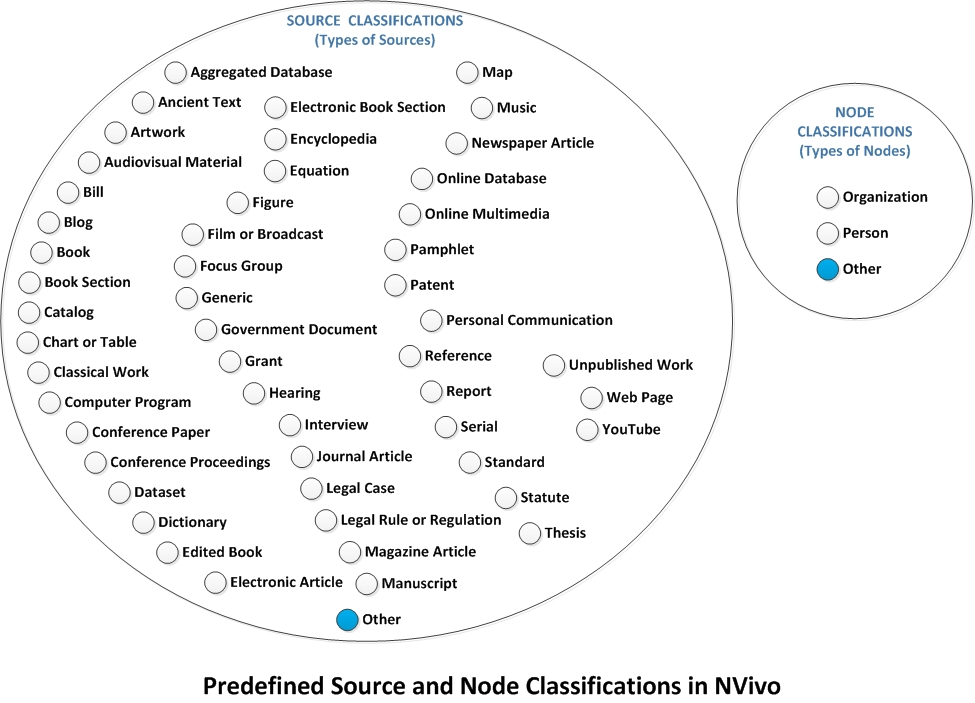
Source classifications refer to certain types of sources with related attribute (descriptive) data. Sources may be articles published in journals. They may be websites. They may be musical recordings. They may be films. NVivo includes a wide range of pre-defined source classifications.
What are "Node" Classifications?
Node classifications refer to certain types of nodes, such as "person" or "organization" nodes with related attribute (descriptive) data. "Person" case nodes are used to identify out respondents with their respective insights. "Organization" nodes describe group entities.
NVivo enables researchers to redefine any of the attributes for any of the preexistent classifications they have created as well as their respective attributes. Also, researchers may create their own "source classifications" and "node classifications." (Note: These are indicated by the filled-in node in the image as "Other" classifications.)
Applying a Source Node Classification to Uploaded Source Files
NVivo has pre-existing source classifications. It also enables the creation of original source classifications.
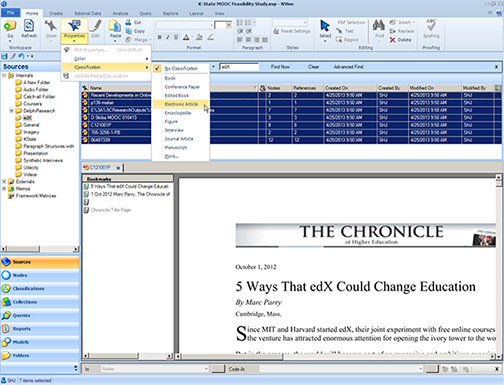
To classify source contents that have already been uploaded, go to the List View. Highlight the desired files. In the Ribbon, go to the Home tab. In the Item group, go to Properties and left-click on the down arrow. The dropdown menu there enables the linking of classifications to the particular source files. Select the classification which applies.
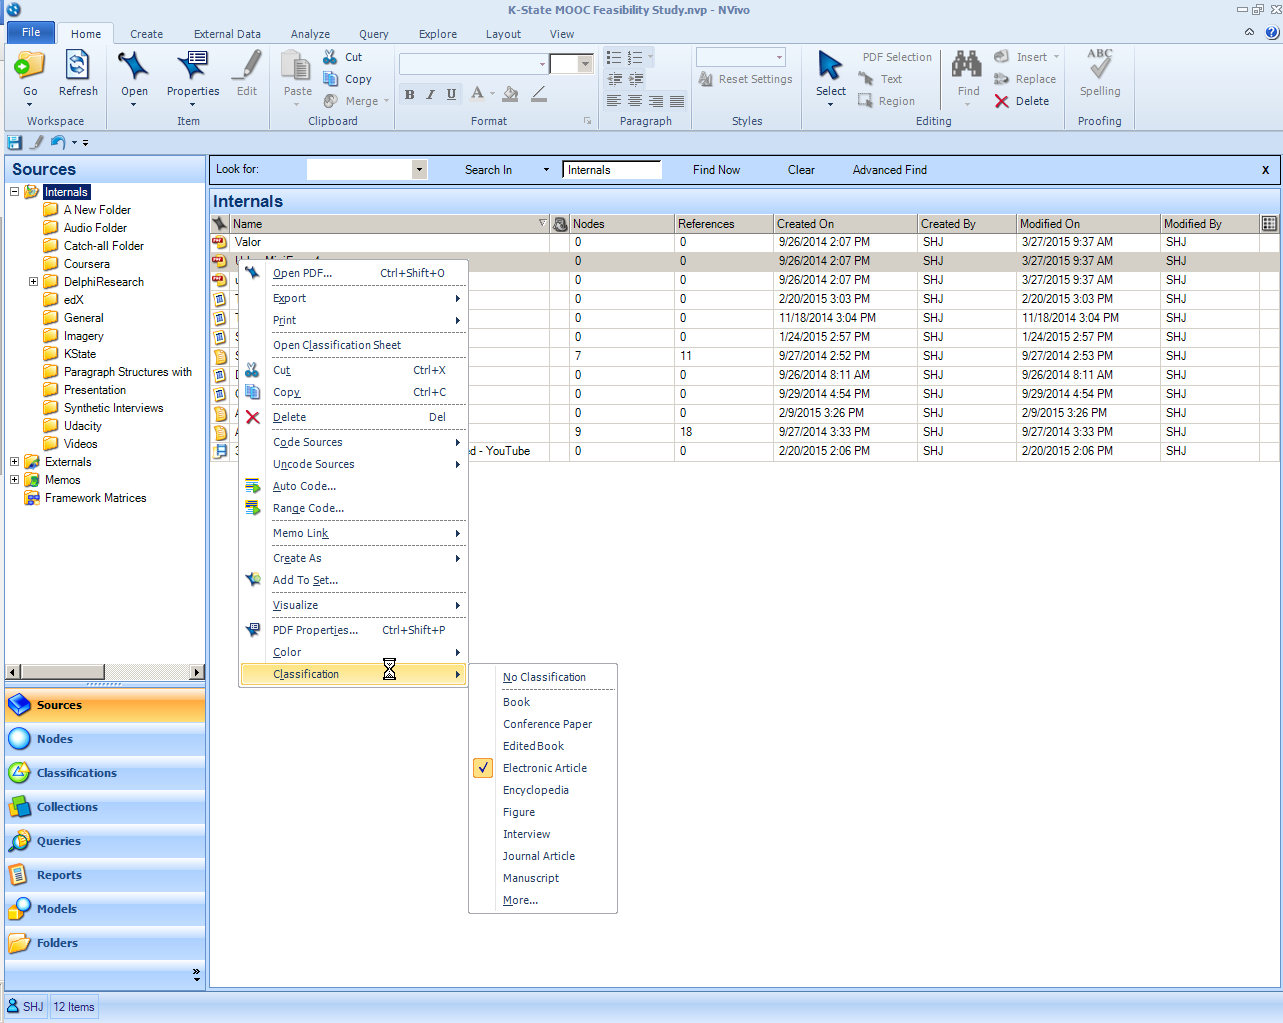
When the source is right-clicked in the list view, in the Classifications area, the identified label may be seen. (Further, the label may be used for querying.)
Creating a New Node or Source Classification Sheet
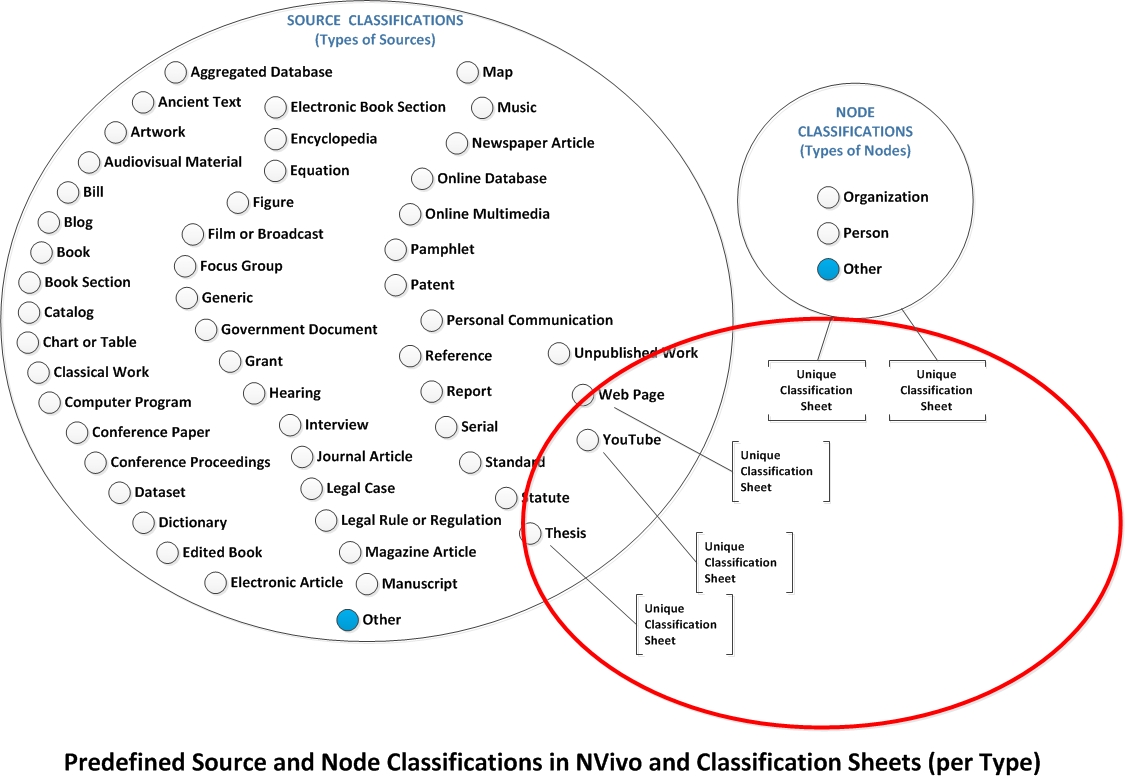
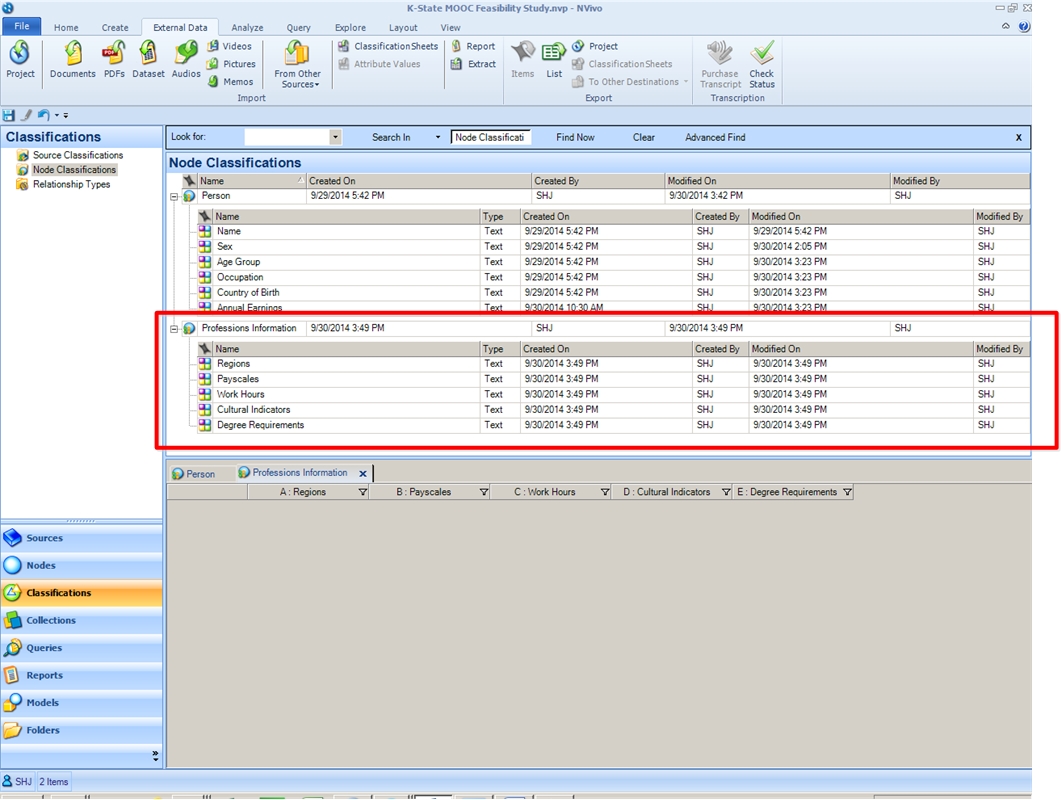
To understand what classification sheets are, it helps to understand that there is a "classification sheet" per each source or node classification. These sheets define the attribute fields that may be used to describe that particular source type or node type. These are represented in the red circle above. It is understood that there are similar pullouts for each of the nodes above.
A Hypothetical Example Showing How Classifications and Attributes Relate
For example, if there is a "source classification" sheet for an "external source" known as a "GoPro walkthrough," the component attributes could be as follows:
- Researcher(s)
- Start Location
- End Location
- Start Time
- End Time
- Mobility Track
- Stated Purpose
- Main Waypoints
- Transcript of Audio
- Time-Space Points of Interest
or whatever other attributes desired.
Creating a New (Node) Classification Sheet
If a researcher would like to use a new classification sheet for either a source or node type, he or she has to decide two things:
- the name of the new classification type
- the attribute data that is linked to that classification type
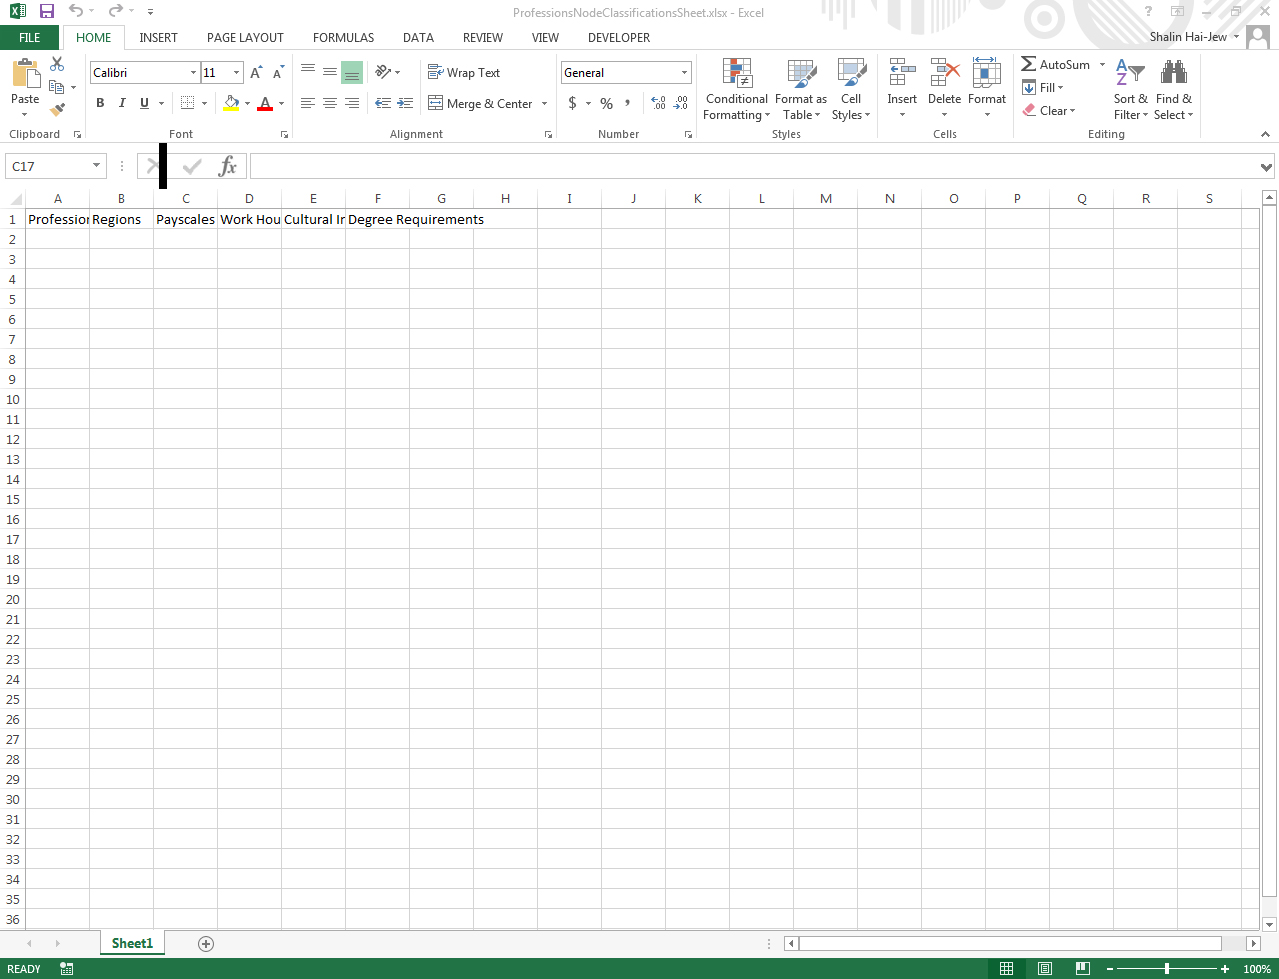
A simple classification sheet structure
To create a new classification sheet, researchers only need a very simple structure. The first cell (A1) has to contain the name of the classification sheet (whether for nodes or for source). The other cells on the first row (B1, C1, etc.) contain the variables contained within the name of the classification sheet. These cells must contain the component attributes or parts of A1.
In the Navigation View, click on Classifications at the bottom left. Select Node Classifications from this set.
In the NVivo ribbon, go to the External Data tab. In the Import group, select Classification Sheets. The Welcome to the Import Classification Sheets Wizard window opens. (Or you can reach this same window by clicking on a blank spot in the active List View window, right-click, and click “Import Classification Sheets.”
This type of classification can be a broadly generic one without attributes. (In that case, no spreadsheet needs to be uploaded. All that would be needed would be to right click and create a label, so that nodes may be coded to that classification. In this case, though, the attributes are desired to add another informational dimension. For this walk-through, it is assumed that it may be helpful to have a professions set of data to overlay with the people case nodes. The knowledge of various professions and basic data about those professions may enhance the understandings of the interview subjects / participants.
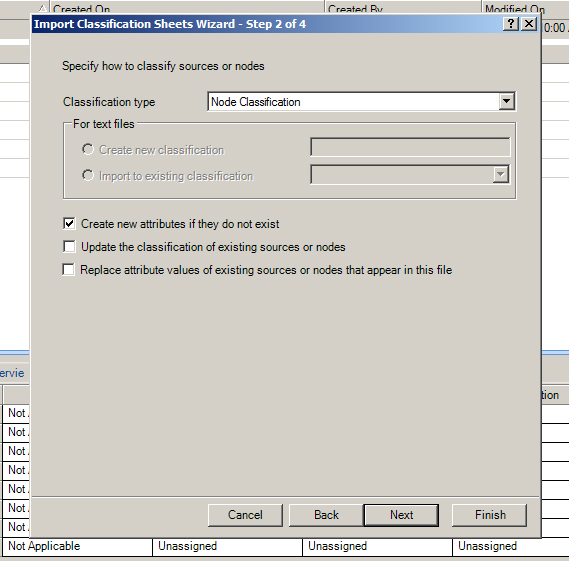
Browse to the particular file. Click “Next.” The default setting is that this is a Node Classification. The check boxes enable a user to do the following:
- Create new attributes if they do not already exist
- Update the classification of existing sources or nodes
- Replace attribute values of existing sources or nodes that appear in this file.
In this case, there are potential new attributes that need to be added. There is no need to update the classification of existing sources or nodes because this currently only involves adding the new node classifications sheet; it does not involve the coding, which in this scenario is expected to come later. There is also no need to replace attribute values. (There are no values included in this particular sheet, just the labels.)
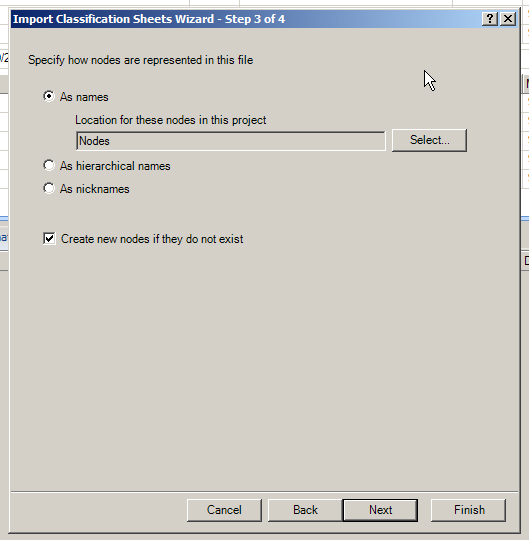
Click “Next.” The next window asks how nodes should be represented in the file. The default is “As hierarchical names.” Because this set does not include hierarchical names (showing the item location in a hierarchy), check “As names.”
Click “Next.” The next screen has questions about how to understand the attribute values and the representation of dates, times, and numbers.
Click “Finish.”
If the attributes in the column headers are set to "mutable," the cells below may be edited within the project. If the attributes in the column headers are set to "immutable," the cells below may not be edited within the project.
| Previous page on path | Using Demographics to Further Explore Interview, Survey, or Focus Group Data, page 1 of 1 |
Discussion of "Creating a New (Node or Source) Classification Sheet with Ingested Data"
Add your voice to this discussion.
Checking your signed in status ...