Using the Content Collection in Blackboard for Course Development
By April Robbs, Ottawa University
Do you need the same content in multiple courses? Would you like to be able to manage course content for multiple sections of the same course from one location? Are you looking for ways to reduce the file size of your courses? The goal of this article is to share several ways you can leverage the Blackboard Content Collection to optimize your course development and revision processes.
Providing Common Content in Multiple Courses
The Blackboard Content Collection allows you to store and manage folders and files at the institution level and at a course level. You can customize the user access permissions on files to best fit your needs. All folders and files can be shared with users and groups and can be shared with users inside of and external to your organization. Additionally, you can overwrite the files when revisions are needed. Check with your Blackboard administrator to see if the Content Collection is available at your institution.
The Institution-level Content Collection is intended for files that are used by multiple courses or multiple departments. This space is also great for administration files and training files.
Examples of files you might save in the Institution Content Collection include:
- standard policies in effect institution-wide;
- program handbooks that need to be available across multiple courses;
- standard/generic directions for common course tasks that student need help with (ex: how to create a narrated presentation, how to use the Blackboard Wiki tool, how to create clickable links that open in a new window, etc.);
- a catalog of master course syllabi;
- standard rubrics; and more!
You can share files in courses or use a special file called a Reusable HTML Object to display course content.
Files
You can provide files in a course using two different methods:
1. link to the files using a permanent URL; and
2. attach the file to an item or assignment.
Method 1: Link to the Files using a Permanent URL
This option is available for all file types stored in the Content Collection. This option is useful if you want to provide a resource or file to students within a content area. To link to a file:
1. Go to the file in the Content Collection.
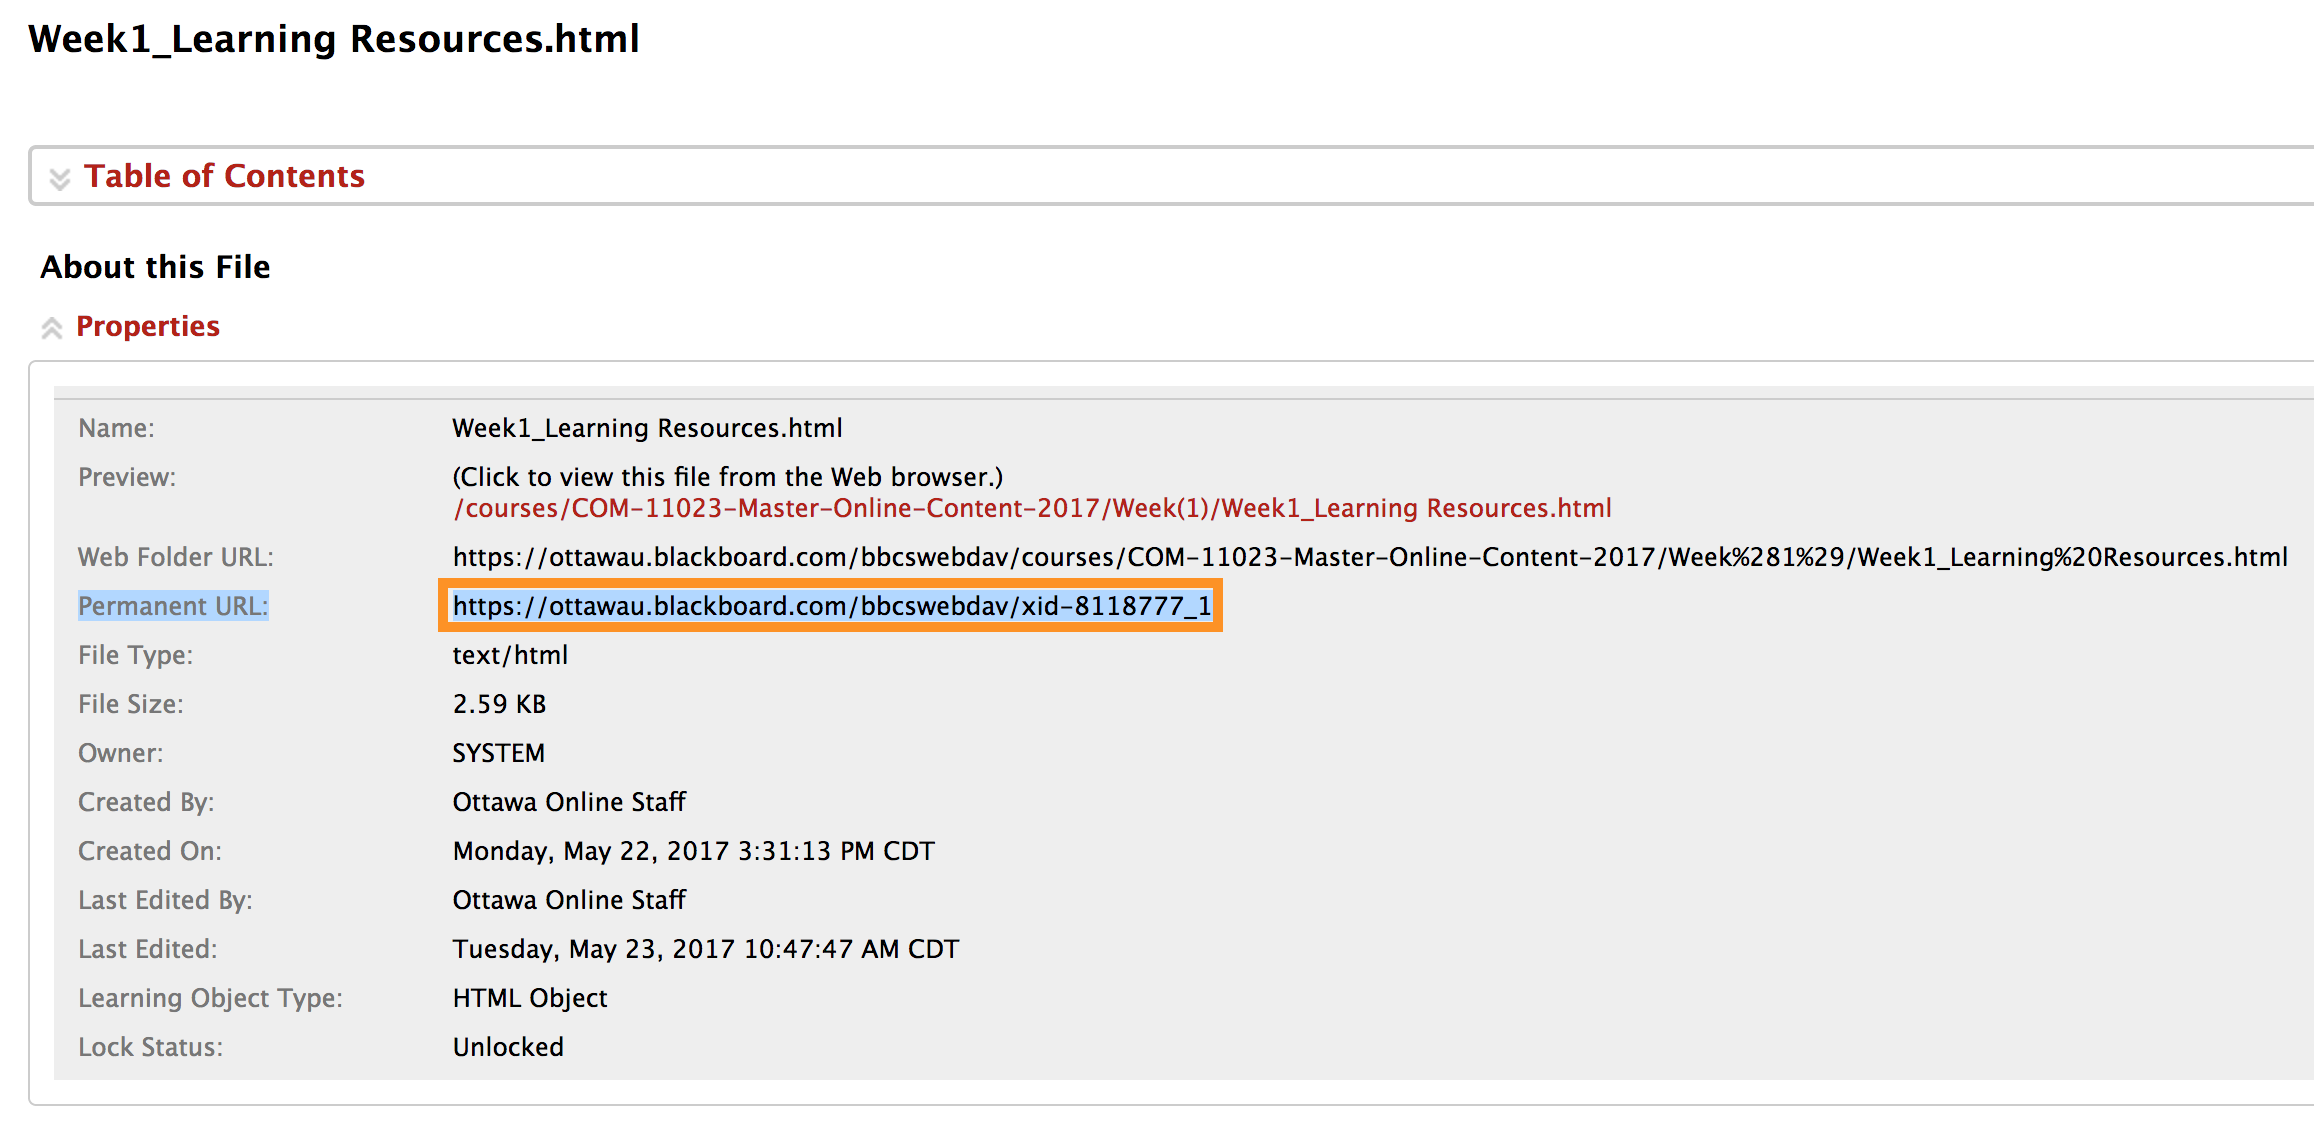
2. Open the “360° View” page for the file.
Figure 1: Open the 360 View for the File
3. Copy the permanent URL from the “360° View” page.
Figure 2: Copy the Permanent URL for the File
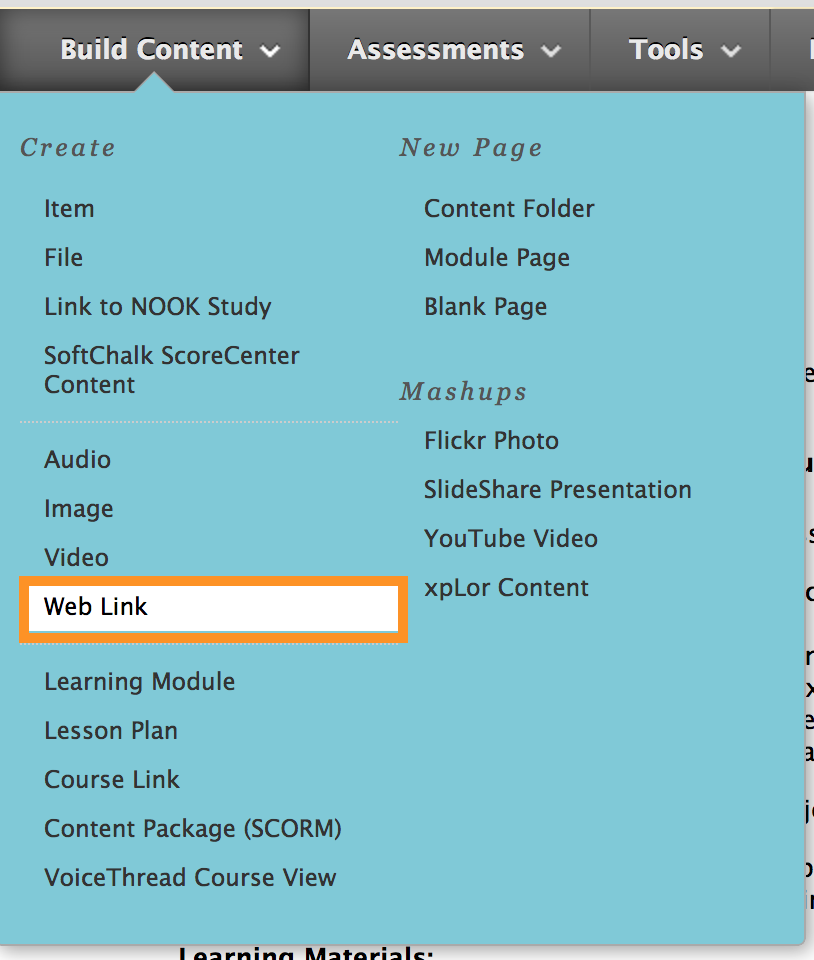
4. Go to the desired content area in your course.
5. Create a “Web Link” and give it an appropriate title.
Figure 3: Create a Web Link in the Content Area in Blackboard.
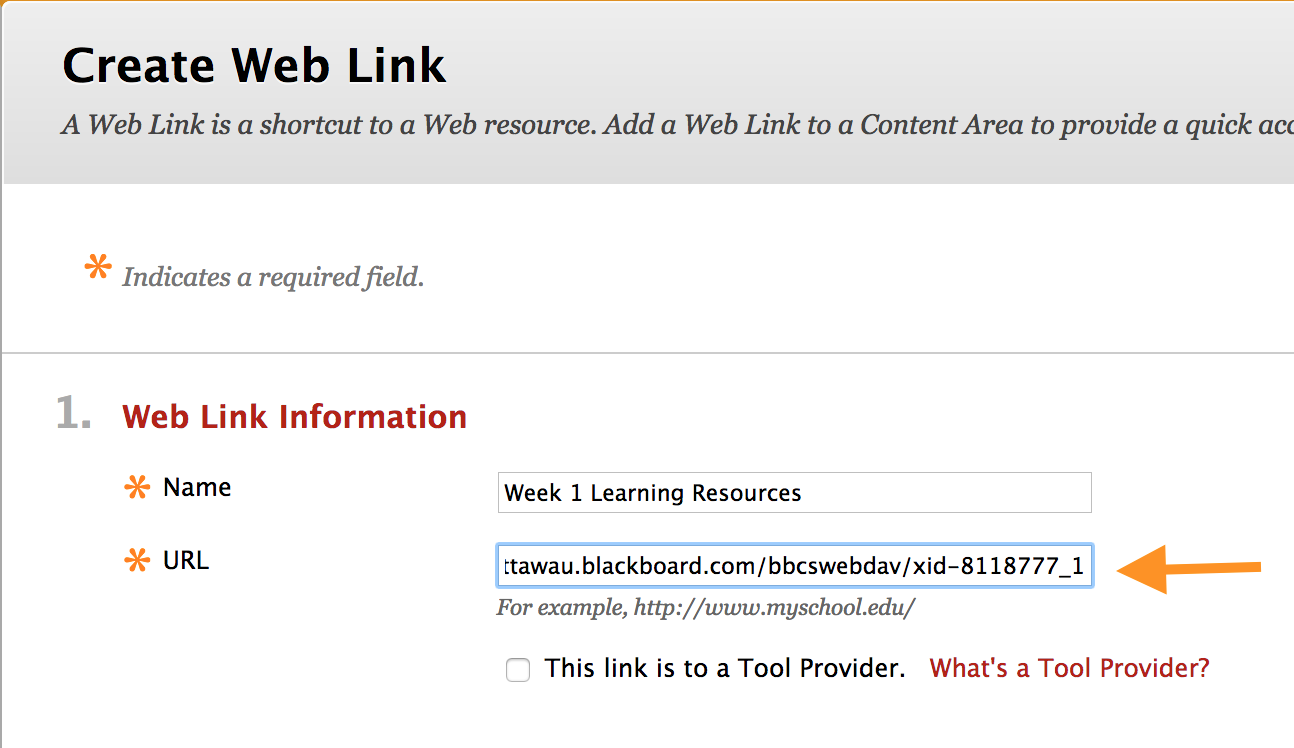
6. Paste the permanent URL into the URL dialog box.
Figure 4: Paste the Permanent URL into the URL Dialog Box
7. Complete the selection of the remaining configuration options.
8. Click “Submit”.
Figure 5 shows the web link. It opens in a new browser tab when users click it.
Figure 5: Example of a Web Link
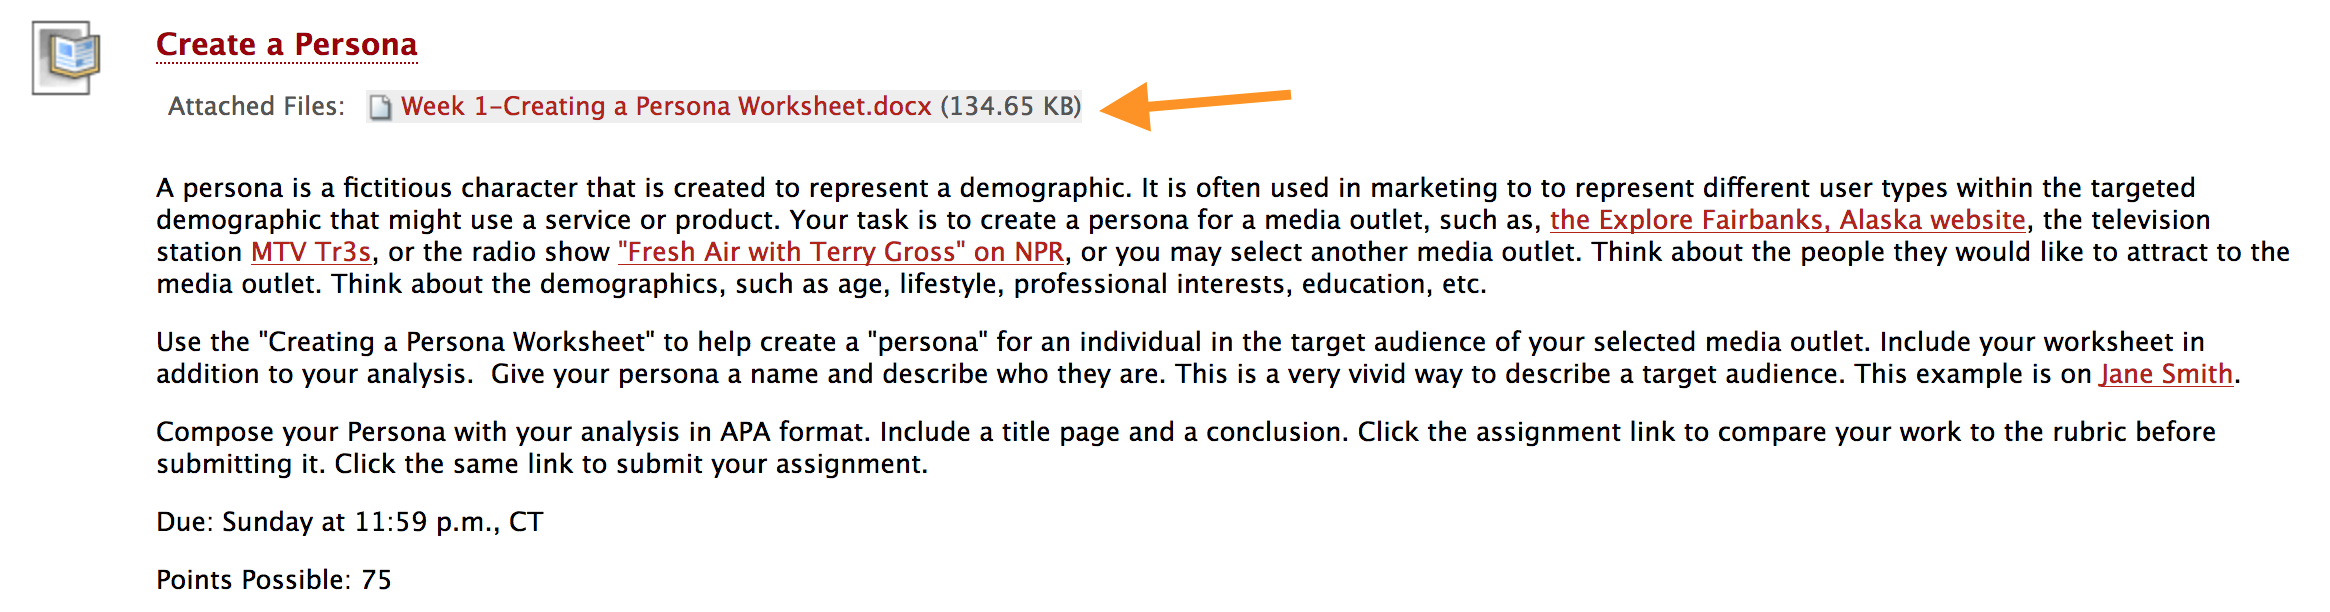
Method 2: Attach a File to an Item or Assignment
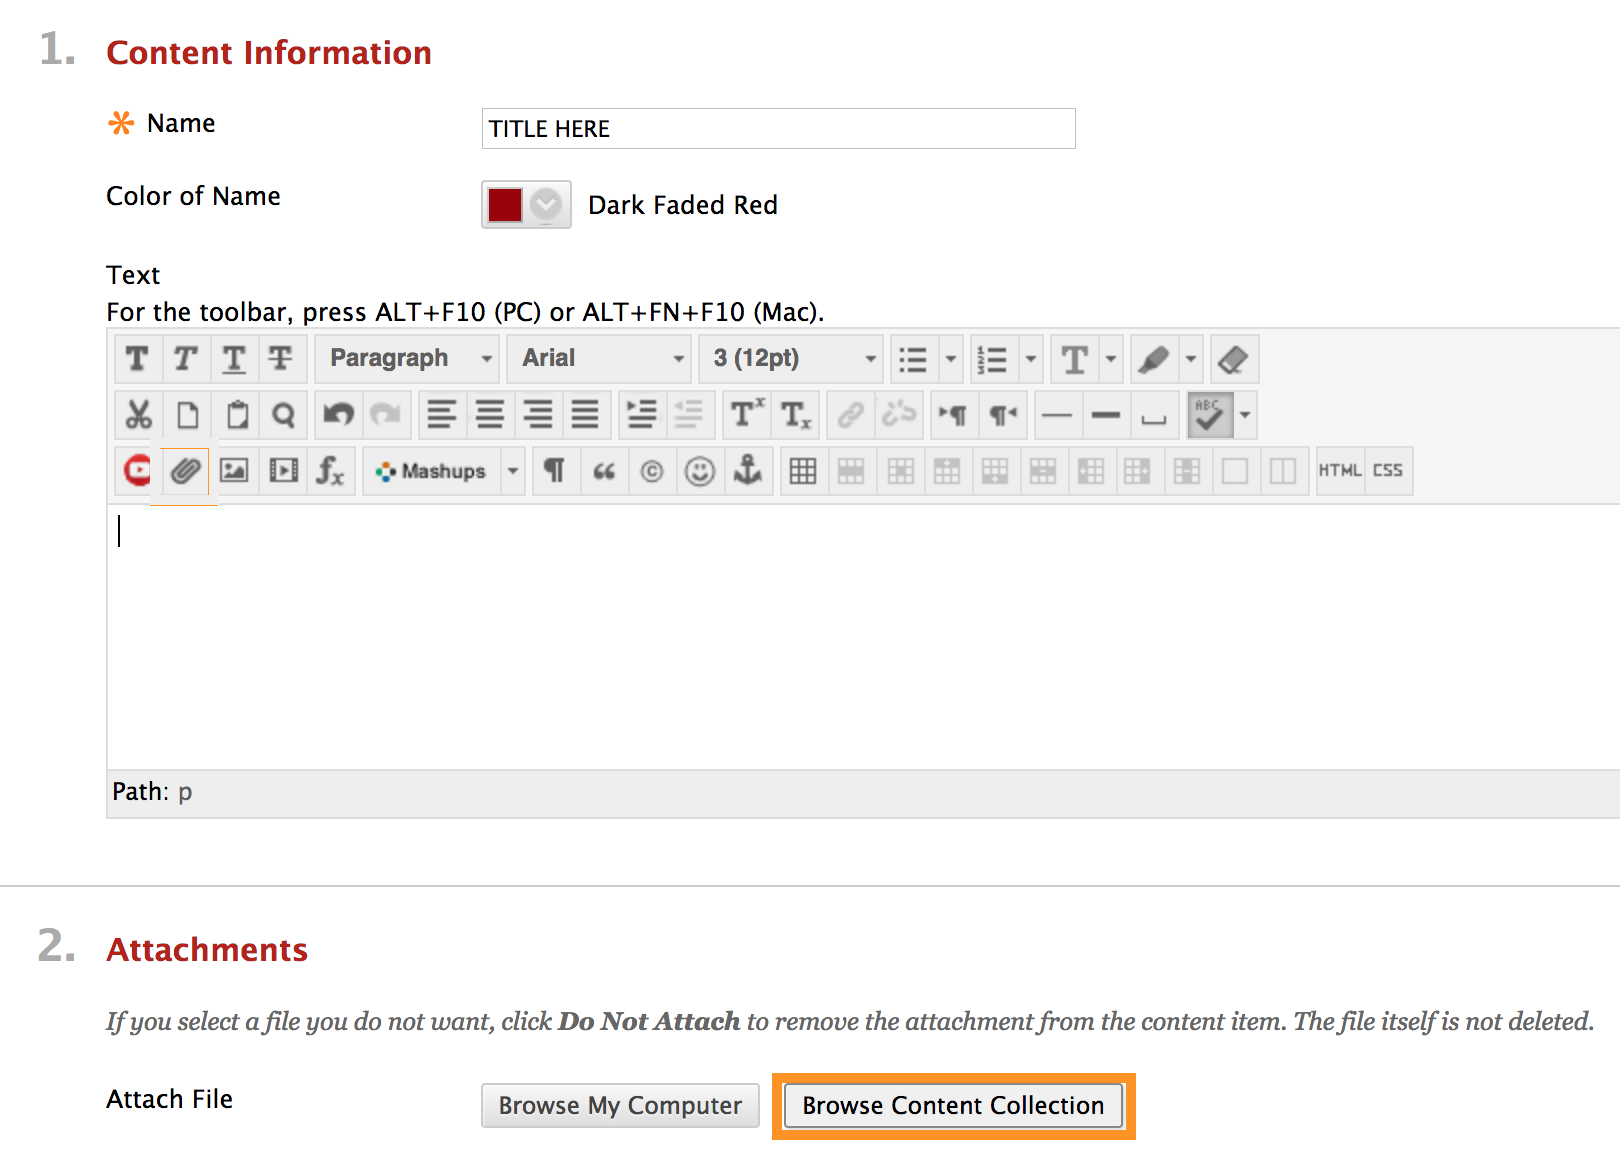
You can attach files from the Content Collection to items or assignments. This is useful when you have files that are directly related to an item or assignment. To attach a file:
1. Go to the desired content area in your course shell.
2. Create an item or assignment and give it an appropriate name.
3. Under “Attachments”, click “Browse Content Collection” option.
Figure 6: Browse the Content Collection to Find the File
4. Navigate to your HTML Object. To locate a file that is stored in the Institution Content folder, use the “Browse” menu to select “Institution Content”.
Figure 7: Browse the Institution Content for files that live outside of the course files.
5. Complete the selection of the remaining configuration options.
6. Click “Submit” to save your work.
Figure 8 shows the attached file under the title of the item or assignment.
Figure 8: Example of an Attached File in an Assignment
Reusable HTML Objects
The Reusable HTML Object is a unique file type to Blackboard that provides some exceptional benefits. You can display an HTML object as course content or as the explanatory text of an assignments. It functions similar to embedding a webpage. To create a Reusable HTML Object:
1. Navigate to the desired location in the Content Collection.
2. Click “Create HTML Object” and give it an appropriate name.
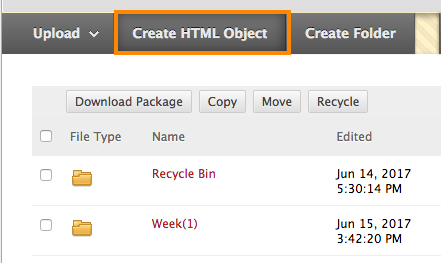
Figure 9: Create HTML Object
3. Use the content editor to input your content.
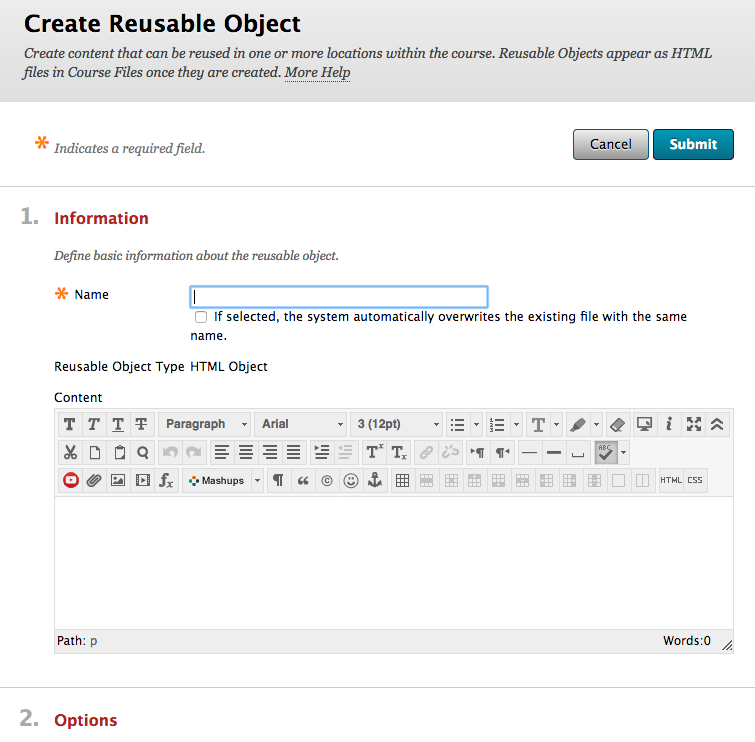
Figure 10: Use the Content Editor to Input your Content
4. Complete the selection of remaining configuration options.
5. Click “Submit” to save the file.
Figure 11 shows the Reusable HTML Object in the Content Collection.
Figure 11: The Reusable HTML Object in the Content Collection
Editing Reusable HTML Objects
You can also edit Reusable HTML Objects directly in Blackboard without the need for Blackboard Drive or an external HTML editor. This reduces the workload of maintaining content because revisions can be made in one place and they are automatically pushed out to all of the places the file is linked. To edit a Reusable HTML Object:
1. Navigate to your HTML Object in the Content Collection.
2. Click the options menu and select “Edit in Blackboard”.
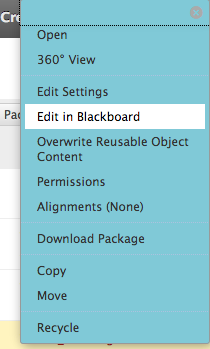
Figure 12: Select “Edit in Blackboard” from the Options Menu to Use the Content Editor
3. Use the content editor to revise the file.
4. Click “Submit” to save your changes.
Displaying Reusable HTML Objects in Course Content
To display a Reusable HTML Object in course content and assignments of course shells:
1. Go to the desired content area in your course shell.
2. Create an item or an assignment and give it an appropriate title.
3. Click the “Insert File” tool (paperclip icon) in the content editor.
4. Select “Browse Content Collection”:
Figure 13: Insert File from Content Collection to an Item or Assignment
5. Select the desired HTML Object (click on the folder titles to enter a folder, select the radio button next to the HTML Object to select).
6. Click “Submit”.
7. Next to “Open in new window” Select the NO radio button.
Figure 14: Set the Attachment to Not Open in a New Window
8. Complete the selection of the remaining configuration options.
9. The content editor displays a link to the Reusable HTML Object.
Figure 15: The Content Editor Displays a Link to the Reusable HTML Object
10. Click “Submit” to save your item or assignment.
Figure 16 shows an HTML Object displayed inside of an item in a Blackboard course.
Figure 16: An HTML Object Displayed Inside of an Item in a Blackboard Course
Permission Considerations
You must grant permissions to make the content accessible to users. System Administrators have full control over the permissions on each file and folder including who can: read it, modify it, remove it, and control its properties and settings.
To permit students and faculty to view a file used in multiple courses, you must set the minimum permissions so that all users can read the file. Follow these steps to set read permissions for all users:
1. Click the permissions icon (a hand holding a file) next to the file.
Figure 17: Click the Permissions Icon Next to the File
2. Hover your mover over "Select Roles" and select "All Roles" from the options menu.
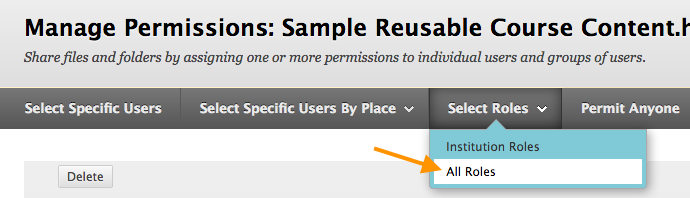
Figure 18.: Select Roles - All Users
3. Select the radio button next to "Read" to select it.
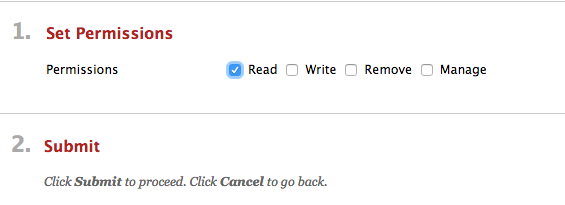
Figure 19. Select the Radio Button next to "Read" to Select It
4. Click "Submit".
You can adapt the permission settings to best fit the needs of your institution. Work with your System Administrator to make sure your permissions are set correctly. Additional information about the Content Collection can be found at https://help.blackboard.com/Learn/Administrator/Hosting/Tools_Management/Content_Collection.
The Blackboard Content Collection can help institutions save time, money and file space by sharing files across multiple courses. Updates can be made in one location that are pushed out to every instance where the file is used. This helps maintain consistency and saves time.
About the Author
April Robbs is an Instructional Designer and Technologist at Ottawa University. She holds certifications from Blackboard in Content System Administration and Community System Administration. She is also a VoiceThread Certified Educator.
| Previous page on path | Issue Navigation, page 13 of 26 | Next page on path |
Discussion of "Using the Content Collection in Blackboard for Course Development"
Add your voice to this discussion.
Checking your signed in status ...