How To Improve Voice Quality in Audacity 2020
1 2020-09-30T07:41:02-07:00 Melanie Hubbard 04c18d7b5dab5c358ce6b6181037461683c156a2 37785 1 How To Improve Voice Quality in Audacity 2020. In this video, I will be showing you simple steps to improve your voice quality using Audacity. For those that ... plain 2020-09-30T07:41:02-07:00 YouTube 2020-04-28T17:00:30Z pc_sgfWAfzw CasualSavage Melanie Hubbard 04c18d7b5dab5c358ce6b6181037461683c156a2This page is referenced by:
-
1
media/audacity waveforms.png
2020-09-05T14:48:26-07:00
Putting it Together
54
plain
2020-10-01T09:34:02-07:00
You are about to engage in an exercise that is intended to help you put what you have learned together as well as introduce you to some basics of sound editing and how to execute those techniques in Audacity.
Exercise Three
For this exercise, you will be recording the text you read for exercise one again and editing it. The editing process will involve selecting the best takes of your reading, assembling them, and cleaning up the track from unwanted sounds like pops and clicks. Audacity's manual is thorough and easy to understand. I recommend looking it over and referencing it when you have technical questions.
Step One:
Listen to the recording you did in exercise one and consider how you might improve its quality. Should you record in a different space? Can you use a different mic or put your mic in a more strategic place?
Step Two:
Rerecord your reading of the text while making more conscientious choices about your space and microphone. Read it at least twice. Don’t worry about saying it perfectly as this is just an exercise. When recording make sure to capture about fifteen seconds of room tone at the beginning (or at some point).
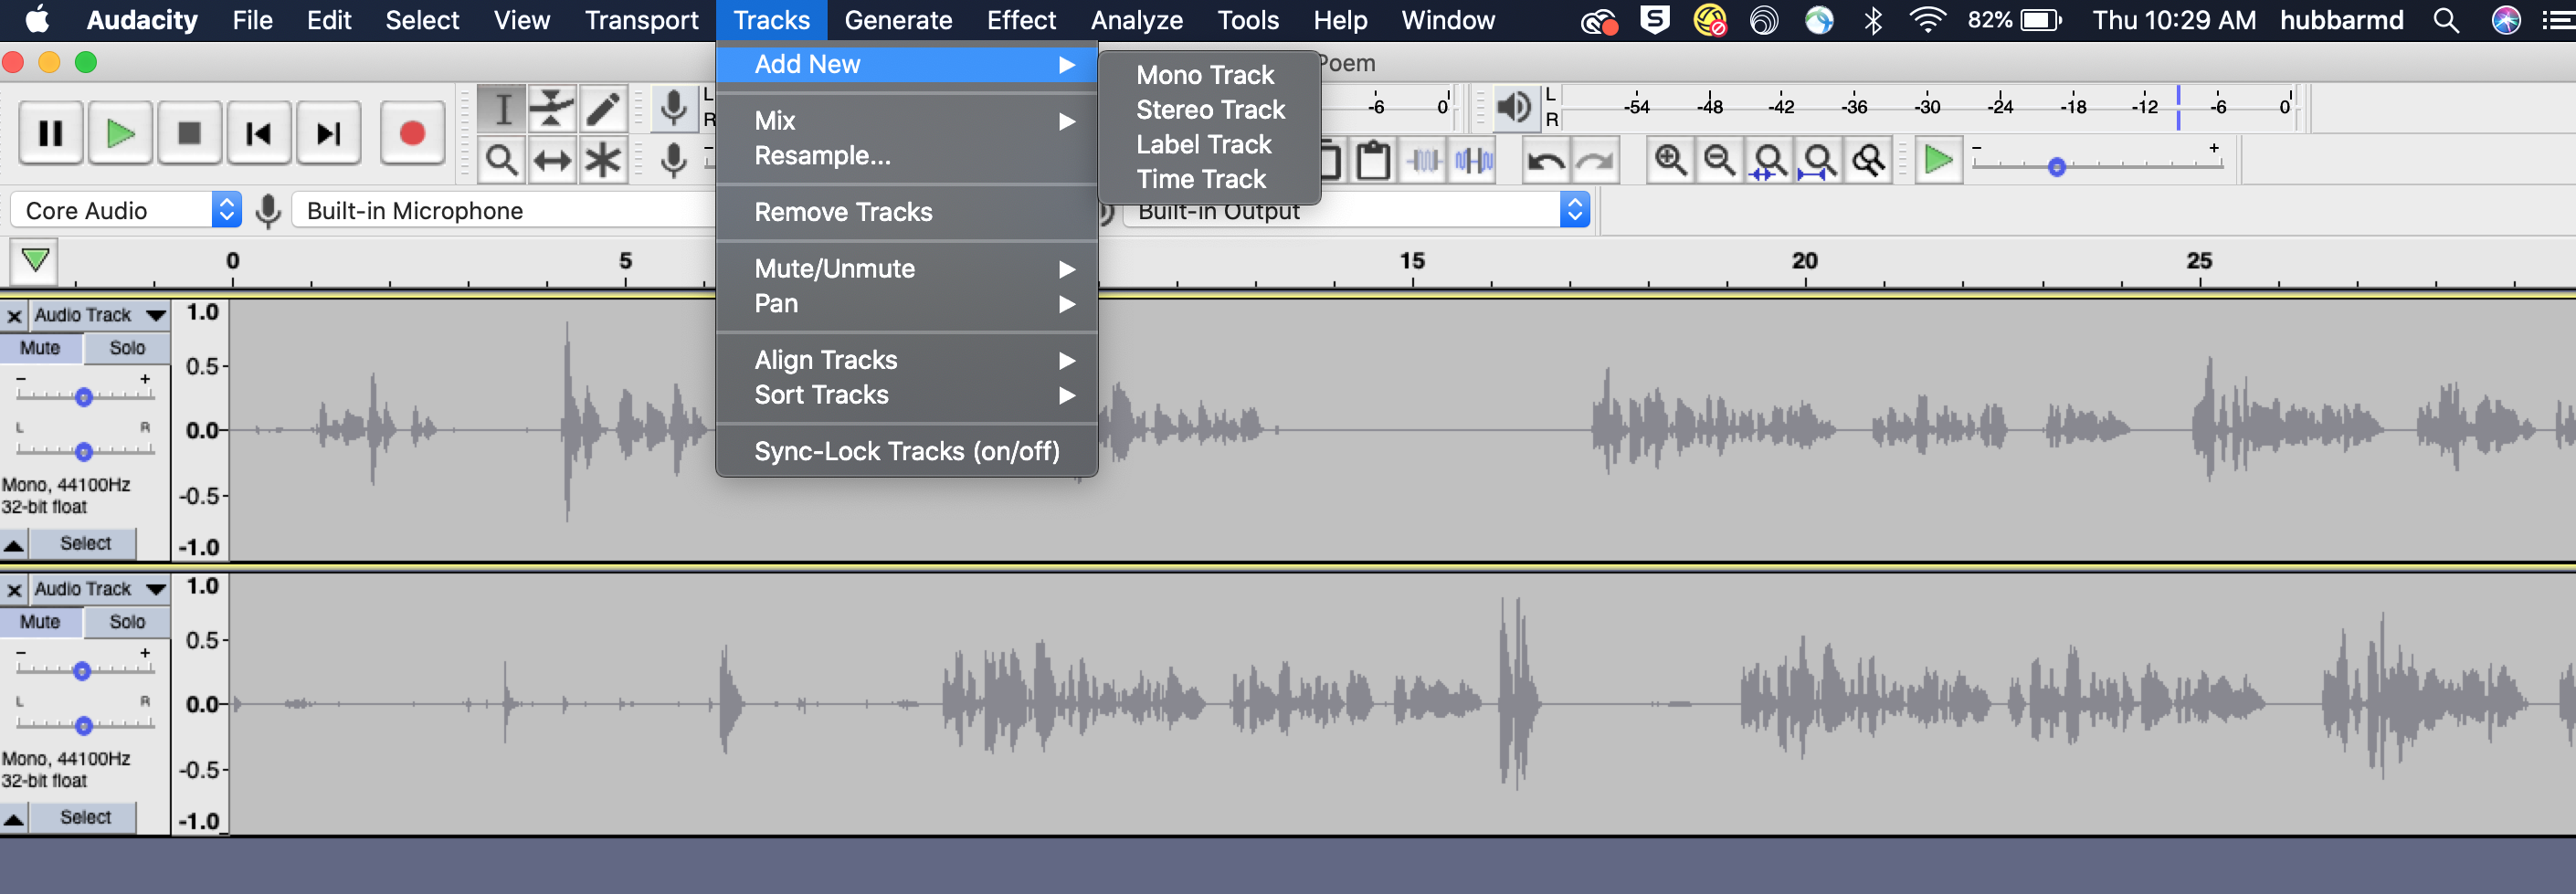
I recommend you record each take on a different track. Depending on your Audacity preference settings, it may or may not generate a new track when you begin a new recording. To create a track, go to Tracks in the menu bar and select Add New and Mono Track.
Step Four: Exporting Your File
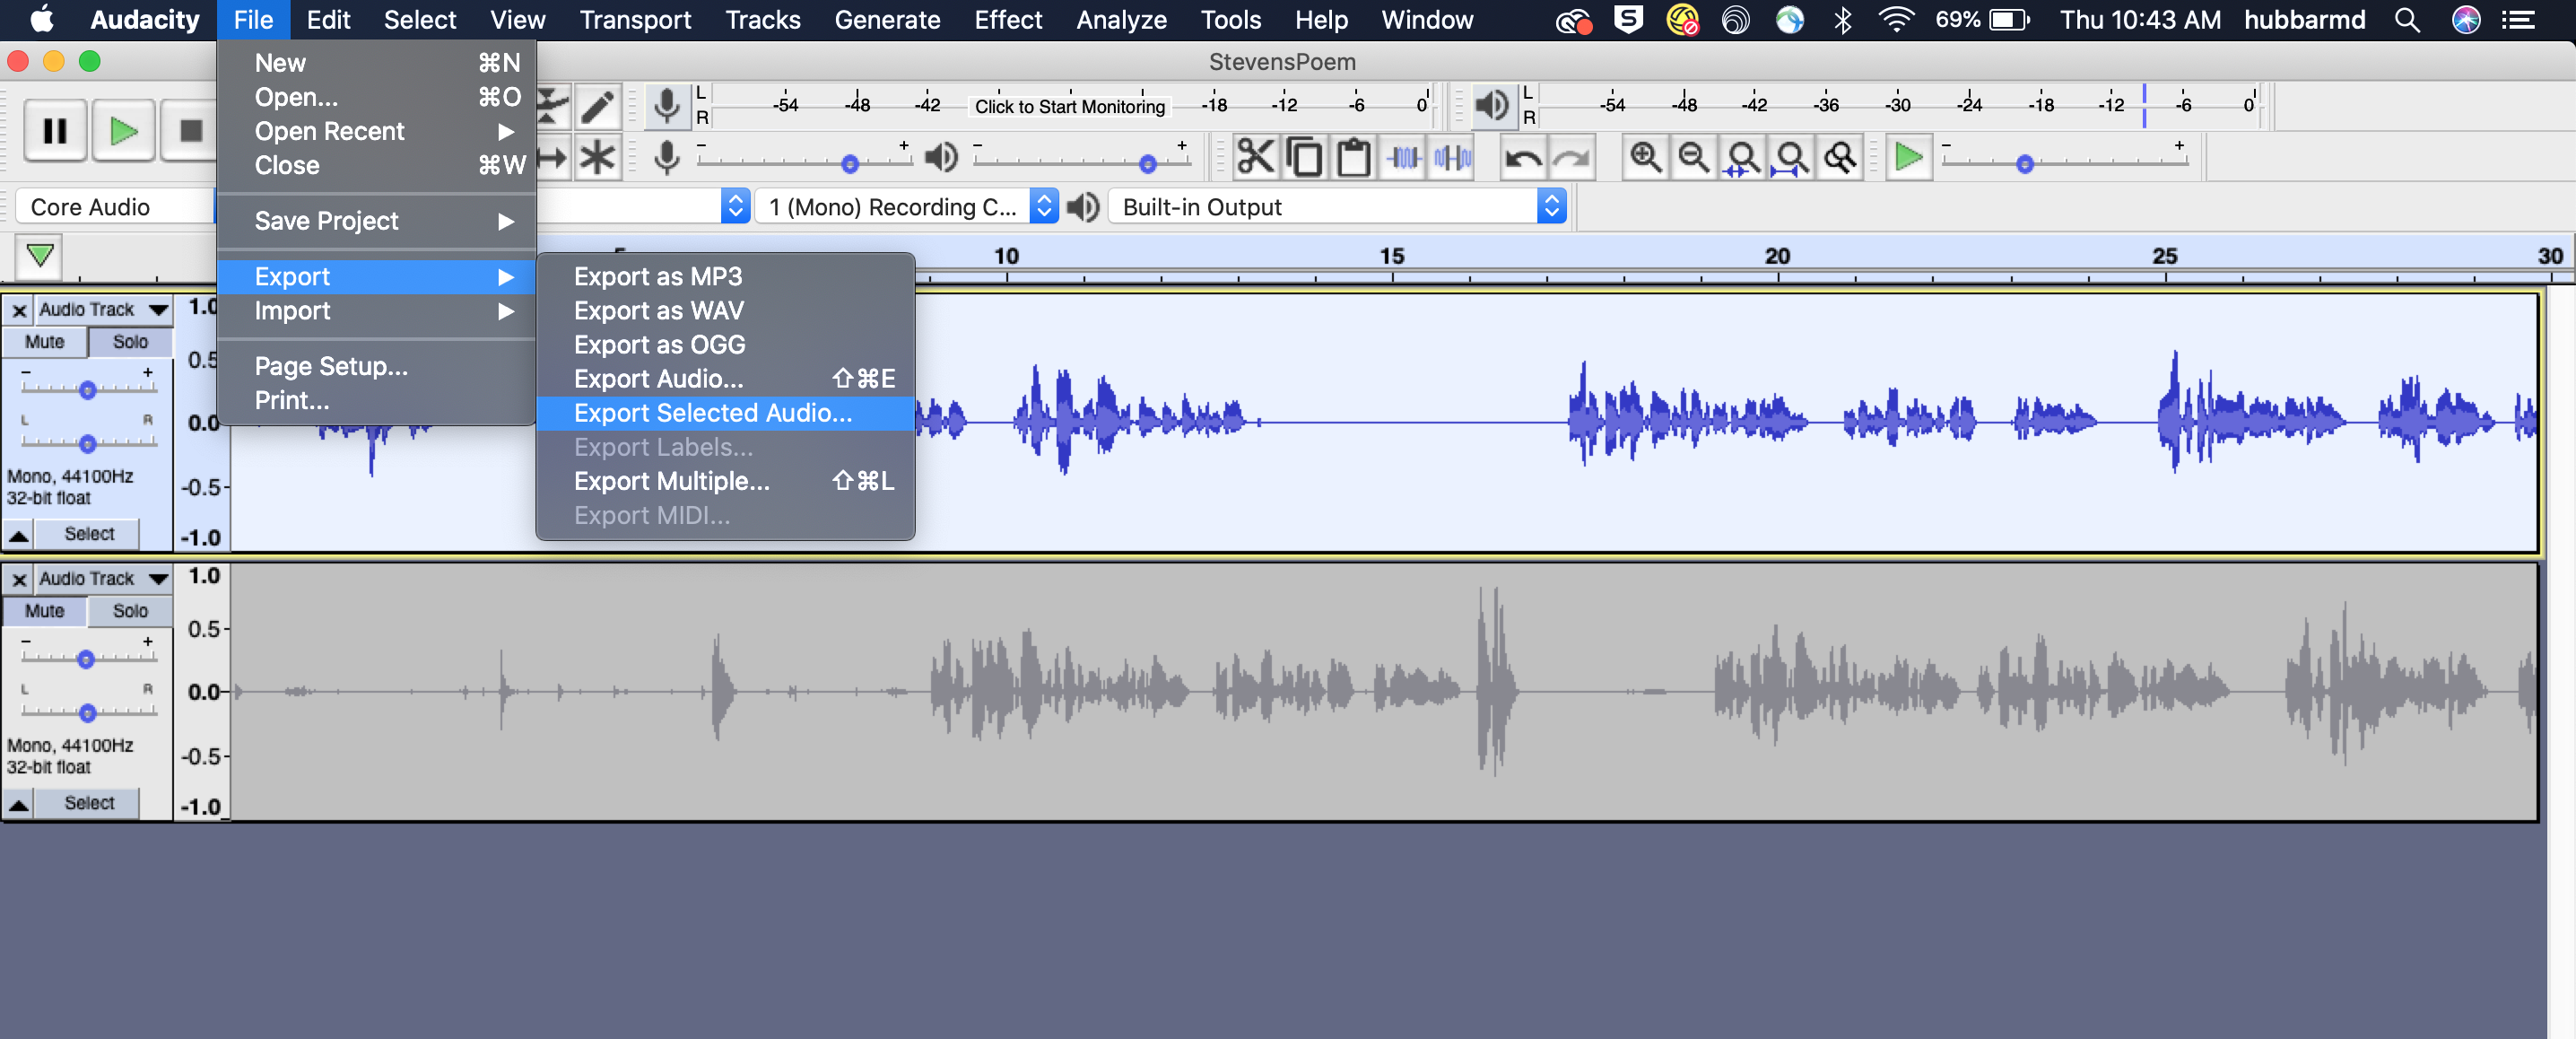
Audacity is a destructive editing platform, meaning when you cut a sound clip, you cannot restore it like you can on non-destructive platforms like Garageband and iMovie. (There is an undo option, however.) For this reason, it is a good practice to export a copy of your files in case you make a mistake that you can't undo. Export each track individually (otherwise, it will mix them down into one audio file). To do this, highlight a track and go to File, Export, Export Selected Audio. Export them as WAV files, which is the highest quality.
Step Three: Assembling Your Sound
Here you will learn how to split, copy, and move audio clips. I will be mentioning keyboard shortcuts using Mac related commands. For PC shortcuts visit the Audacity manual.
Listen to all the recoding to identify the best takes. (Don't worry about it if the best takes are still rough. This is just for practice.)
Step Four: Adjusting the Timing and Clean Up
At this point, you are going to smooth out the sound by adding crossfades and in and out fades, adjusting the timing between the clips (the pacing of the reading), and cleaning up more difficult clicks and pops when possible.
[video]
Step Five (optional): Improving Vocal Quality
Finally, if you would like, to experiment with effects that might improve the audio quality by following CasualSavage's "How To Improve Voice Quality in Audacity 2020" video. (CasualSavage has a number of helpful videos on Audacity and audio recording more broadly.) I recommend you create a new track and copy your sound clip so that you can compare the two clips.
Step Six: Exporting
Now that you are done, it’s time to export your audio.
[video]
If you feel comfortable with it, share your audio file with me. I’d love to hear how it turned out and about your process.
To conclude, let's look at some other tools. iMovie is a video editing platform into which you can import audio exported from Audacity as well as being platform that can record and, to some extend, edit audio. Garageband is a non-destructive sound recording and editing platform that you might find appealing. -
1
2020-10-02T09:17:01-07:00
Editing in Audacity
10
plain
2020-10-27T07:31:48-07:00
Step Four: Assembling Your Sound
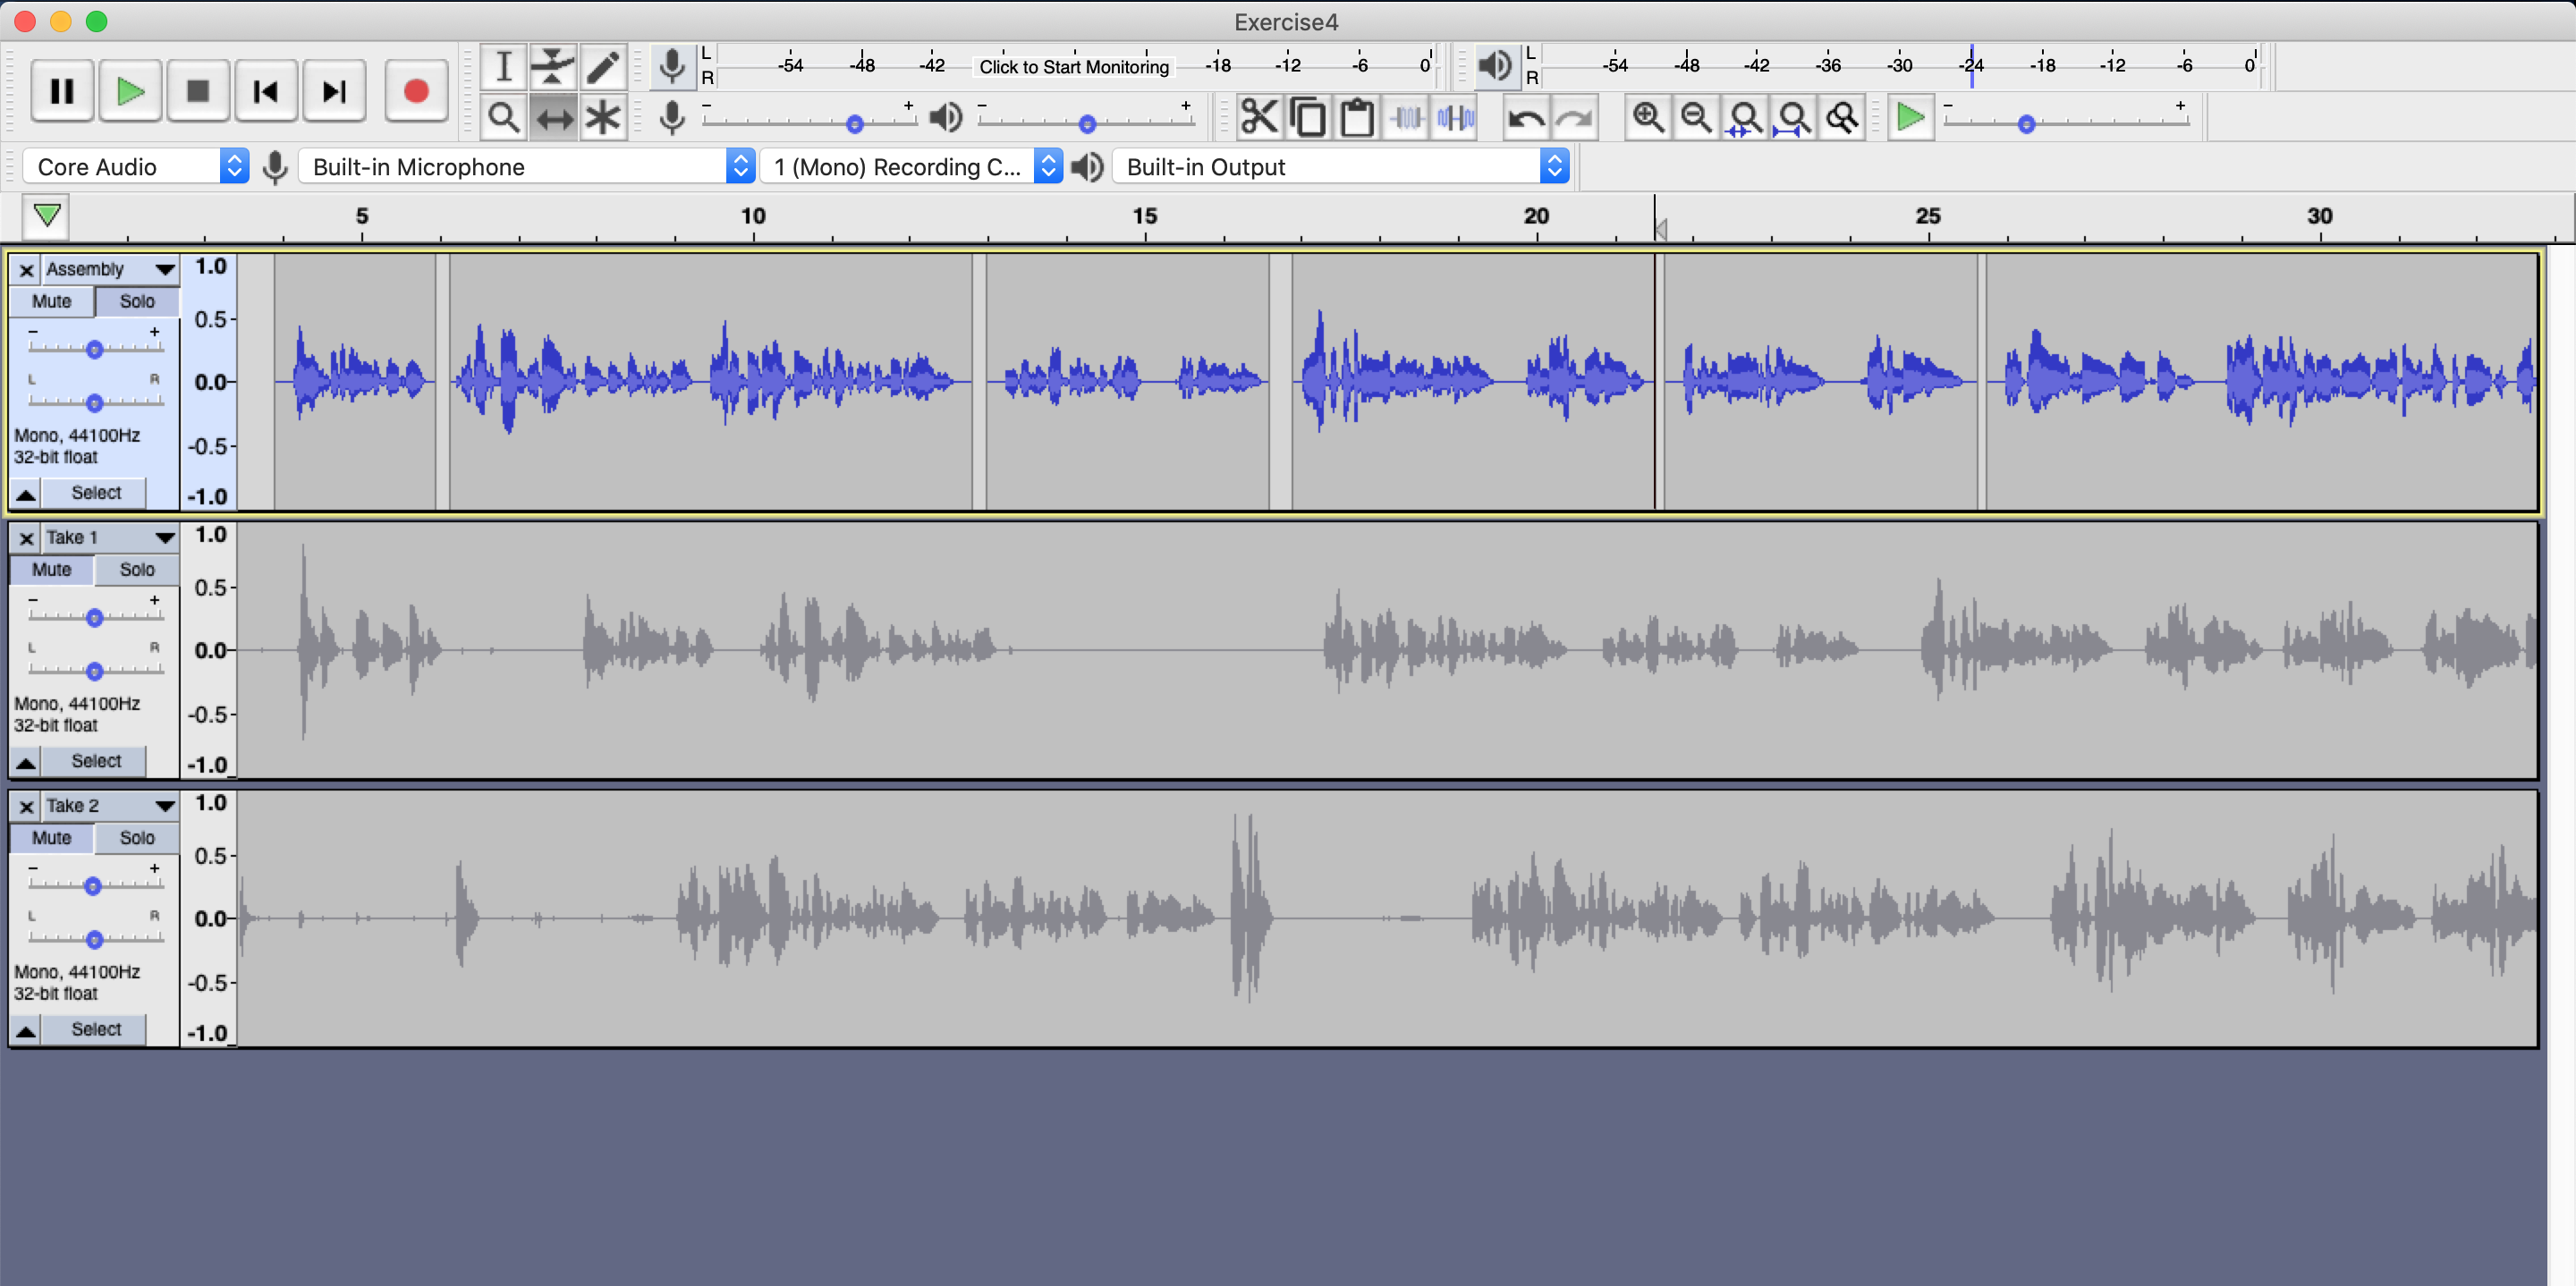
Here you will learn how to split, copy, and move audio clips. As part of this step, you will need to listen to the recordings to identify the best takes. When you have concluded, your assembly should look something like this:
This video will show you the skills and techniques to create your assembly:Step Five: Adjusting the Timing and Clean Up
At this point, you are going to smooth out the sound by adding crossfades and in and out fades, adjusting the timing between the clips (the pacing of the reading), and cleaning up more difficult clicks and pops when possible. This video will show you the skills and techniques you will need as well as teach you about the multitool.Step Six (optional): Improving Vocal Quality
Finally, if you would like, to experiment with effects that might improve the audio quality by following CasualSavage's "How To Improve Voice Quality in Audacity 2020" video. (CasualSavage has a number of helpful videos on Audacity and audio recording more broadly.) I recommend you create a new track and copy your sound clip so that you can compare the two clips.Step Seven: Exporting
Now that you are done, it’s time to export your audio. If you feel comfortable with it, share your audio file with me. I’d love to hear how it turned out and about your process.
To conclude, we'll look at some other tools. That information will be made available October 3rd. -
1
2020-10-27T07:54:47-07:00
Practicum: Improving Vocal Quality
8
plain
2020-10-27T12:07:02-07:00
Finally, if you would like to experiment with effects that might improve the audio quality, follow CasualSavage's "How To Improve Voice Quality in Audacity 2020" video. (CasualSavage has a number of Audacity videos that will help you develop your knowledge and skills.) If you choose to take this step, I recommend you create a new track and copy your sound clip so that you can compare the two clips.
Technical Note
If you created multiple tracks for your final assembly, it is best to mix down the tracks so that all of the tracks you want to add the effects to are on one track. You can do this by using the mix function or export all of the tracks together to mix them down into one clip and reimport the audio.
To export and mix down multiple tracks, highlight all of the tracks you want to export and go to File, Export, Export Selected Audio. Select "Export Selected Audio." -
1
2020-10-27T07:42:38-07:00
Adjusting the Timing and Clean Up
2
plain
2020-10-27T07:44:33-07:00
At this point, you are going to smooth out the sound by adding crossfades and in and out fades, adjusting the timing between the clips (the pacing of the reading), and cleaning up more difficult clicks and pops when possible. This video will show you the skills and techniques you will need as well as teach you about the multitool.
Improving Vocal Quality (optional step) Finally, if you would like, to experiment with effects that might improve the audio quality by following CasualSavage's "How To Improve Voice Quality in Audacity 2020" video. (CasualSavage has a number of helpful videos on Audacity and audio recording more broadly.) I recommend you create a new track and copy your sound clip so that you can compare the two clips.