Using iMovie to Inspire Creative Top-Notch Projects in the Classroom
By Manjula Shinge, The Teacher's College, Emporia State University
In harmony with the well-known adage attributed to Benjamin Franklin that states, "Tell me and I forget, show me and I remember, involve me and I understand," educators use numerous methods to engage their students in classroom activities with the goal of enhancing learning and cognitive retention. One such method is requiring students to videotape their educational activities and projects, which reaps huge benefits irrespective of the discipline, level of instruction, mode of course delivery, or even demographics of the students.
This article discusses examples of the video projects I asked my students to complete, the observed necessity of assisting them, the need to learn how to use iMovie, and the basics of how iMovie works. I share my experience in the hope of helping educators come to grips with the anxiety and trepidation they feel at the thought of learning and mastering new technological programs and software applications and to assure them that these perceived challenges are not too bad.
Student Video Projects
In one of my teacher education classes, students are required to videotape themselves using innovative teaching strategies in their English as a Second Language classrooms. In another class, I ask students to videotape themselves interviewing an English learner, listen to the different language structures and patterns used by the interviewee, and analyze five basic linguistic components namely phonology (sound), morphology (words), syntax (sentences), semantics (meaning), and pragmatics (language use). When creating, editing, and submitting their videos, students are given the freedom to choose the equipment they will use to videotape their interactions, the software to best meet their editing needs, and the format or medium they will use to submit their projects to me.
In the past, I received submissions that ranged from excellent to unacceptable in terms of quality of picture and sound as well as clarity of message. Some videos were vertical, instead of horizontal, and had to be watched with the head bent sideways because of the way the equipment was held during recording. Videos that were recorded using a phone displayed only the center one-third of the screen with broad black bands on the left and right edges. Being a Windows user myself, there were times when I was unable to access students' projects that were videotaped on Apple products such as Macs, iPads, and iPhones. This led to much frustration and loss of time as instructor and students worked together to resolve these issues. My students, who are primarily K-12 teachers, reached out to their school district technological experts for help while I consulted with university Information Technology experts to find solutions.
It quickly became clear to me that some students were technologically savvy and enjoyed a sense of ownership in deciding how best to record and edit their projects while others needed hand-holding and step-by-step instructions on how to accomplish this task as quickly and as painlessly as possible with the gadgets they already owned. I began looking for ways to maintain rigorous productivity while facilitating learning outcomes in my classes.
The Need to Learn iMovie
The trend of many school districts is to use Apple products. Knowing that many of my students had access to Apple products, turning to iMovie was the most logical move. I discovered that iMovie is a versatile video editing software application that can be used to create presentations or video clips that include text, images, and sound. I learned that my students could use their Macs, iPads, iPhones, or for that matter any equipment to record their activities, assignments, and projects and then edit those mp4 video files with iMovie.
As mentioned before, I am a Windows user, and I wasn’t keen on learning a new software application, but I took up the challenge to learn how to use iMovie, so I would be able to share step-by-step instructions with my students to assist them in completing projects that were excellent in quality but achieved with minimal effort and time. Many of us dread the unknown. I believed that having a set of instructions as a starting point would help my students feel more confident and enthusiastic in working on their projects. After their initial success, the students could diversify and experiment with their own creative choices.
The videos my students submitted, before the use of iMovie, began with a shot of them talking to their interviewee, which continued for about 30 minutes. It was hard to understand what was happening in the video, who the participants were, and at what point in the interview the five linguistic criteria were observed. Though the students provided approximate timeframes of these occurrences in their papers, the video had no indication. Therefore, it was critical for me to carefully listen to the recording so that I could evaluate each of the criteria on the assessment rubric.
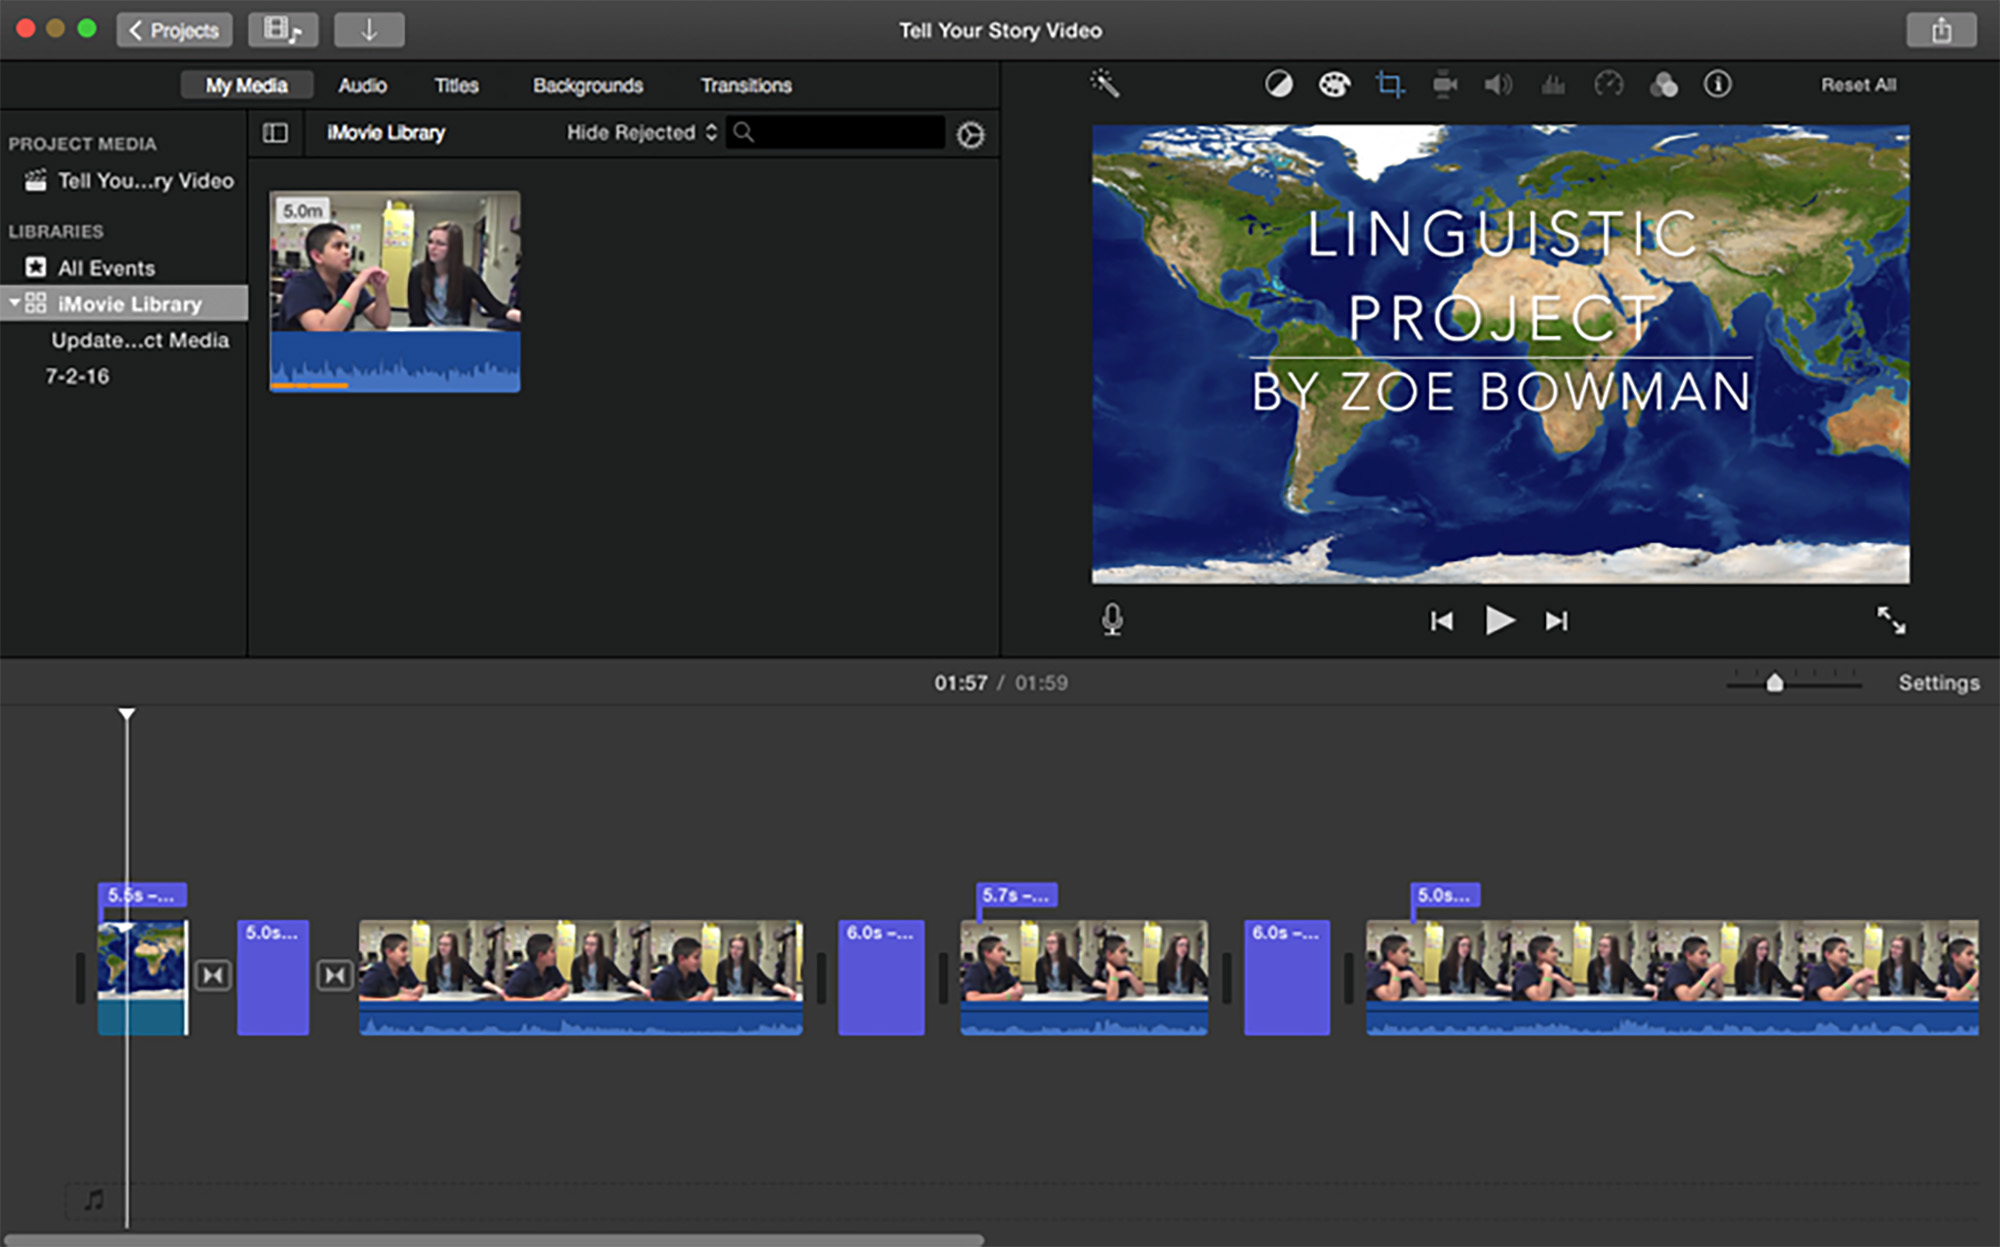
The use of iMovie enabled my students to effortlessly make title pages providing information such as what the movie was about, names of participants, and the date it was recorded, etc. Students could choose to be as elaborate as they liked by adding images or sound to the title page. Figure 1 shows a screenshot of a project that is being edited. The interface may look complicated, but the software is simple to use.
Figure 1: iMovie in Edit Mode
Basics of How to Use iMovie
The first step in the editing process is for the recorded video to be downloaded into the iMovie Library (highlighted on the left of screen). The video is then dragged down to the lower half of the screen, called the workspace, where all the editing is done.
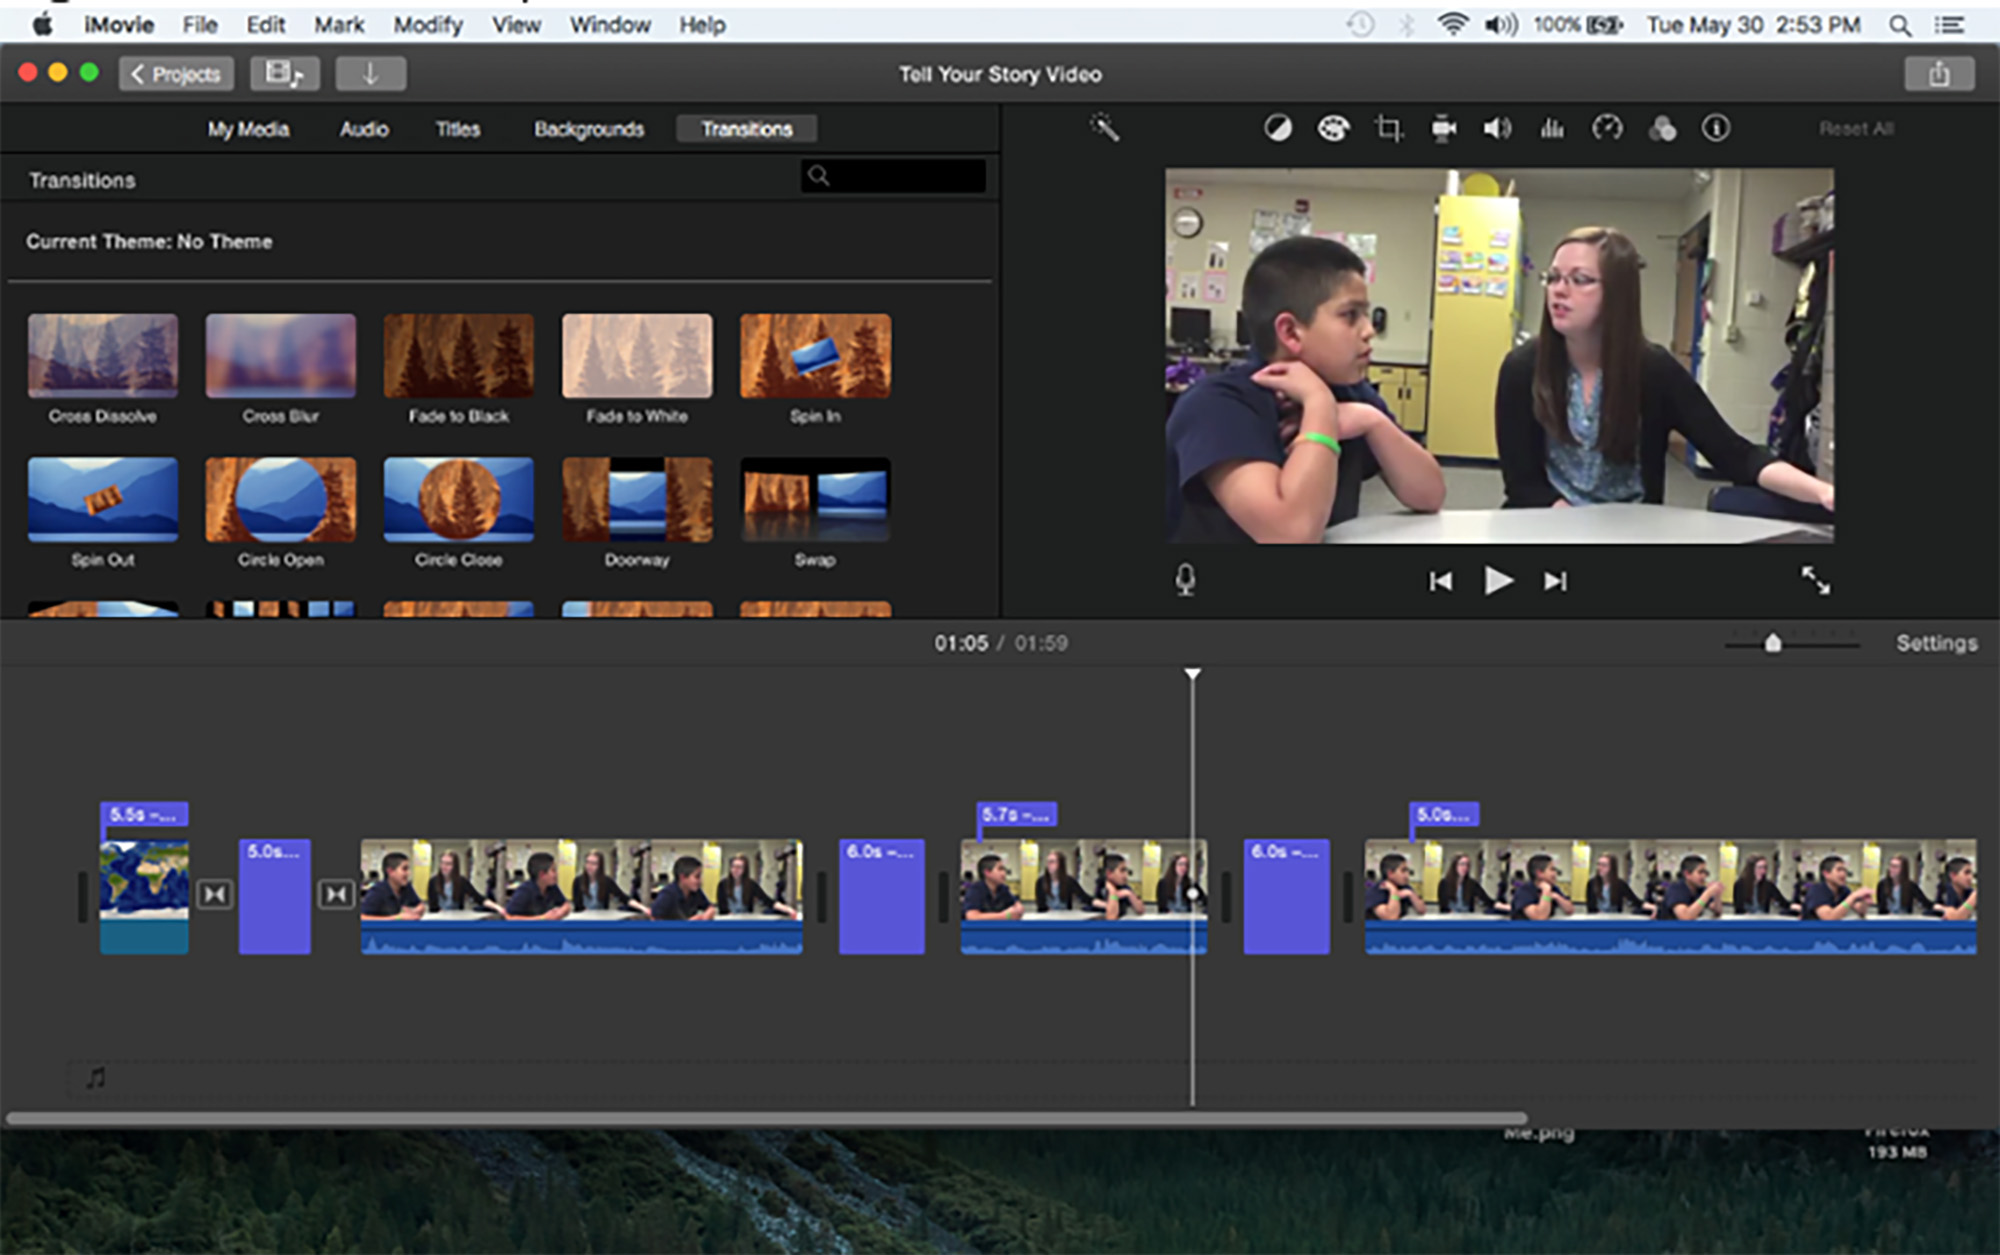
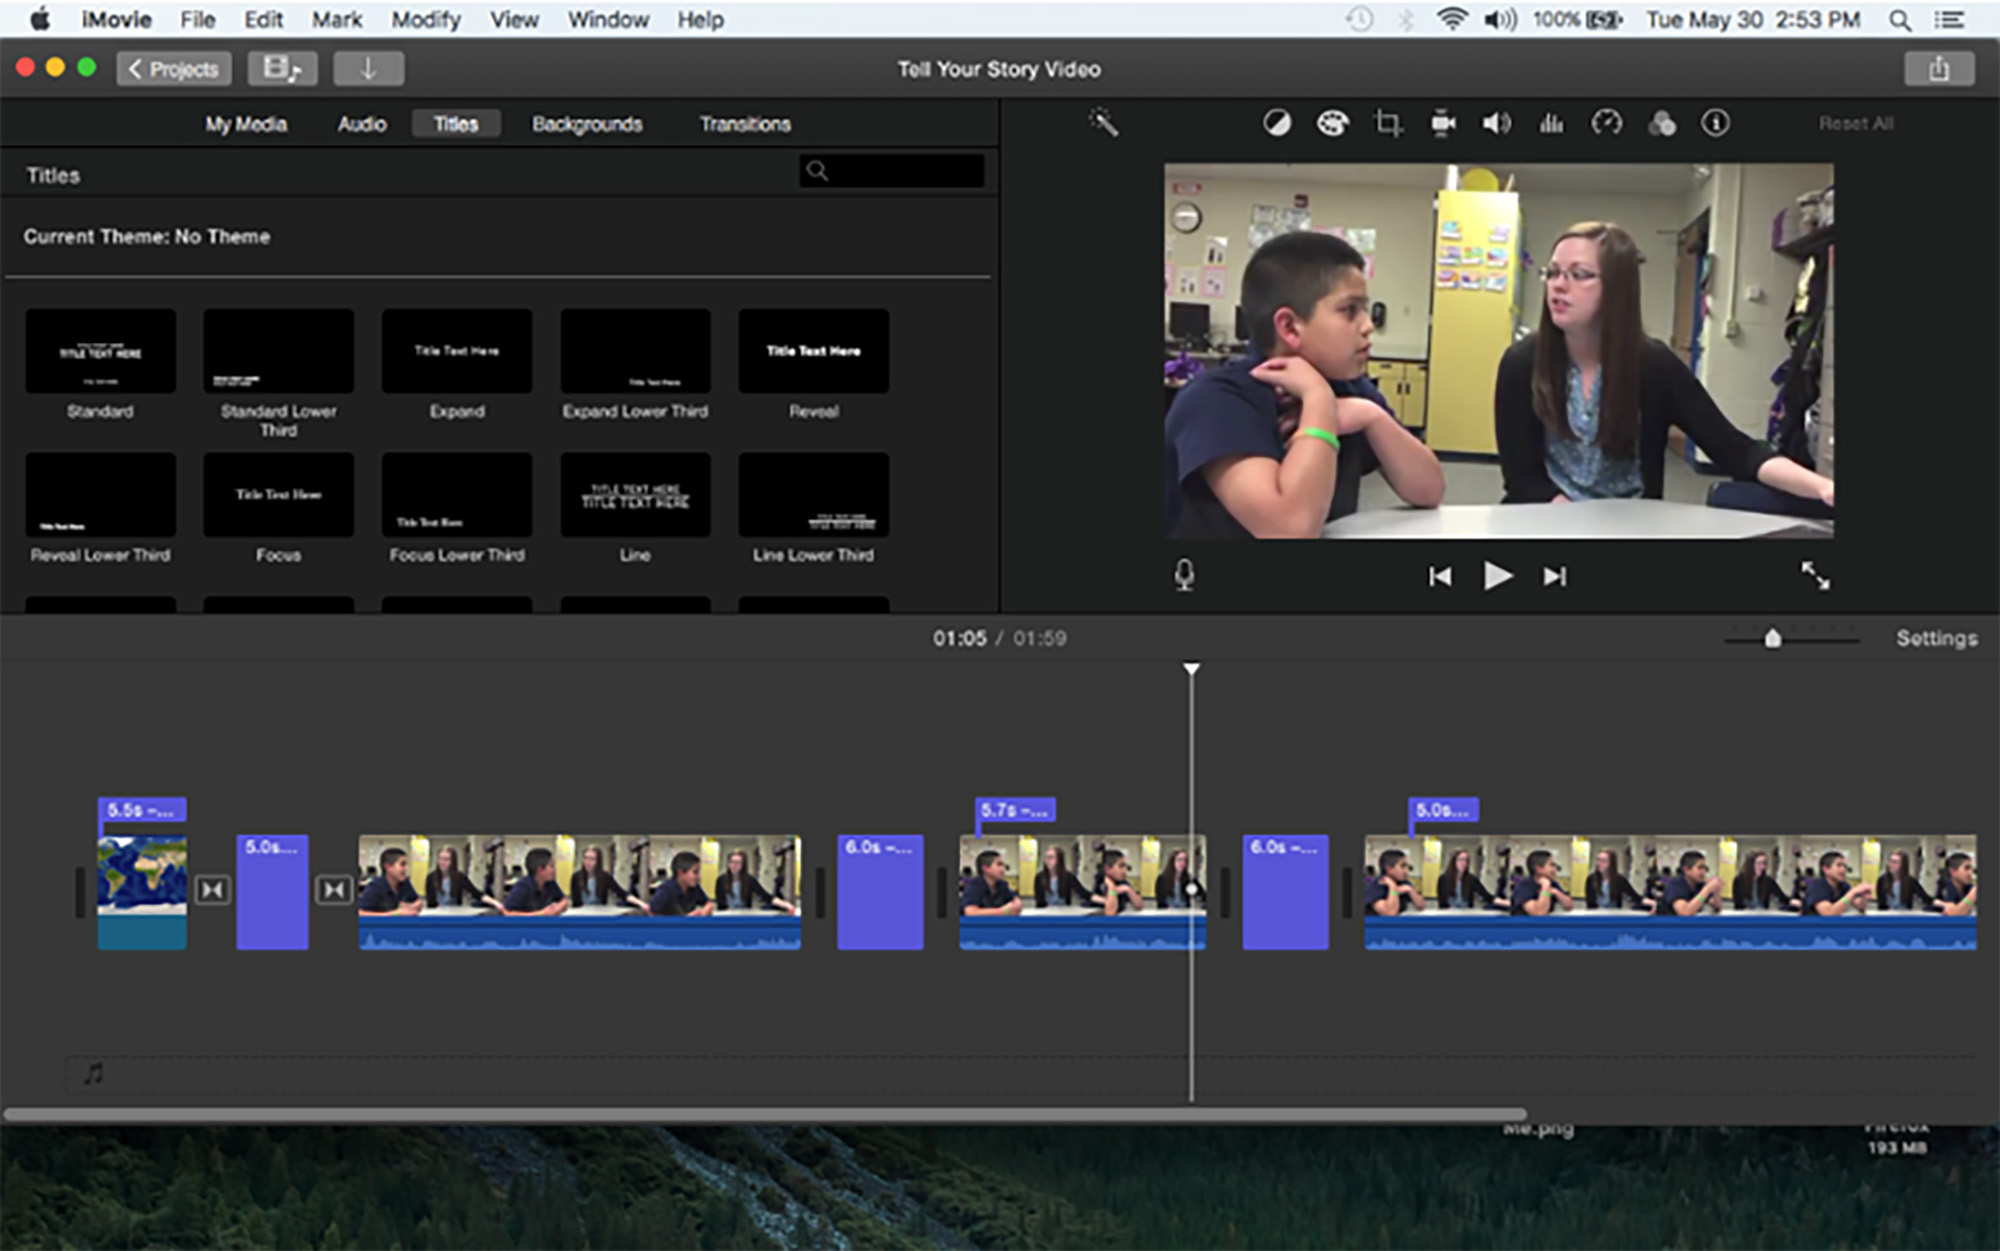
Clicking on the tabs My Media, Audio, Titles, Backgrounds, and Transitions (top part of the screen) enables the use of those features. To add a specific feature to the video, identify the exact location where the feature should be placed and split the video at that spot. Then drag the feature to the location in the workspace. The user can now make changes such as editing existing text in titles or determining the length of time each transition will display in the video. Figures 2 and 3 show some available templates of title pages and transition options.
Figure 2: Transition Options in Edit Mode
Figure 3: Title Templates in Edit Mode
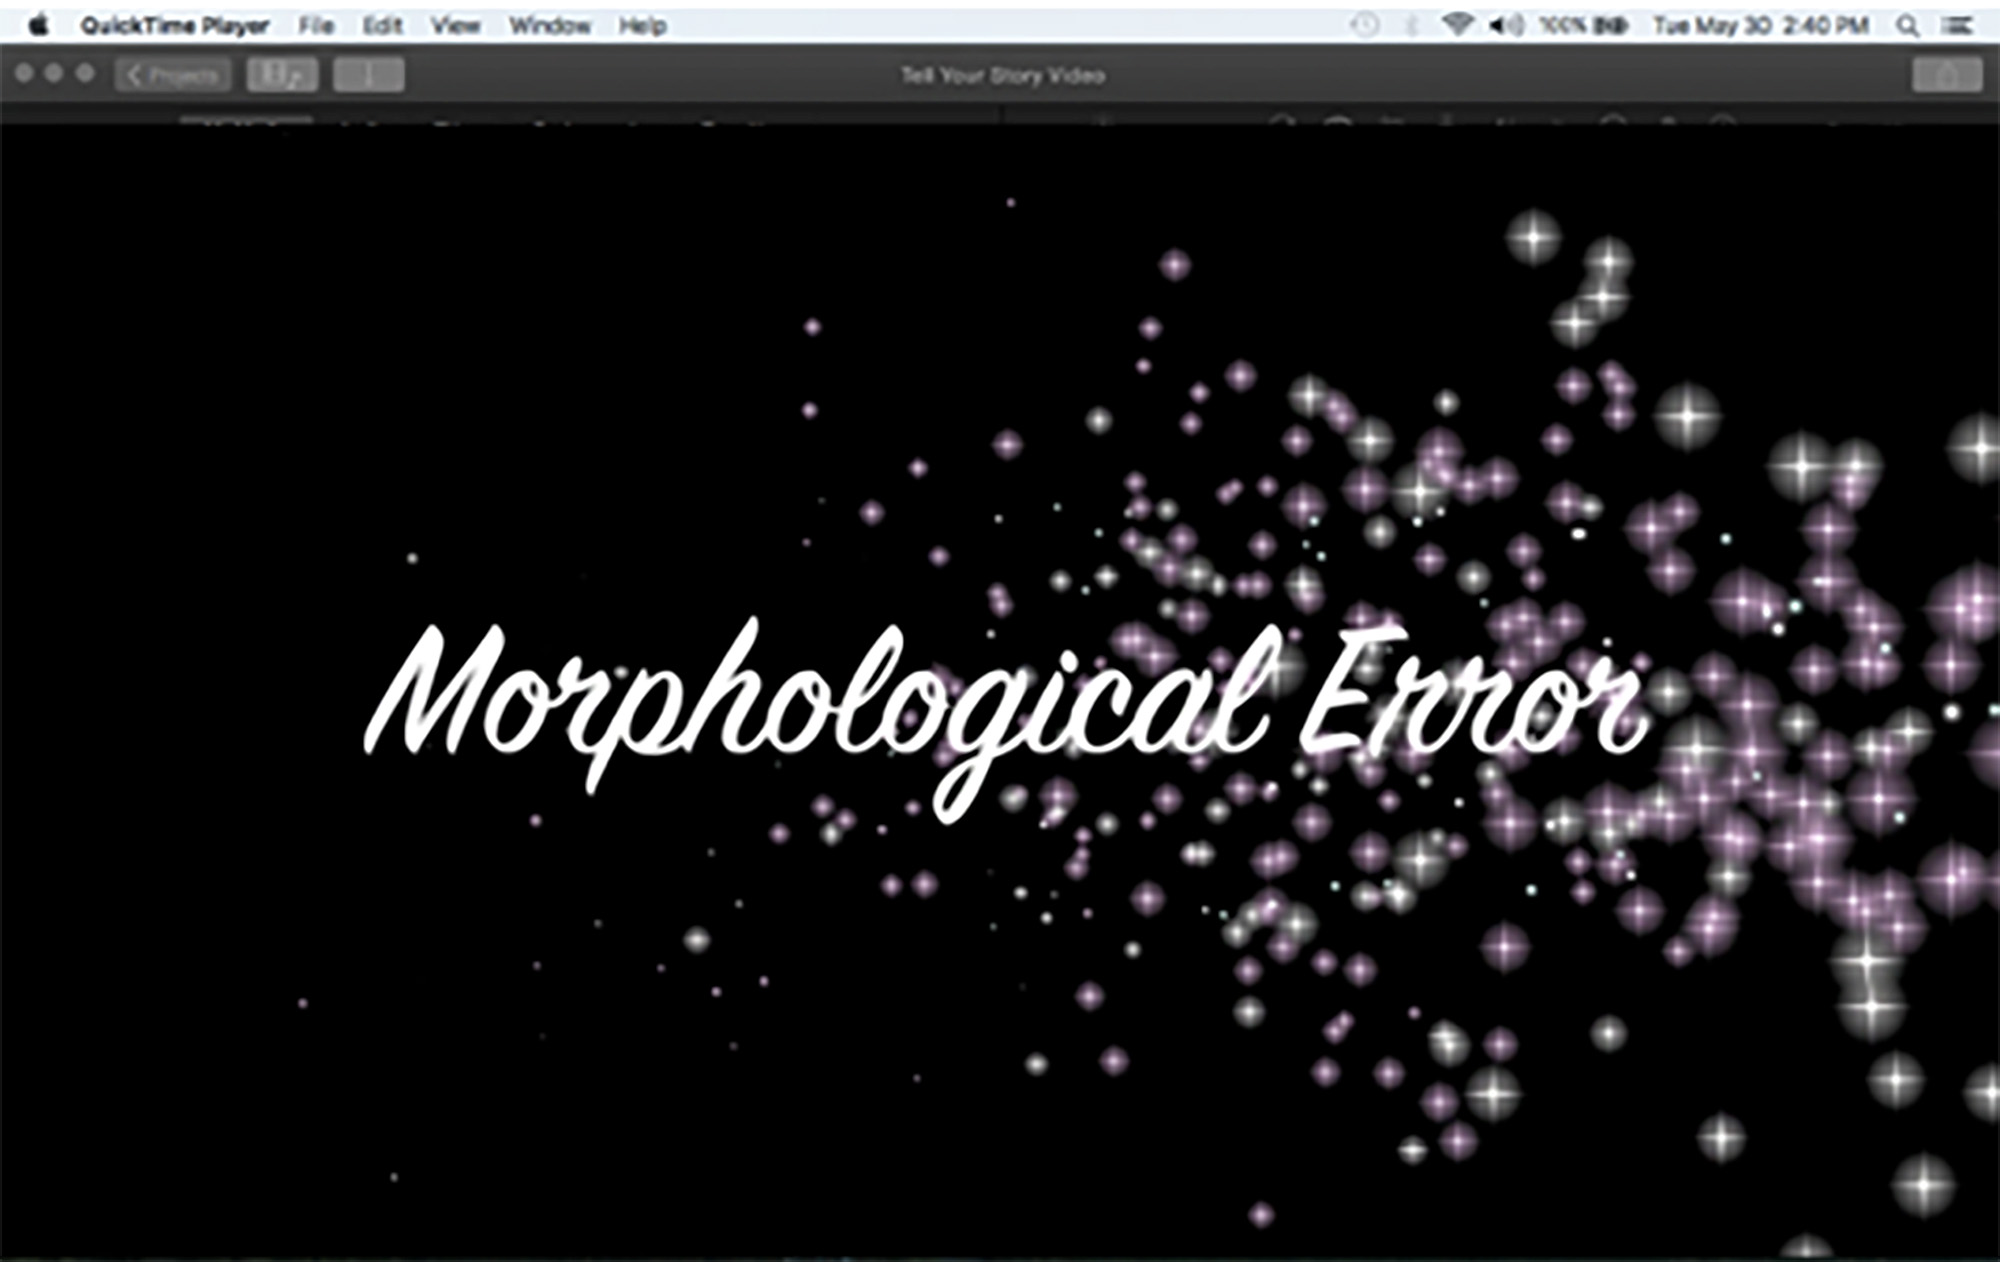
After learning how to create a title page using the tabs/features explained above and shown in Figure 1, my students opted to highlight the five linguistic criteria in their video. They split the video into five segments, gave a title to each segment and highlighted the associated interviewee speech. Figure 4 shows one of the segments that was entitled Morphological Error. The interviewee’s utterance, How to Speaks English, was an example of a morphological error. Figure 5 shows its appearance as a subtitle during the interview.
Figure 4: A Title Introducing a New Section in the Video
Figure 5: A Subtitle Indicating a Linguistic Structure
A close examination of Figure 1 shows that there are three layers to this edited video. The video file occupies the center position, and titles are placed in split segments of this file. However, subtitles are placed on top of the video file, and audio files are layered below the video file.
Benefits of Using iMovie
With these simple steps, a student project that merely showed two people talking through the entire length of the video was transformed into an exciting, informative and creative video that effectively displayed student comprehension, analysis, and application of materials learned in the course.
Students in my class were asked to conduct their interviews for about 30 minutes because it took time for interviewees to warm up to the topic and speak spontaneously. When students used iMovie to edit their recordings, they had the capability to identify and highlight segments where the linguistic structures occurred, and delete unwanted parts of the video. This allowed students to submit videos that were about five minutes in length, and drastically reduced the time spent in evaluating student work.
My hope is that this article will encourage colleagues to use iMovie in the classroom because it is a win-win situation. The quality of student work improves manifold because they are held accountable for providing precise and accurate information. This, in turn, helps educators to evaluate student work quickly and more efficiently.
About the Author
Manjula Shinge, Ph.D., is an Associate Professor in the Department of Instructional Design and Technology / Teaching English to Speakers of Other Languages (IDT & TESOL) at The Teachers College at Emporia State University.
| Previous page on path | Issue Navigation, page 10 of 26 | Next page on path |
Discussion of "Using iMovie to Inspire Creative Top-Notch Projects in the Classroom"
Add your voice to this discussion.
Checking your signed in status ...